GM Service Information Accessories Manual
-
Recently Browsing 0 members
- No registered users viewing this page.
-
Forum Statistics
250.4k
Total Topics2.7m
Total Posts -
Member Statistics
342,791
Total Members8,960
Most Online
-
Who's Online 0 Members, 0 Anonymous, 3,800 Guests (See full list)
- There are no registered users currently online
-
Latest Articles
-
Posts
-
.thumb.JPG.2c573de60d3a3a4407c7d92298db46dd.JPG)
By Grumpy Bear · Posted
Just did an injector/HPFP replacement on Pepper at 192,400 miles; close enough to 200K, RIGHT? (If 200K is considered life end and to me it isn't). But hey, to each his own. Have never run a catch can on this vehicle. Back side of every valve looked like a new valve spray painted semigloss black. Port walls looked 'neat' (all a normal result of passive EGR via VVT) Zero build up even in AFM cylinders. Just color. It uses no measurable oil and never has. At 155,000 I put her on E-85 and a borescope of the cylinders at plug change showed very clean pistons and valve faces. The replaced injector tips looked new. (It was the pump piston seal that was leaking). Oh well, have six good backups. Still gets 28 mpg on gas (highway average) and over 20 (highway) on alky. UOA's look good and runs as good now as it did when I bought it. Better in fact. What improvement would a Catch Can provide this motor? And given all this I expect that IF I installed one I'd see some water/gas/oil vapor accumulation. Byproducts of normal combustion. Having said that, IF my motor used an appreciable amount of oil I'd consider it a useful 'crutch' until I had the situation corrected OR if bore polished, until I junked it or rebuilt it to stave off repeated plug fouling. I'm not telling you what I THINK. But what its DONE. -
By Grumpy Bear · Posted
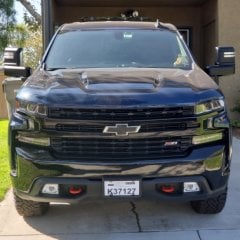
Love the look. I'm a SCSB lover myself. Two items. 1.) A spacer changes scrub radius but this also changes when we use wheels of different offsets. A little isn't a big deal. 2.) Steel wheels, alloy wheels all have different thickness. Same effect on the stud and lug nut as a spacer. When hub centric the wheel isn't supported by the stud. It's supported by the hub. The stud just keeps it all together. -
 I had a evap sol go bad a couple weeks ago. . I replaced it. While watching live data at the time I saw I had some cylinder 1 misfires. No MIL but on live data I could see ~50 at startup and about 70 more after an hour a drive all on cyl 1. I also noticed that the LTFT were -5% to -15% always. And that bank 2 is always -3% richer than bank 1. Even across all driving modes, city, highway, etc it’s always 3% richer than bank 1. So I start with the misfire. Swapped coil, plug, and plug wires from 1 to 3. No follow. I got an Injector reseal kit, pulled the D/s injector rail, swapped #1 and #3 injectors, resealed them, reinstalled and retested. The misfire followed to 3. So I ordered and replaced all 8 injectors, spark plugs, and plug wires. Also replaced the 1 time use fuel pipes under the intake manifold. Injectors that were in the truck since new were Part # 12668390. I replaced them with # 12742701 Got from RockAuto. Pretty certain they’re genuine and the correct ones. I called a friend at a parts store who told me “the 12742701 were the correct superseded part # for the originals I was replacing”. So started truck after replacing all that and it’s running -15 - -30 LTFTs. I reset the fuel trims with GDS2 and drove it for a 60 miles trip each way. There have been no changes in the LTFTs. I checked if the HPFP was leaking into the crankcase. I removed the pvc and watched the trims. No difference. I checked the alcohol content and it was at 10% I’m out of ideas here. Truck seems to run great. Just always rich on the fuel trims. Anyone with any help or ideas would be greatly appreciated. I ran an injector balance test just for the heck of it and it came back this. I’m confused. I have gds2 and some other diag tools if anyone knows of anything I should test next.
 -

-
By Grumpy Bear · Posted
No, but don't skimp on safe! 😉
-
-
GM-Trucks.com Clubs
-

Black Truck Club
Open Club · 612 members
-

White Truck Club
Open Club · 380 members
-

Canadian Owners Club
Open Club · 282 members
-

Red Truck Club
Open Club · 156 members
-

diesel 3.0
Open Club · 279 members
-

Texas Owner's Group
Open Club · 371 members
-

NorthSky Blue Club
Open Club · 118 members
-

Midwest Owner's Group
Open Club · 212 members
-

2015 Custom Sport Club
Open Club · 5 members
-

GM Snow Plowing Club HD
Closed Club · 14 members
-
-
Popular Contributors
-


Recommended Posts
Create an account or sign in to comment
You need to be a member in order to leave a comment
Create an account
Sign up for a new account in our community. It's easy!
Register a new accountSign in
Already have an account? Sign in here.
Sign In Now