Jump to content

PureZ71's 2021 Silverado LT Trail Boss Build


PureZ71

Recommended Posts

Hello,


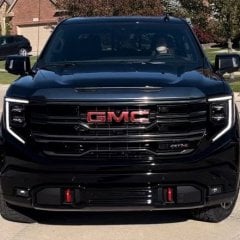
Here is my build thread for my new 2021 Silverado LT Trail Boss today. I did have to wait for the one I wanted but was definitely worth it. Got the Crew Cab, Standard Box, 6.2L, Leather package and many more. I'll hopefully start writing more in this build thread. I previously had a 2013 BMW M5 (picture below). Restarting my blog as my old one wasn't allowing me to edit the first post. For those on Instagram, please be sure to follow on @PureZ71 (https://www.instagram.com/purez71/?hl=en)


Current mods (as of 5/19/22)

- ReadyLift 2" SST Lift Kit

- Toyo Open County R/T (35X12.5XR18)

- AWE Full Catback exhaust system

- RetraxPRO XR Tonneau Cover

- SB3 Ceramic Coating and PPF by Superior Auto Shine

- Front Windows and Windshield Tinted

- BulletProof Hitch (Heavy Duty 6" Drop)

- LasFit LED Turn Signals, Reverse Lights & License Plate Lights

- Front & Rear Mud Flap Delete Kit

- Rydonair Flexible Rubber Antenna Replacement

- Center Console Organizer Tray & Center Console Divider

- Plastic Dip the chrome around the front bow-tie

- Z71 Emblems Replacement (Black & Red)

- Black Z71 Grill Emblem

- Silverado 6.2L Matte Black Emblem

- ProClip Phone Holder

- UnderCover SwingCase for Driver & Passenger Sides

- HS2 Black Hoop Side Steps


Old/Replaced Mods

- Blacked out Muffler Tips

- Gator EFX Hard Fold Tonneau Cover


Current photo(s) of the truck (as of 5/19/22)

NJg5dcP.jpg

eWVx1J2.jpg


Day I got the truck

fvZQVYu.jpg

H8ZJSaa.jpg


My previous build

mzbKkTn.jpg


Edited by PureZ71
  • Like 1
Link to comment
Share on other sites

LasFit.com LED lights came today. I was surprised that almost everything in the truck is using LED expect the turn signals, reverse lights and license plate lights. Here is the link for those that also want to upgrade. Made a really big difference. https://www.lasfit.com/collections/led-whole-package-for-chevrolet-silverado/products/2019-2020-chevrolet-silverado-custom-fit-led-headlight-low-beam-h11-w-dust-cover?afmc=1tz&utm_campaign=1tz&utm_source=leaddyno&utm_medium=affiliate&variant=32507806187604


Overall the install took about an hour. The hardest part for me was the license plate lights since my hands really didn't fit so I had to use some needle nose pliers. Plus it was like 40 degrees out tonight but I really wanted to get these installed.


NOTE: Since these are LED make sure you test them before you put them in. If there is not light coming form the bulb; remove the bulb and rotate it 180.


U7wOsGO.jpg


Before (stock)

ETESxLM.jpg.

eO3Ud99.jpg


License Plate Lights comparison

E9DsAst.jpg

Reverse Lights

rKyMcJF.jpg


Left Side LasFit LED reverse Light VS Right side OEM

s7QYmwx.jpg


Both Reverse light and License Plate lights on

1oXOUSj.jpg

yPCgwNG.jpg


Turn Signals lights comparison

TJbudt4.jpg


Turn Signal Comparison

4pR1h1T.jpg


Both Turn signals converted to LED

X2m3WV6.jpg


Link to comment
Share on other sites

Replaced the chrome Z71 badges with black ones with the red insert. Got these on amazon (link below). The install took maybe an hour. The hardest part really was getting the old tape off the car. I did use tape to mark the location of the badge before removing it (highly recommend).


https://www.amazon.com/gp/product/B08P35XBNX/ref=ppx_yo_dt_b_asin_title_o00_s00?ie=UTF8&psc=1


IMG_0199.jpg

IMG_0200.jpg

IMG_0201.jpg

IMG_0203.jpg

Link to comment
Share on other sites

Continuing the black out the chrome process, next was the 6.2L badges on the hood.  Got it from ebay (link below), came within a few days from NJ. Install was pretty easy, most of the time was taken removing the old tape. It did come with this template which I used to mask off so that I can get the alignment correct.


- Silverado 6.2L Matte Black Emblem 


jx3nomG.jpg

CZdDDUq.jpg

9V67I5Y.jpg

3vOUJyy.jpg

Link to comment
Share on other sites

Being the PNW means we get plenty of rain so I just figured it would be best to prepare for that with a tonneau cover for the truck. I ended up going with a Gator Hard Fold for my 6'6" bed. The install was very easy. Mount two rails on each side of the truck bed and then put the cover down. Secure the cover into the rails with 4 hand tighten screws.


Link: https://gatorcovers.com/p/gator-efx-hard-fold-tonneau-cover/v/chevy/silverado-1500/2021/


SDl2GcH.jpg

AeoEss0.jpg

Zghnis4.jpg

Link to comment
Share on other sites

Got the truck back from Superior Auto Shine after they applied a ceramic coating and a paint protection film to the front bumper. I previously had them do this to my old M5 so I know they work is solid.


0exQSys.jpg

4wzJ9IG.jpg


Got a few rolling shots on the way home

k072yvY.jpg

B2l98Ru.jpg

Link to comment
Share on other sites

Got my ready lift 2” sst lift kit installed today. Had it done at the dealer. Took a few hours. I only had them install the front pieces for this kit as I wanted the truck to be completely leveled.


Before/after
9654edf52b84c605a5bbebfce94e8129.jpg
1ec314b32296b42b3119dccb3339062f.jpg
41d9d449c61783ee9b6096ebf83c6d3b.jpg

bd17d7f7fbfb71aa916e3ff60c87d53c.jpg

2e02e4ff09d281a106228e581df7b0af.jpg
 

Link to comment
Share on other sites

Got another part, its the Front and Rear mud flap delete kit. I originally ordered the painted plugs but didn't like the look of them so I went with this kit. This is a mod to prep for something else coming soon. I only ended up using the front section of this kit as well.


https://switchsuspension.com/chevrolet-silverado-1500-2019-2021-front-rear-mud-flap-delete-kit/


1mktvha.jpg

8hkQnpP.jpg

k1QRpp3.jpg

Link to comment
Share on other sites

Link to comment
Share on other sites

For those wondering what I needed to trim and remove, here is it

I first removed the bracket that holds the mud flap. This rubs a lot, especially in reverse. It’s held by 4 screws, removed using 12 or 13 mm socket
0d019a16bc65b9e82c8daf5c31fbef8c.jpg
5ba435f6d7361558339de2ebf6039164.jpg


Then I had to trim the actual liner. This was a back and forth process as I would turn the wheel, mark where it’s hitting, turn the wheel the other way to go in and cut and liner, then turn the wheel back to check fitment. Then drove it around the block slowly at full lock to find any other pieces that were hitting until I finally had no rubbing
39bb220331a28e0316775cc483cdb1b4.jpg

Hope this helps, if you have any questions please let me know and I’ll try to help answer them.


Link to comment
Share on other sites

ke any truck owner, you need a hitch for that time you have to tow. I went with one fro BulletProof Hitches. I got the Heavy Duty 6" drop. Just need a trailer and something to tow now. Also got the lock for the hitch pin as well.


https://www.bulletproofhitches.com/collections/2-hitches/products/2-0-heavy-duty-6-drop-rise


KAeQt0K.jpg

RuPKtEL.jpg


---------------------------------------------------------------------

Added a little extra storage with a swing case in the truck bed. Install took like 10 minutes

https://realtruck.com/p/undercover-swing-case-truck-bed-toolbox/udc-sc104d/

96c845fc90ebbbfd3cc83c0f036d3955.jpg

Link to comment
Share on other sites

Finally got around to doing this, officially no more chrome left on the truck. Went ahead and removed the muffler tips and sprayed them with high-temp paint for a matte black look. Getting them off and on was such a pain because of how tight of an area there is to get the 3 bolts out from each side. Used a 10mm socket wrench for it. Especially hard if you have bigger hands like I do. As for the paint it self, I wiped them clean, used some 80 sand paper to prep for paint. Sprayed a light first coat followed up 3 heavy coats. I waited about 10-15 mins before each coat. Then a few hours to let the tips dry. Installing them was worst than removing it because of trying to get the first couple of threads on by hand was a pain. Eventually got it and am very happy with the results. I'll take some proper photos sometime next week.


Wo3xfSw.jpg

YslyCXz.jpg

Pn4Shjz.jpg

L3fQedw.jpg

F0Mljkr.jpg

WBEneuN.jpg

Link to comment
Share on other sites

Join the conversation

You can post now and register later. If you have an account, sign in now to post with your account.

Guest
Reply to this topic...

×   Pasted as rich text.   Paste as plain text instead

  Only 75 emoji are allowed.

×   Your link has been automatically embedded.   Display as a link instead

×   Your previous content has been restored.   Clear editor

×   You cannot paste images directly. Upload or insert images from URL.


×
×
  • Create New...

Important Information

By using this site, you agree to our Terms of Use.