
Jump to content

Silverado Headlight Trim / Bezel Removal


Recommended Posts

Posted

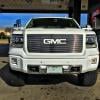
Here are mine after I color matched them. Sorry for the crummy shots, the weather is terrible here in MA today.

2017-01-22%2012.16.29sm.jpg2017-01-22%2012.16.39sm.jpg2017-01-22%2012.16.45sm.jpg


And here's a quick how-to on removing the bezel/trim ring.


Here's what you will need for tools. A couple different size regular screw drivers and a T20 torx driver.

20170122_131533sm.jpg


Take off this plastic bracket off the bottom using the torx driver.

20170122_122831sm.jpg


There's a total of 6 tabs holding the bezel on the housing. 2 on top, 2 on the bottom, and 2 on the the inside edge. The edge that meets the grill, not the fender. The fender side has tabs that go into slots but they don't clip in, they will act more like a hinge. Carefully pry the tabs away from where they catch and shove one of the plastic cards in the gap so that the tab can slide along the card and not re-catch.

20170122_123842sm.jpg20170122_123956sm.jpg


Once you have cards in all 6 clips stand the housing on the outside edge. So the edge that meets the grill should be up. Carefully pry from the grill edge down. Start in the middle and go very slowly. I used plastic pry tools for popping interior fittings out I also used a plastic putty knife to "cut" the double stick tape. Don't get frustrated if you accidentally lose one or some of the cards and the clips re-catch. Just pry the tabs out carefully and put the cards back. It takes a little practice. Do not pull on any of the clear plastic loops/tabs. They are brittle and will break. Make sure the room is quiet because as you slowly pry you will hear the tape start to slowly let go. Let it slowly pull itself loose and don't try to rush it.


Here I taped it in place to give an idea how it swings out as the tape lets go.

20170122_131851sm2.jpg


The black strip in the middle is held on with 2-sided tape and 6 clips. I just used a regular screw driver to break the tape and I pushed the clips/tabs through with my thumbs.

  • 4 weeks later...
  • Replies 48
  • Created
  • Last Reply
Posted

Here are mine after I color matched them. Sorry for the crummy shots, the weather is terrible here in MA today.

2017-01-22%2012.16.29sm.jpg2017-01-22%2012.16.39sm.jpg2017-01-22%2012.16.45sm.jpg


And here's a quick how-to on removing the bezel/trim ring.


Here's what you will need for tools. A couple different size regular screw drivers and a T20 torx driver.

20170122_131533sm.jpg


Take off this plastic bracket off the bottom using the torx driver.

20170122_122831sm.jpg


There's a total of 6 tabs holding the bezel on the housing. 2 on top, 2 on the bottom, and 2 on the the inside edge. The edge that meets the grill, not the fender. The fender side has tabs that go into slots but they don't clip in, they will act more like a hinge. Carefully pry the tabs away from where they catch and shove one of the plastic cards in the gap so that the tab can slide along the card and not re-catch.

20170122_123842sm.jpg20170122_123956sm.jpg


Once you have cards in all 6 clips stand the housing on the outside edge. So the edge that meets the grill should be up. Carefully pry from the grill edge down. Start in the middle and go very slowly. I used plastic pry tools for popping interior fittings out I also used a plastic putty knife to "cut" the double stick tape. Don't get frustrated if you accidentally lose one or some of the cards and the clips re-catch. Just pry the tabs out carefully and put the cards back. It takes a little practice. Do not pull on any of the clear plastic loops/tabs. They are brittle and will break. Make sure the room is quiet because as you slowly pry you will hear the tape start to slowly let go. Let it slowly pull itself loose and don't try to rush it.


Here I taped it in place to give an idea how it swings out as the tape lets go.

20170122_131851sm2.jpg


The black strip in the middle is held on with 2-sided tape and 6 clips. I just used a regular screw driver to break the tape and I pushed the clips/tabs through with my thumbs.

How did you go about painting them? And what kind of paint? It looks great!!


Sent from my iPhone using Tapatalk

Posted

I want to color match my front end on my 16 but I can't get myself trying that method. If anyone here had a Siren Red front end and wants chrome instead we can work something out lol.

Posted

How did you go about painting them? And what kind of paint? It looks great!!


Sent from my iPhone using Tapatalk


I got the paint in a rattle can from automotivetouchup.com. I used Duplicolor grey primer, Duplicolor lacquer clear, and Dupilicolor acrylic enamel clear you can get at any auto parts store. One can of each is plenty. I sanded off most of the "chrome" before priming. I put 2 light coats and one "wet" coat of base coat(color) as the can directed. I put 3 coats of lacquer clear and then 3 coats of acrylic enamel clear. I then let them cure for 3 weeks before putting them on the truck so that the paint was hard enough to handle most road debris and so I wouldn't chip it while reassembling them to the housings.


I hung the parts in my garage from bungee cords to spray them.


FYI - wear a respirator. And do not do it in any space where the fumes can get into your house. The paint smells REALLY bad. And you can spray enamel over lacquer but you cannot spray lacquer over enamel.

Posted

And it's still holding up good to this day?


Sent from my iPhone using Tapatalk


It's only been a couple months but those months have been December, January and February in Massachusetts. They've been through the car wash(no touch) at least a half dozen times and been peppered with sand and salt on the highway pretty much every day. I'm going to run it through a car wash tonight and I'll take a good look at them and post an assessment of their condition.

  • 6 months later...
Posted


It's only been a couple months but those months have been December, January and February in Massachusetts. They've been through the car wash(no touch) at least a half dozen times and been peppered with sand and salt on the highway pretty much every day. I'm going to run it through a car wash tonight and I'll take a good look at them and post an assessment of their condition.

Any word on the condition now?

  • 2 months later...
Posted
On 8/30/2017 at 8:49 PM, Josh_perry24 said:

Any word on the condition now?

I noticed the paint cracking a couple months ago, I'm not certain when it started.  I had taken are really good look at them since a couple months after I painted them and thought I was in the clear.  Noticed it one day in late August or early September when I was waxing it.  I suspect I didn't get enough of the chrome off before painting as I was very careful about the primer, paint. clear.


I will try again at some point, probably not until next summer now.  But I will sand off all the chrome completely before I try it.  I have been trying to find a part number for the black "WT" trim but all I can find is the part number for the complete housing.  They would be an ideal way to start since they have no chrome on them.  But I'm not going to spend that much for just a trim ring.  Before I put them back on the truck I wrote down every number I could find on the trim itself but none of them yielded anything in searches.


If anyone has or can direct me to where I can get the part number for the black trim I'd greatly appreciate it.

  • 1 year later...
Posted

I have a 2018 with 4000 miles it’s blue and the bumpers grill and headlight are blue and I want chrome anyone want to trade parts 

Posted
11 minutes ago, htmsr24guy said:

I have a 2018 with 4000 miles it’s blue and the bumpers grill and headlight are blue and I want chrome anyone want to trade parts 

I have a pair of like-new headlights with chrome bezels already on them. ?


Let's make a deal!

Posted
I have a 2018 with 4000 miles it’s blue and the bumpers grill and headlight are blue and I want chrome anyone want to trade parts 
If you had Siren red I've would been all over this

Sent from my SM-G955U using Tapatalk

Posted
23 minutes ago, lapoolboy said:

I have a pair of like-new headlights with chrome bezels already on them. ?


Let's make a deal!

What do you have in mind 

Archived

This topic is now archived and is closed to further replies.

  • Latest Articles

  • Posts

    • I can relate. 3 years ago I did that on my Avalanche. I was sore for a week. The only maintenance I do myself now is drop and fill on the transmission on my Honda’s. It’s just too easy. My yard work with my walks in the morning will be enough now I passed 70. The contributing factor is the heat in Texas. You just have to pace yourself. 
    • I am sorry if this was misleading. That was a document attached to our most recent work order number (Doc# 7105804) that summarized all the current updates. These programs were ‘redone’ in the past but these versions dated 4/1/2016 were the ones that actually made all of the problems disappear. These programs were relayed to the dealer from the technical services group at GM. Here is the exact wording on the last work order:   “Front view camera reprogramming with SPS. A new version of FCM software was released to the service dept. In addition to providing general robustness and stability enhancements, this update includes all enhancements from previous software version releases. SPS camera and calibrate camera. OLH to perform extended camera relearn procedure after camera calibration. Would not take with first GDS learn. Front camera SPS – BDYZ333157450 GDS2 – camera road calibration performed 2810835 Front view camera reprogramming with SPS LT 0.6 OLH – extended camera relearn procedure OLH LT 1.5”   I got the truck back on 4/8 – since that time it has been great no problems whatsoever. The lane keep assist, active cruise control and AEB all work very well around town and at highway speeds up to 80mph. During this time I had been away for a week and purposely let the battery sit without a batter tender. Even with the battery a bit lower there were no problems exhibited. I really think this one has it fixed after dealing with these issues over a couple of years. These new programs and relearn process when completed seem to make all the parts (and newer replacement parts) ‘talk’ to each other without any glitches. Hope this helps
    • I turned 72 today. My day began with a trip to the pharmacy to pickup meds for me and the dog and then a stop at my chiropractor before heading home. Once home I started the job of replacing the rear brake pads and one rotor on our 2018 Silverado which will probably end up taking me 3 days to finish, gotta pace myself you know. Sometimes I question myself on why I still do most of my own repairs but if I wasn't then it's more than likely I would be sitting in front of the TV all day. It seems like the list of things I need to do gets longer no matter what I accomplish. I'm not complaining but being retired was so much easier when I was 62.   Peace
    • google "bathub failure curve". Basically, any part of the vehicle can fail at any time.  It starts off as being more likely (early failure), then the failure rate goes down (but does not go to zero), then it goes up over time because it wears/ages out.
    • I went from every other day to about once in five since the rain abated. I'm not unhappy about that. Took most of the month for the ditches to dry enough to mow. 
  • GM-Trucks.com Clubs

  • Popular Contributors

×
×
  • Create New...












