
Jump to content

Recommended Posts

Posted

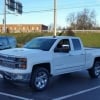
Hey all.  Hoping for some help!  Started my truck this morning for the first time in about a week. When I pulled out of my driveway the DIC told me to service pretty much every system in the truck (trailer brakes...no trailer attached, Stabilitrak, power steering...drive with care, 4x4, etc) and the steering wheel became ridiculously heavy with speed and tach both at 0 while moving/running.  I threw a brand new battery in it but still nothing.  The video below is AFTER the new battery was installed.   It's like the ECM isn't getting 12v or ground. The fuel gauge shows empty, which it's not, the trans isn't showing what gear it's in, and there's absolutely no cranking. All fuses are fine.


Posted

Electrical problem.

Any chance mice got to it?

Chewed wires?


:)

Posted

Clean and tighten battery ground at engine block.. Sounds like a low voltage concern.. clean and tighten ground wires fom battery to engine block , battery to fuse block.. don't over look any.

Sent from my SM-G965U using Tapatalk

Posted
6 minutes ago, Hillwood said:

Clean and tighten battery ground at engine block.. Sounds like a low voltage concern.. clean and tighten ground wires fom battery to engine block , battery to fuse block.. don't over look any.

Sent from my SM-G965U using Tapatalk
 

Good idea!!

Check all grounds.

:)

Posted (edited)

Hmm. That's a tough one. 


You could have an internal alternator fault. You might try disconnecting it, to see if that helps. 


To check your ground, you can take a small wire and attach it to the negative battery terminal (not the cable, but the actual terminal itself), with both cables hooked up to the battery. Then connect that small wire to the body and the engine. Then start using electrical stuff, like the starter, head lights, etc. If the small wire gets warm or hot, or the electrical components work properly, then you definitely have a ground issue. I would also grab a volt meter, and start probing stuff. If you put the negative probe on the negative battery terminal, and probe the brake light or headlights (when they are tuned on), are you getting 12+? If so, is it constant or does the voltage wander around? You might also look at any fuseable links and any main power relays. You can swap relays around to test them. 


Wiring is not much fun.... 


f492ab0a97de7483630f4aba5c13105b.jpg


Edited by starman8tdc
Posted

Thanks for all the quick replies!  I was just able to get my code reader to finally connect and pull codes.  The only code is U0100 which is Lost Communication With ECM/PCM "A"

Posted

U codes are communication codes... LOW VOLTAGE LOSS OF COMMUNICATION!

Sent from my SM-G965U using Tapatalk

Posted

If everything electrical looks good, I would remove the ECU and "smell it". Does it produce an odor of burnt electronics? Is it wet? Any signs of heat damage to the outer case? 


Also, you could clean the connections to the ECU, and maybe throw some dialectic grease at it. 


Posted (edited)


      I hate to say it, but you might be looking at a diagnostic shop. Running low on options. 


      If you go down that path, try to find one that will guarantee a diagnosis without exceeding 1 hour ($100-$150). Most won't, but some will. 


      Some repair shops will charge you $900 in diagnostics, and then say it needs a $1200 part. Then $2100 later, the problem is still there. Then they say: Oh, well that part needed to be replaced, but there must be another part that is bad as well. We will put our diagnostic guys back on it (after you pay this first bill). 


     I have seen people spend thousands on diagnostics and parts, with no remedy. 


     Not trying to scare you, just trying to caution you.


     Call 5 or 6 shops and talk to them a bit before you choose one. 


     If I can think of any other tests you could try, I will post it. 


     Good luck. 


P.S.


https://repairpal.com/obd-ii-code-u0100-lost-communication-with-ecm-pcm-a


https://www.obd-codes.com/u0100

Edited by starman8tdc
Posted

I’m pretty sure it has nothing to do with it but those gauges I saw in the video, are they newly installed? Yeah grasping at straws but as mentioned, this could get ugly.

Posted

I will guarantee you there a many more codes in the system. Need a proper scan to start with.

Posted
4 hours ago, SS502 said:

I’m pretty sure it has nothing to do with it but those gauges I saw in the video, are they newly installed? Yeah grasping at straws but as mentioned, this could get ugly.

No, factory gauges. 

Create an account or sign in to comment

You need to be a member in order to leave a comment

Create an account

Sign up for a new account in our community. It's easy!

Register a new account

Sign in

Already have an account? Sign in here.

Sign In Now

  • Latest Articles

  • Posts

    • I only have a few of the ACDelco blue remaining. One or two of the (old, old) ACDelco Professional boxes, and a couple of the newer style GM boxes with the simulcast in Chinese along with English. FWIW they've all been pretty good, regardless of where they are made, and in 20 years I've never had a problem with an e-core filter.   Now I have a couple of the "A" series in my home inventory. They come in a plain white box with the GM hologram sticker and model information. Have not installed one yet, want to use up my oldest inventory first.
    • Compression test? Weird noises? Fuel trims?
    • I suspect at some point in the near future, the hardware will be free and you pay a subscription to access the vehicle - alldata style.
    • I've been eyeing an upgrade to my tonneau cover for a bit now.  Intrigued by the BAK MX4 EZ-Lift with the torsion spring and went for the upgrade.  Thoughts and musings during unpacking, install and a few days of usage.   Once my order went into Realtruck, it took about 4 days to ship.  Unfortunately, FedEx Ground destroyed the box and contents and it was unusable upon receipt.  To Realtruck's credit, one email with pictures and an RMA was sent to me to send the first one back, and another unit was shipped out.  It arrived 3 days later, unscathed.   I opened the box and it looked like every other BAK MX4.   Biggest differences are the rails and retaining clamps, and of course the spring attached to the cover itself.     NOTE - if you are upgrading from a MX4 to the EZ-Lift, you will have to replace the rails.  The EZ-Lift rails have a notch cut in them to allow the new style retaining clamps to fit properly.  The new retaining clamps also have 2 knobs/carriage bolts and there are two tracks underneath the front panel. The strap clips are mildly different (more like the Undercover Flex clamps) in that the screws go in from the underside.  Personally I prefer these over the BAK clamps that use the nutserts that are a nuisance to install.  The remainder of the parts in the box (drain tubes, rail clamps, and bumper pads) are standard issue BAK.     I did not replace my front bed seal at the time because it seemed to be in decent shape.   BAK recommends shims on the GM trucks unless you place the clamps on the flanges about 1/3 of the way in from both the front and rear of the bed.  I shimmed the front and the middle, and initially placed the clamps equidistant.  This also turned out to be a mistake, because when I set the cover in place, the new style retaining clamps wouldn't clear the front clamp.   New style clamp inserted in the track:     And the issue which occurred because the front rail clamp was too far forward:     Once I removed the shim from the front of the bed, and slid the clamp back to the front flange, everything cleared fine.     The cover set on the rails without issue and I installed the strap clamps.  After I completed my adjustments, I pulled the pin to activate the torsion spring.  Mistake #3 on my part.  PULL THE PIN AS THE VERY VERY VERY LAST STEP!  The reason is, once you pull the pin, the torsion spring is activated.  If you have to loosen the front clamps and adjust the cover, the front panel will - by virtue of the spring, refuse to lay down.  The only way to get it to lay down so you can reinstall and tighten the clamps is to fully open the panel against the back of the cab, which will then allow the front panel of the cover to lay down and be tightened.  Not a big deal unless you haven't installed the foam pads yet (typically the last step) because minus the foam pads, you will need to place something between the frame of the cover and the back window so it doesn't get scratched.  The next time I install one I will install the foam pads before I pull the pin and activate the spring.   After using it for a few days:   The spring assist is great.  You literally can open it with one hand.  My shoulders aren't getting any younger and this was part of my motivation to swap out. The second panel latches and unlatches itself as you open and close the cover.  Neat in concept, however it took me a minute to get used to closing the cover and not hearing the "latching" sound that would tell me it was locked in place. The paddle handles are a huge upgrade and I wouldn't be surprised to see them become the standard across the Realtruck line.  They effectively eliminate the concern that a thief could coat hanger the cover open and get to the contents in the bed. I'm not sure why the very front panel on my cover has a different finish from the other 3 panels.  I have a request into Realtruck to find out if mine was not manufactured properly or if it was by design.   All in all I'm pleased.  Same level of protection, looks good, keeps stuff mostly dry (they all leak around the tailgate) and easy to install.
  • GM-Trucks.com Clubs

  • Popular Contributors

×
×
  • Create New...











