
Jump to content

Color matching bumpers, a simple how-to


Recommended Posts

Posted

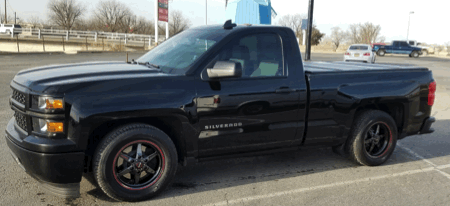
So I decieded to color match my WT bumpers for my Black Out edition truck. The steps below won't really apply to Chrome as they will need more prep to make sure and take paint. Being that I have argent painted bumpers this is a bit easier.


First, obviously, was to remove the bumper, I did the rear first just to test out wether this would turn out worth a damn as it would be easy to have fixed if I messed it up. I won't get in to detail about removing the bumper just give some advice.


Pull the tag lights and the clips holding the harness to the bumper, I ordered new push mount zip ties as most will break when you pry them out, even using a pry tool designed for removing stuff like this, also pop out the trailer plug so you can easily remove the plug in for it. After that remove the bolts holding the bumper in, I can't remember how many there are as I had already removed my reciever hitch. You'll notice that once the bumper is loose you still can't remove it as the brackets hit the bed, I put a 2x4 on the bumper and then used a pry bar to get the last fraction of an inch to pull the bumper out.


Next you will want to pull the steps off, there are about 5 screws holding them in place, a combination of 7mm screws and some torq screws, can't remember the size off the top of my head.


After that pull the screws on the end for the bumper step pad (the part on top of the bumper). There are also some clips on the bottom side that you push down on and they slide out, there are 6 if I remember right. Most you can see but there are two under the bumper frames on both ends, don't forget those.


Double check everything now and you should just have the big plastic holding tabs for the bumper pad, use pliers to squeeze them as you pry your way across the bumper pad from one side to the other. If you don't squeeze these they will snap off. Around the plate there are some push on clips that you can easily pop off with a small screwdriver. I think there was 6 in all.


Next you need to remove the spare tire lowering tube, on the back side there is a big star washer, grab your needle nose and pry about half of the tabs up until you can push it through, you can straighten the tabs out after to reinstall the tube.


Now you should have a bare bumper, lets prep for paint. Make sure where you paint there is air circulation, that you wear a dust mask and that there isn't any wind to kick dust and other crap up on the piece you are working on. I did mine in my three car garage in the main section while cracking my third door open and positing a fan to blow out of it to help evacuate fumes.


Once again, this is for the argent bumper that comes on the WT trim, or any bumper that is not chrome, though I would think the argent bumpers would be the only one you would do this to as you are going to have paint matched, chrome or argent colored.


Get the bumper setup up stable on some saw horses or something, I used some boards and wooden boxes I had built for other projects to get it up off the ground, and clean it with some dish soap and water, get all the grease, dirt and other crap off it. After that hit it with some bug and tar remover/paint prep to get it nice and spotless.


After that you will need to rough the paint up, I used a grey scotchbrite, this is around 500-600 grit. Since we aren't going to use primer, no use on top of good paint, we want to keep the scuffs small. If you have scratches and such use grittier pad or sanding paper then apply primer. Make sure and scuff in a criss-cross pattern to get the entire surface scuffed up good, pay attention in particular to the visable areas. I still scuffed the areas that would be under the plastic trim to hold any overspray.


After you have a good scuffing hit it with another round of grease and tar remover and wipe it down followed by some kind of solvent like acetone to get any residues off. After that hit it with a tack cloth to remove any lint, dust, etc.


Now to paint. I used Automotive Touchup brand color matched paint in a rattle can, I used their clear coat too, honestly, when I do the front I will probably use a gun, just to get easier coverage. Shake it up for at least a minute to get the paint mixed well and then spray your first layer. The first layer you want to leave fairly light, is a tack layer for the rest of the layers. Get decent coverage but don't worry if you see some of the old paint coming through, we are doing this a few times. Give it 10-15 minutes to flash off before laying down more coats. After the first you want to lay down thicker layers. Don't forget to shake your can! Hit the bumper with slow, overlapping layers holding the can around 8" away from the bumper. You want to keep on moving to make sure you don't get drips. Long even sweeps that over lap by about 50% are your best bet. Make sure and focus on the exposed parts of the bumper. I painted the whole thing but wasn't worried too much about the parts that would be under the plastic. Wait another 10-15 and apply your third coat. You should have a solid coat by now, if you have paint left over feel free to do a 4th coat. Don't worry if it looks a bit mottled, the base coat sometimes does that, it will even out under the clear. Give the base around 30 minutes to cure out before you move on to clear.


The clear works much in the same way as the base. You are going to do 3-4 coats to give you plenty of depth for polishing. You will go on with medium coats from the start. Lay down a solid coat, focusing on the area that will be visable, I didn't even worry about the area around the plate as it is covered by plastic completely. Give it between 5 and 10 minutes between coats. After all your coats let it sit for around 48 hours to let the clear set up and then you can hit it with your buffing compounds to get the shine.


I have attached pictures from the process below.


I hope this helps and don't hesitate to ask questions. I am no expert by any means, but I am just sharing some things that I have learned so far from doing it myself. Anyone has any constructive criticism please let me know!


My bumper before, showing the argent paint.

post-148500-0-58233500-1445642543_thumb.jpg


Doing the base coat, you can see mottling, it will go away with the clear. This is after the second coat of base color. I did one more heavy coat after this.

post-148500-0-43746200-1445641615_thumb.jpg


Two coats of clear in, starting to look better!

post-148500-0-76500400-1445641620_thumb.jpg


Done with the clear, looking good.

post-148500-0-47660600-1445641625_thumb.jpg


Got a good shine already, now to buff it out in a couple days after the clear has had time to cure. You can see the base coat without clear behind where the plate will go, that will be covered with the plastic bumper pad.

post-148500-0-32869200-1445641630_thumb.jpg

post-148500-0-43746200-1445641615_thumb.jpg

post-148500-0-76500400-1445641620_thumb.jpg

post-148500-0-47660600-1445641625_thumb.jpg

post-148500-0-32869200-1445641630_thumb.jpg

post-148500-0-58233500-1445642543_thumb.jpg

post-148500-0-43746200-1445641615_thumb.jpg

post-148500-0-76500400-1445641620_thumb.jpg

post-148500-0-47660600-1445641625_thumb.jpg

post-148500-0-32869200-1445641630_thumb.jpg

post-148500-0-58233500-1445642543_thumb.jpg

post-148500-0-43746200-1445641615_thumb.jpg

post-148500-0-76500400-1445641620_thumb.jpg

post-148500-0-47660600-1445641625_thumb.jpg

post-148500-0-32869200-1445641630_thumb.jpg

post-148500-0-58233500-1445642543_thumb.jpg

Posted

Honestly, it shouldn't be that much harder, just takes more prep to make sure everything adheres to the bumper.


I agree, color matched looks so good on these and the Sierras.

Posted

Looks good man. I finally dropped of my new front bumper and new rear no step bumper to get color matched. Hopefully get them back next week.

Posted

Looks good man. I finally dropped of my new front bumper and new rear no step bumper to get color matched. Hopefully get them back next week.

Where did you find a no-step? Going to look good!

Posted

Where did you find a no-step? Going to look good!

ordered from my local dealership. I shaved the holes on the bumper before I dropped it off to my painter
Posted

ordered from my local dealership. I shaved the holes on the bumper before I dropped it off to my painter

You do that with the step bumper or is there still a part number for the stepless one?

Posted

You do that with the step bumper or is there still a part number for the stepless one?

Their is a no step bumper for sale on ebay primed ready for paint. I think you can still get them from the dealer.


RT

Posted

You do that with the step bumper or is there still a part number for the stepless one?

Yes there still available through the dealer.

Archived

This topic is now archived and is closed to further replies.

  • Latest Articles

  • Posts

    • "Teardown" is complete. Head surfaces are clean and ready, new intake is prepped and ready. Coolant drained and water pump is removed, radiator is removed, new hoses and pump are ready.   The replacement intake is also from a '95 (with I think 260k, the odometer said). Noticeably less pitting where it covers the rear coolant passages. I'm not sure if that's a tribute to more frequent use, more frequent coolant changes/upkeep, or if the intake was machined at some point. But it appears I found a good one.   My coolant hoses were original, and the lower hose still retained the factory spring inside. It's not really rusty, but it's got deposits all over it. Unsure if I should re-install it (will thoroughly clean it first). Someone said hose technology has gotten better since 1995 (has it?) and I don't need the spring. I think modern EPDM is what made those hoses last from 1995-2026, so it's a question of how much suction can the water pump really pull, and will it collapse the hose without a spring?   I'm stopped and waiting for parts, however.   When I first brought the truck home, the fan was intermittently hitting the radiator shroud. I could see someone had monkeyed with the shroud (put a bunch of cardboard as a spacer between the upper/lower shroud halves. Someone said the motor mounts have likely failed and the engine has sagged. I wasn't sure I believed that. The engine is really solid in its mounts: To remove the old intake I *just* nearly permanently welded to the heads with freshly cured RTV and gasket snot two weeks ago, I literally had to use the arms on my lift and a chain with a bolt attached to the intake to pull it loose. It almost picked the front of the truck off the ground before ....scuuuuuuuuuuup.... I could actually hear the gaskets tearing and it broke loose and the whole truck settled back down. Motor barely moved.   SO, those parts I'm waiting on... The lower radiator mounts/bushings had completely failed. The radiator needs to be insulated from the rad support, and the bushings help the rad stand at the correct height. The plastic "baffle" was also destroyed at some point. Someone had attached the shroud to it incorrectly, overlapping a joint that should have been underlapped, creating another suspect issue potentially causing things to hit the fan. Broken tabs, side is busted off, and it's perma-formed/bent where it was jimmied incorrectly.   The baffle? Unobtainum. Long since discontinued from GM, of course. Aftermarket/capa/chinese? Also unobtanium. In GM's infinite wisdom, it appears there are at least two different variations whether the Blazer is 2 or 4 door, and I can't yet tell if they shared the same part with the S-pickups. Plan B, if I can't find a viable used one, will be to create a bracket to re-assemble the critical joint I need to seal a gap with the shroud. But that will bug me, it won't be...perfect.   The water pump bolts appear to have been installed with...plumber's putty. I guess, sure, if it works...? I've found a few "backyard fixes" like that. Someone's been here before....   If I can't find someone to jam bamboo under my fingernails to fill my free time this week I think I'll install the driver's power window motor and replace the rear door speaker that's inop. I've got a genuine GM "9.5" ohm working replacement. Why GM used a non-standard resistance....nevermind. Of course they did, you can get more sound from a cheap factory amp that way.   And the saga goes on...
    • // Thank you, also for your  response. More information is always good. This 2013 GMC is most likely my 'forever truck"-I'm 77 and retired...and truck only has 42K on it-very clean-so I try to keep it that way.  Tks again for your  response- glenn
    • I started my install this weekend. Everything was pretty straight forward but I ran into one issue with running power through the firewall. The nipple grommet on my High Country already has a small harness running through it - has anyone else ran into this issue? And on the engine bay side, does the wire basically just penetrate the factory wiring boot? I did this on my '22 Trail Boss and it seems much easier but thats been a few years. My other thought would be possibly drilling a new hole adding a rubber grommet just to the lower left of the factory hole. Thoughts?   Has anyone used a T-harness off the Bose amp and obtained power from there? It seems a little odd that such a small amp needs 3 power leads
    • ///// Ok--Thanks for that info--I could not find yesterday when I looked for the specs on that NAPA filter what I wanted. Their website is not very user friendly. I buy all teh filters for  our three vehicles once or twice a year. Have always run NAPA Gold on everything I own....I buy it thru my Son's account for his business-which he has a Heavy Equipment repair shop-one reason he uses NAPA so much-they have such a full line of coverage for just about anything/anywhere- He gets s  good discount because of volume bought. Anyway-Thank you -Sir for your response.   glenn
    • It is possible to add your own 12v outlet to your truck.  Check out this video:   I verified via GM Upfitters that pin 31 is the same on the 1500 trucks.  The wire is GM part number 84779405.   You can get the GM 12v outlet from Amazon  https://www.amazon.com/Genuine-Accessory-Receptacle-25774623-13549530/dp/B0F1H9YRGF EWAY 12 Volt Power Adapter for GM   https://www.amazon.com/EWAY-Chevrolet-Silverado-Cigarette-Ignition/dp/B0915RRW6Q/ref=sr_1_1?   I just haven't figured out a good place to put the 12v outlet in my truck.   Some people are getting USB-C to 12V adapters  https://www.amazon.com/WYMECT-Cigarette-Lighter-Socket-Adapter/dp/B0F87WNQKB/ref=sr_1_1_sspa? Not sure if they provide the correct amperage that a device like a tire inflator would need.  
  • GM-Trucks.com Clubs

  • Popular Contributors

×
×
  • Create New...










