

-
Recently Browsing 0 members
- No registered users viewing this page.
-
Forum Statistics
250.5k
Total Topics2.7m
Total Posts -
Member Statistics
342,965
Total Members8,960
Most Online
-
Who's Online 3 Members, 1 Anonymous, 1,533 Guests (See full list)
-
Latest Articles
-
Posts
-
 I ordered the Snap On...waiting for it to come in later this week or early next week. New front cover, new crank seal and new balancer are on. Water pump, pulley, fan, hoses, and plastics reinstalled. I can move forward knowing all my timing marks are dead on and the front engine is hopefully sealed better than it was. Take 2 with the water pump...trying high temp thread sealer on the lower bolts. Rebuilt injector and new-new regulator is in, it looks like new. Top intake reassembled and all the bits are reconnected and snugged down. Thinking about knock sensors again, I located both of mine and, there's your problem, Francis... The driver's side one is broke, plastic is bashed in, part of the wire is bare, and it appears to have been damaged like that for a long time. I saw the wire but didn't think anything of it. The knock sensor might not be my pulled timing issue, but it sure looks suspect. It must still be conducting, otherwise I'd expect a CEL. But perhaps with its sacred crystal inside exposed, jilted and dirty, maybe it's sending mixed signals. So I'm waiting for one of those and a new pigtail to come in. Pass side sensor looks good, except for the spark plug wire resting on it (!). The plug wires are healthy so it shouldn't be causing an issue, but I separated them and added zip ties to nearby looms to keep everything well apart. So, I'm down to installing a knock sensor AND, oh, replacing the exhaust and cat. I actually think that's going to be fairly easy, it's all bolt-together, all new stuff from Walker is laid out on the shop floor ready to go. Hopefully have this thing on the road again for the weekend. My luck? It will still be leaking oil, coolant, pulled timing, intermittent CEL for running rich, or it probably won't run at all -- because that's how this project has gone. I've never worked on a vehicle so ...hurt? ...cursed? in my life. Everything has been effed with SO HARD, but I think...knock on wood...I've managed to undo all the backyard stuff and we're almost reset back to "just" an 80k mile, 30 year old Blazer.
 -
 Yes. You need to check out that thing, and the hub further.
 -
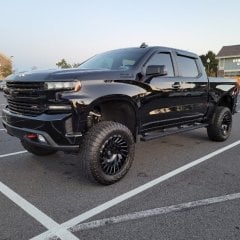
By anthony2558 · Posted
Would this be normal or a worn CV Shaft? 51K miles 3.5" lift? Boots are intact and no visible leaks showing. Attached is a the video I took. Thanks https://youtu.be/ZnW7PPRmjJY?feature=shared -
 If everything checks out at the MAF, then the MAF is BAD, new or not. You don't need a signal generator to troubleshoot this. PCM needs ALL powers and ALL grounds able to light a halogen headlight bulb - if it can light the bulb bright, then the wiring is good enough to run the PCM. Best thing you can do for yourself is spend some time here: scannerdanner.com - Check out all his YouTube videos on similar issues. If you decide to subscribe it's the best bang-for-buck ratio in the automotive world, hands-down. He's got TONS of free vids on YouTube, too.
 -

-
-
GM-Trucks.com Clubs
-

Black Truck Club
Open Club · 613 members
-

White Truck Club
Open Club · 381 members
-

Canadian Owners Club
Open Club · 282 members
-

Red Truck Club
Open Club · 158 members
-

diesel 3.0
Open Club · 281 members
-

Texas Owner's Group
Open Club · 371 members
-

NorthSky Blue Club
Open Club · 118 members
-

Midwest Owner's Group
Open Club · 213 members
-

2015 Custom Sport Club
Open Club · 5 members
-

GM Snow Plowing Club HD
Closed Club · 14 members
-
-
Popular Contributors
-

.thumb.JPG.2c573de60d3a3a4407c7d92298db46dd.JPG)


Recommended Posts
Create an account or sign in to comment
You need to be a member in order to leave a comment
Create an account
Sign up for a new account in our community. It's easy!
Register a new accountSign in
Already have an account? Sign in here.
Sign In Now