Jump to content

Recommended Posts

Posted (edited)

Little back story first…


Purchased my truck a month ago with a readylift sst lift (leveling kit top and bottom with new control arms. Dealer threw on the nitto recon grapplers 33x12.5x22. This is the first issue… we agreed upon 285/55/22 for the tire size… parts guy decided on his own to go with the 33/12.50 because of availability without discussing with me. When I picked up the truck the tires did not clear the new control arms. It wasn’t even close. I ran out and grabbed some hub centric spacers (1/4”) and had them throw them on. Alignment bought me some space but not enuff. I still rub from time to time. When I noticed the rubbing I contacted my salesman and they are going to make it right. They will take my tires off and replace them with whatever I choose.


That being said, the sst lift leaves more space in the wheel wells than I thought it would. I’m going to stuff 35s in there if I can! The 12.50 will present the same issue with control arm clearance. Would going with a thicker spacer work?? I know I have to trim the bracket in the fender well and pull back the wheel well liner and all.. just wondering if my control arm clearance issue can be resolved with a spacer.. 


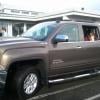
I attached pics for reference.image.thumb.jpg.74453c71740bbb302852601bd40c1392.jpg

image.thumb.jpg.6257b80bcdacd6bf64317ed50b691e0f.jpg


anyone running a similar setup??

Edited by Usudno
  • Haha 1
  • 2 weeks later...
Posted

Well… almost 35s. But the control arm rubbing is way worse!🤦‍♂️


new tires are 295/55/22 ridge grapplers. The ridge grapplers are substantially more aggressive on the sidewall. Even tho the 33x12.50x22 recon grapplers are a 12.50, these run more. 1/4” spacer is still in place but I’m thinking I will have to go with a larger spacer. Seems like the norm is 1.5” hubcentric. Does that Allow me to not trim the wheel studs?


thanks and BTW.. tires look great. Pics tomorow.

Posted
On 1/22/2023 at 1:21 PM, Usudno said:

Little back story first…


Purchased my truck a month ago with a readylift sst lift (leveling kit top and bottom with new control arms. Dealer threw on the nitto recon grapplers 33x12.5x22. This is the first issue… we agreed upon 285/55/22 for the tire size… parts guy decided on his own to go with the 33/12.50 because of availability without discussing with me. When I picked up the truck the tires did not clear the new control arms. It wasn’t even close. I ran out and grabbed some hub centric spacers (1/4”) and had them throw them on. Alignment bought me some space but not enuff. I still rub from time to time. When I noticed the rubbing I contacted my salesman and they are going to make it right. They will take my tires off and replace them with whatever I choose.


That being said, the sst lift leaves more space in the wheel wells than I thought it would. I’m going to stuff 35s in there if I can! The 12.50 will present the same issue with control arm clearance. Would going with a thicker spacer work?? I know I have to trim the bracket in the fender well and pull back the wheel well liner and all.. just wondering if my control arm clearance issue can be resolved with a spacer.. 


I attached pics for reference.image.thumb.jpg.74453c71740bbb302852601bd40c1392.jpg

image.thumb.jpg.6257b80bcdacd6bf64317ed50b691e0f.jpg


anyone running a similar setup??

That is crazy about the dealer ordering different size tires without your approval.  An inch and three quarters difference in height and a much wider tire which is where most fitment issues come into play on these trucks. I have 35x11.50 on my AT4,  no level, just Bilstein 5100 set at medium setting (0.6 inches of lift over the factory 2 inches) +15 offset wheel (stock offset plus a half inch spacer basically) had to remove the mudflap bracket to keep it from rubbing on turns.

  • Like 2
Posted

Well here it is. Trimmed and all. I need to tie strap back the wheel well liners.. getting the slightest rub on full lock reverse. Mirror caps will be in tomorrow. I may tackle the chrome strip on the steps tomorrow as well.

2E163949-769A-4253-A8D0-C7796A82CC68.jpeg

  • Like 1
Posted

Another picture.. tinted the third brake light as well as the turn signals on mirrors.

083E05F9-B6C2-4C89-8A78-24FF9364E0EC.jpeg

Posted

Diamondd2… I have the ready lift control arms.. they stick out a bit farther and cause the issue that was at hand. I ended up going with longer wheel studs rather than the 1.5” spacer. I used a .5” spacer with the longer studs and it looks damn good if I must say. Just finished pulling metal bracket in the rear and pulling the liners all back. Gonna take it for a ride see if I can’t find some satin black wrap for the running boards… mirror caps are a no shoe so far.

  • 1 year later...
Posted
On 2/4/2023 at 9:07 AM, Usudno said:

Diamondd2… I have the ready lift control arms.. they stick out a bit farther and cause the issue that was at hand. I ended up going with longer wheel studs rather than the 1.5” spacer. I used a .5” spacer with the longer studs and it looks damn good if I must say. Just finished pulling metal bracket in the rear and pulling the liners all back. Gonna take it for a ride see if I can’t find some satin black wrap for the running boards… mirror caps are a no shoe so far.

What extended wheel studs did you end up going with?

Posted

I run 35x12.5 R18's on my 15 gmc sierra 1500 z71 (stock wheels). I have a RC 3.5 lift kit and it only rubs the inner fender at full lock and it touches the upper arm at full lock. This kit has angled uppers though. I DO NOT recommend this kit though. I haven't put much for miles on it ( maby 15-20k) it has already settled and now rubs a bit more. I also run a RH grill guard and RC hidden mount 12k winch (synthetic line). I did however just purchase the  https://cognitomotorsports.com/cognito-4-inch-performance-lift-kit-with-fox-ps-ifp-2-0-shocks-for-07-18-silverado-sierra-1500-2wd-4wd.html. can't wait to see the difference. 

Posted
On 11/26/2024 at 2:05 PM, bryanw80 said:

What extended wheel studs did you end up going with?


Probably won't get a response.


image.png.0edf9345cc894e359f3344da0f0c8924.png

Create an account or sign in to comment

You need to be a member in order to leave a comment

Create an account

Sign up for a new account in our community. It's easy!

Register a new account

Sign in

Already have an account? Sign in here.

Sign In Now
  • Recently Browsing   0 members

    • No registered users viewing this page.
  • Forum Statistics

    250.5k
    Total Topics
    2.7m
    Total Posts
  • Member Statistics

    342,913
    Total Members
    8,960
    Most Online
    Smitty462
    Newest Member
    Smitty462
    Joined
  • Who's Online   5 Members, 1 Anonymous, 698 Guests (See full list)

  • Latest Articles

  • Posts

    • Have considered installing a DC to DC charger in your camper to replace your isolator?  
    • Common failure.  You need to replace the fuel door housing.   The painted cover transfers over to the new housing.  To remove the old one there is 4 spots where you poke the plastic to release it.  
    • No such thing as regenerative braking on a pure ICE vehicle.     Regenerative braking is the re-capture of energy from electric motors and stores it in the battery pack.  So hybrids, PHEV and EVs have regenerative braking.     What you are seeing is the charging system changing modes is all.  Its likely entering charge mode for some sort of reason is all.  All of the charging modes will be listed below.   As for L10 vs D.  L10 turns off automatic grade braking.  L10 puts you in control of grade downshifts where in D it will automatically do it based on brake pedal position and other factors.  Otherwise L10 and D drive exactly the same aside from that one aspect.    Battery Sulfation Mode The BCM will enter this mode when the interpreted Generator output voltage is less than 13.2 V for 45 minutes. When this condition exists the BCM will enter Charge Mode for 2–3 minutes. The BCM will then determine which mode to enter depending on voltage requirements.   Charge Mode The BCM will enter Charge Mode when ever one of the following conditions are met:   Windshield wipers are ON for more than 3 s. Climate Control Voltage Boost Mode Request is true, as sensed by the HVAC control module via serial data. High speed cooling fan, rear defogger, and HVAC high speed blower operation can cause the BCM to enter the Charge Mode. The estimated battery temperature is less than 0°C (32°F). Battery State of Charge is less than 80%. Vehicle speed is greater than 145 km/h (90 mph) A current sensor malfunction exists. System voltage is determined to be below 12.56 V When any one of these conditions is met, the system will set targeted generator output voltage to a charging voltage between 13.9–15.5 V, depending on the battery state of charge and estimated battery temperature.   Fuel Economy Mode The BCM will enter Fuel Economy Mode when the estimated battery temperature is at least 0°C (32°F) but less than or equal to 80°C (176°F), the calculated battery current is less than 15 A and greater than −8 A, and the battery state-of-charge is greater than or equal to 80%. Its targeted generator output voltage is the open circuit voltage of the battery and can be between 12.5–13.1 V. When fuel economy mode is active, the generator is not charging, only maintaining open circuit battery voltage. The BCM will exit this mode and enter Charge Mode when any of the conditions described above are present.   Headlamp Mode The BCM will enter Headlamp Mode when ever the head lamps are ON (high or low beams). Voltage will be regulated between 13.9–14.5 V.   Start Up Mode When the engine is started the BCM sets a targeted generator output voltage of 14.5 V for 30 s.   Tow/Haul Mode (if applicable) Pressing the Tow/Haul Mode button located on the center stack, the vehicle system voltage is raised and the remote (non-vehicle) battery will be charged. Having the headlamps on will raise the system voltage and if the Tow/Haul button is applied it will not serve any purpose. The voltage is regulated between 13.9-14.5 V.      
    • Hello from Australia Just sharing that there is now a way to delete the active shutters entirely with just a plug in module. Opens up tons of room to light bars etc.
    • I have an observation and a question... 1) I watch the voltage closely because I have had to dial in the cut-in/cut-out voltages of the battery separator to my camper.  The "smart" charging drives me nuts.  Anyway, I noticed that when coasting for a while, and especially if lightly using the brakes (though not necessary), the voltage goes up from mid/high-13 volts to mid/high-14 volts.  Then it drops back down after stopping or going again.  Consistently!   The only explanation I can come up with is REGENERATIVE BRAKING!  Well, maybe that's a little bit of an exaggeration, but it's certainly free extra battery charging.   2) Driving on mountain roads I will use L and vary the max gear.  Things straighten out and I end up in L10.  Sometimes I leave it there for a while.  Is there any difference between L10 and D?   
  • GM-Trucks.com Clubs

  • Popular Contributors

×
×
  • Create New...