Jump to content

Cab marker lights install, part 1


Recommended Posts

Posted

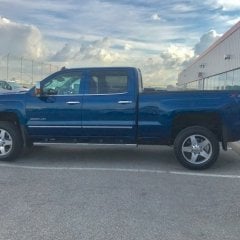
So I finally got around to installing the cab marker lights on my 2017 GMC 1500 Sierra SLE. 

I had spent some time researching and buying the necessary parts.  I didn’t want to use aftermarket parts so I bought only GM parts.  

I have to first mention that in a lot of other posts I’ve read either on here or other forums that people would buy a harness and only use the two wires associated for powering the cab marker lights.  It is too difficult a job to try and integrate the bought harness with the harness in your truck.  All the posts that I have read the harness that people bought was a harness that has wiring for the cab marker lights as well as othe circuits.  It seems like a waste to spend over $100 for the harness and just use two wires from it. 

I found a part number for a harness that only has the cab marker light circuit.  

Its GM part number:  23170765.    The price of the harness was approx. $57. 


978_DA70_D-5_F4_C-49_CC-9_AEC-_D310_F5_A


A182_D219-7606-4_AE2-_BCE5-_C54_F747_ECE


96_AACD52-07_E9-44_A1-_B4_BE-1_DFC2_EF99


So the first thing I had to do for the actual install was to figure out where the lights get mounted on the roof.  I found a drawing from another forum showing the dimensions of how the lights get mounted on the roof.  


5_E8_D63_C3-_DC9_B-4_D9_C-_BF2_D-3_B50_F


The odd thing about these lights from GM is they mount through 3/4” square holes.  So I made a template for each light.  Laid out some tape on the roof and traced out where each light should get mounted and the located of each hole the needs to be cut out. 


AB6_E751_B-8_B9_B-4109-83_B8-1_FCDF56262


That old saying measure twice cut once applies here !!    I must have spent close to an hour measuring and re-measuring the position of the templates.  After I figured the location of where the holes were to be cut the next step was to go inside and drop the front of the headliner. 

The first step was to remove the sun visors. They’re secured with three Torx T20 screws.  There’s also a T20 screw holding down the catch for the sun visor.  Next I removed the overhead console.  To remove it first flip down the sunglasses holder and grab the center of the overhead console and pull it down.  Once that is down there are two Torx T10 screws holding the rest of the overhead console up.  Once those two screws were removed grab the overhead console at the rear and pull it down.  There are two clips at the rear holding it up.  Undo the connector for the overhead console. 


07_E5_CDB2-_A6_B9-48_BB-_BF05-7_CAF804_C


F69_E7_D4_A-_ABA1-4_E64-8_C54-_E04_D44_C


The next step was to remove the A-pillar grab handles.   Pop two covers to reveal the two 10mm bolts.  Remove the bolts and the panel should just pull out. 


6_F8_BBBCE-55_C5-45_FF-8_D51-1_BFC4065_C


The next items to remove are the assist handles on the roof.  Pop open to two plastic covers to reveal two 8mm bolts. Remove the bolts and the handles should just pull out.  


Now the most frightning part - making the first cut in the roof !!!

I was so nervous about cutting open my one year old truck.  But I did it.  I took my Dremel tool with a small cutoff wheel and started to make the cuts.  I kinda felt sick; like my nads just went up into my body.   At this point I was committed.  No turing back.  After making the first cut the rest of them wasn’t too bad.   I had to file out the holes to get them looking decent and measuring 3/4”.  It’s better to cut smaller than to cut too big.  

I couldn’t believe I just cut four holes on the roof of my truck.   


5_B5_FE398-18_F2-412_F-_B582-_AEC35_AF81


After cutting each hole I took some colour match touch up paint to the edge of each cut.  As the paint dried I routed the harness from the passenger side fuse panel up along the passenger A-pillar and along the forward of the roof.  As the first coat of touch up paint dried I applied a second coat.  

The harness got zip tied to the truck’s original harness. 

After the paint had dried I put a bead of marine grade silicon around the perimeter of the opening of each cutout just to make sure I won’t get any water leakage into the interior.  I tightened each cab marker light with a 10mm deep socket and  connected the light connectors to the harness. 

Next the interior was put back together in reverse of how it was taken apart.  


I haven’t yet connected power to the lights.  In a previous post I made it was discovered that the connector in the fuse panel where the harness gets connected to doesn’t have power at the pins (pin 3).  

My next step is to tap the power for the cab marker lights from the clearance marker lights from my tow mirrors. 

Thats going to be part 2.   

I’ve had enough today.  I was working out in the hot sun and am now burnt behind my neck, and it’s dinner time soon.  

To be continued......


37_AEB15_F-7_ECB-4684-_B694-_DB4154_AC1_


  • Replies 40
  • Created
  • Last Reply
Posted

Oh yeah! I would have been just as terrified about cutting into the roof. It was terrifying enough cutting into the headliner. Point of no return. Nice work!


Sent from my iPhone using Tapatalk

Posted

They make a square punch for the holes.  


My wife would kill me if i told her i was cutting holes in my roof. 

Posted
They make a square punch for the holes.  
 
My wife would kill me if i told her i was cutting holes in my roof. 

Should have seen the look from my wife when she saw this...

0d4ca9fe1738181b87f0f049f2daff79.heic

04b3bd4d1cdf0eb0187c498a3d092c68.heic


Sent from my iPhone using Tapatalk
Posted
25 minutes ago, bndawgs said:

They make a square punch for the holes.  


My wife would kill me if i told her i was cutting holes in my roof. 

85_A1585_F-42_E4-44_A3-_BA0_A-152_CDB452


Although more time consuming, it’s a lot cheaper to do the cuts with a Dremel tool. 

Posted
42 minutes ago, bndawgs said:

They make a square punch for the holes.  


My wife would kill me if i told her i was cutting holes in my roof. 

You are right on with the wife comment!  My wife and I celebrated our 40th this month and I spent some time reflecting on the times she has been the voice of reason over my more ambitious plans.  The beauty of our relationship is that if I can convince her to support my plan, she shares in it if it fails. (No "I told you so"...)    OP has done a fabulous job and I appreciate his detailed install report.  I think if I get the courage and enough desire to install cab marker lights, I'd first search for non-oem lights that don't require square holes!

Posted
44 minutes ago, Sour_Squirrel said:

85_A1585_F-42_E4-44_A3-_BA0_A-152_CDB452


Although more time consuming, it’s a lot cheaper to do the cuts with a Dremel tool. 

This was the punch I was thinking of.  But yeah, dremel would be the cheapest option


Posted

i peed a little just reading this.... but awesome write-up Sour!!!!.... looks awesome!

  • 10 months later...
Posted

Does anyone have a picture of the location where this harness plugs in and also which pin is pin 3?

I have found where i believe the harness plugs in and have checked all the tabs (pins?) inside of that location with my test light and 3 of them (6 total if i remember correctly) have power and the rest do not (this is the same with the key on or out of ignition, and lights on or off)

I just want to be sure my plan of action is correct before going forward and a picture would be very helpfull. Thanks guys

Posted
On 6/13/2018 at 10:23 AM, bndawgs said:

This was the punch I was thinking of.  But yeah, dremel would be the cheapest option


I had bought the punch off of CuzznVinny. It worked great and no mess from the dremel. The holes still had to be cleaned up a little, but it was quick and easy. I was still very nervous punching that first hole.

Posted
20 hours ago, DetroitChevy said:

Does anyone have a picture of the location where this harness plugs in and also which pin is pin 3?

I have found where i believe the harness plugs in and have checked all the tabs (pins?) inside of that location with my test light and 3 of them (6 total if i remember correctly) have power and the rest do not (this is the same with the key on or out of ignition, and lights on or off)

I just want to be sure my plan of action is correct before going forward and a picture would be very helpfull. Thanks guys

The connector is supposed to plug into a spot on the passenger side fuse panel.  

Some trucks have pin 3 powered (with headlights on) and some don’t.  

Mine didn’t so I had to find another source of power to turn on the marker lights. 


This is is what I did.  

btw I’m the OP who did this install....


Posted

Other threads on this, but I applaud you Sour_Squirrel for doing this yourself. I paid to have it done on my truck.


Archived

This topic is now archived and is closed to further replies.

  • Recently Browsing   0 members

    • No registered users viewing this page.
  • Forum Statistics

    250.4k
    Total Topics
    2.7m
    Total Posts
  • Member Statistics

    342,843
    Total Members
    8,960
    Most Online
    CaptainDad
    Newest Member
    CaptainDad
    Joined
  • Who's Online   1 Member, 0 Anonymous, 554 Guests (See full list)

×
×
  • Create New...