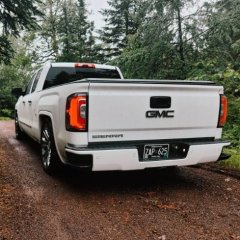
Jump to content

Recommended Posts

Posted

So after some debating, I decided to switch up the exhaust on the truck. The Carven system was nice but after awhile I started to get sick of the drone and it was pretty aggressive. It did sound good but for the amount I drive this truck everyday it was just too much.


I went with this system

https://www.americantrucks.com/proven-ground-53sierra1500-3-inch-single-exhaust-system-with-polished-tip-side-exit-s511855-53.html#customer_reviews


The price almost seemed too good so I was hesitant but with all the good reviews I decided to give it a shot. I am glad I did! The fit,finish and quality was that of a system at a much higher price. It is much quieter than the carven system. Still has a nice rumble but 0 drone. If you want something slightly louder than stock but not much I highly recommend this kit! If you want something that will scare the neighbors than this isn't it. But for what I was wanting I am very pleased!


WODddxL.jpg


RKUoBpV.jpg


b39Pp1v.jpg


rwLYW8y.jpg


Next on the list was front and rear brakes. Both pad and rotors. Nothing overally fancy, ACDelco pans and rotors. Rears looked like they had never been done so they were due. I also went ahead and painted the caliper and bracket when they were off.


lNSiG9T.jpg


Pb44Eow.jpg


If you notice the frame coating I used last year did not hold up. So I will have to address that soon.


  • 2 weeks later...
Posted

I got the frame painted over the weekend. The wax coating I used last year was junk for lack of a better term. So after doing some research and thinking, I used Tractor/implement paint. Perfect for a frame. High resistance to chipping and durable with rust protection. 


vngU4Qb.jpg


Getting all the other wax off the frame was a PIA


BFWODFb.jpg


This stuff is heavy duty


vQ5HEqQ.jpg


I also added the rear rock guards or whatever you want to call them. One was broken when I bought the truck so I took them both off. I found some used on Ebay so figured I would replace them.


E6zP4LB.jpg


Front done too


yBIFNyA.jpg


I also picked up some winter tires for my 18's. 245/60/18 which is the same overall diameter as my 22s.


xUBOZaf.jpg


  • Like 2
  • 2 weeks later...
Posted
On 4/10/2023 at 9:28 AM, 04palass said:

Before I put them back on I toot he opportunity to Fluid Film all the holes in the boxEIy5dI4.jpg


I am so happy with how they came out!


Hey 04palass,


Pickup looks nice that's for sure. Question for you, when you pulled those flares off was there any adhesive or are they just clipped on?

  • Like 1
Posted
On 10/20/2023 at 4:03 PM, PrairieGM said:

Hey 04palass,


Pickup looks nice that's for sure. Question for you, when you pulled those flares off was there any adhesive or are they just clipped on?


Thanks! And yes, it was just bolts and clips no adhesive 

  • Like 1
Posted

Thanks for the information. Just was curious because I have to do get them off mine sometime and wanted to see how much of a pain it be ha.

Posted


On 10/23/2023 at 9:19 PM, PrairieGM said:

Thanks for the information. Just was curious because I have to do get them off mine sometime and wanted to see how much of a pain it be ha.


No problem! Its actually super easy!


Finally got a radio ordered!!! I will post updates on that shortly. I also did a good pre-winter detail and used about 2 cans of fluid film in every possible crevis I could find. Trying to keep the rust at bay. So far, so good.


lNvzO9k.jpg


5JirMgX.jpg


Winter wheels will be going on soon.

  • Like 1
Posted

Winter Mode engaged


lYiCM3C.jpg


Still waiting on GMC center caps but to be honest, for winter wheels I really don't mind the look

  • Like 1
  • 2 weeks later...
Posted (edited)

After 2 years of owning the truck I finally up graded the radio! I am very happy with it, especially for the price. No issues and was plug and play out of the box. Although my truck came with next to no options it made it easier. I am very happy overall!


https://www.amazon.com/Silverado-2014-2018-Carplay-Navigation-Bluetooth/dp/B0B19Y8P18/ref=sr_1_5?crid=24LV9E3UZ6JV0&keywords=2015%2Bsilverado%2Bradio&qid=1688053221&refinements=p_72%3A1248879011&rnid=1248877011&s=electronics&sprefix=2015%2Bs%2Celectronics%2C101&sr=1-5&th=1


Old WT radio


BsPEeHu.jpg


Easy plug and play!

mOuCvJS.jpg


cUhqYi2.jpg


Just needs a Denali Cluster!


8T9aAp7.jpg


Edited by 04palass
  • Like 4
  • 1 month later...
Posted (edited)

Well I did it! lol Finally Denali OEM LED taillights. 


ctljYte.jpg


j76gczG.jpg


PVUAWHB.jpg


I did like the LED's but it just didn't have the look I wanted. I used Harnessdr 14-15 LED taillight harness. I have used his harnesses before for my heated steering wheel and headlights. Always plug and play easy! I believe he is on this forum and if you see this, THANK YOU! For making these things like these so easy for us enthusiasts! 

m8xIESh.jpg


You may also spot a black tailgate handle. Well I am working on hooking up a OEM back-up cam. More on that when I get it finished.


7zXvdlq.jpg


5a3RxNw.jpg


Happy New Year!

Edited by 04palass
Posted

Nice!! About to do the 16+ Silverado LED taillights myself on my 14. Going to run them without the resistors and see if WAMS can program the BCM to delete the hyper flash and whatnot.
 

Good luck with the OEM camera. I added it as well. Wired it up like factory. I had the runs of wires from the X63A to the X138 but was missing a couple runs of wires between X138/X50/X275/HMI. Was pretty simple once I got some terminal pigtails. 
I like to find the bare terminals so I can have nonstop runs without wire splices, but couldn’t get anyone to help figure out the bare terminal part numbers at some locations. 

Side note is you likely have X138 since it is a WT, the rest of the trims I believe have the X185 which has the interior runs and the chassis runs. So you may need to run those. 

Will have to find my markups to the schematics if you want them.

  • Like 1
Posted
7 hours ago, 04palass said:

Always plug and play easy! I believe he is on this forum and if you see this, THANK YOU! For making these things like these so easy for us enthusiasts


Looking good!


And you are correct, he is on this forum. His user name is @pgamboa He has helped me out previously with my tow mirror upgrade as well as converting the front yellow tow mirror running light into additional turn signal indicators as well. Excellent products from him.

  • Like 1
Posted
7 hours ago, 04palass said:

Well I am working on hooking up a OEM back-up cam. More on that when I get it finished.

Just wanted to give my humble opinion on this. I was never happy with the video quality of the OEM camera. It was never very clear. I upgraded my camera and it is way better now. The upgrade I bought was this one. It integrated and replaced perfectly the OEM one. 


https://www.camerasource.com/automotive-backup-cameras/2016-2018-sierra-silverado-hd-replacement-camera-cs-gmtrmod-16?make_filter=6008&model_filter=6208&year_filter=6282


  • Like 1
  • Thanks 1
Posted
18 hours ago, tuckin22 said:

Nice!! About to do the 16+ Silverado LED taillights myself on my 14. Going to run them without the resistors and see if WAMS can program the BCM to delete the hyper flash and whatnot.
 

Good luck with the OEM camera. I added it as well. Wired it up like factory. I had the runs of wires from the X63A to the X138 but was missing a couple runs of wires between X138/X50/X275/HMI. Was pretty simple once I got some terminal pigtails. 
I like to find the bare terminals so I can have nonstop runs without wire splices, but couldn’t get anyone to help figure out the bare terminal part numbers at some locations. 

Side note is you likely have X138 since it is a WT, the rest of the trims I believe have the X185 which has the interior runs and the chassis runs. So you may need to run those. 

Will have to find my markups to the schematics if you want them.


That is super helpful thank you!!


17 hours ago, mikeyk101 said:

Just wanted to give my humble opinion on this. I was never happy with the video quality of the OEM camera. It was never very clear. I upgraded my camera and it is way better now. The upgrade I bought was this one. It integrated and replaced perfectly the OEM one. 


https://www.camerasource.com/automotive-backup-cameras/2016-2018-sierra-silverado-hd-replacement-camera-cs-gmtrmod-16?make_filter=6008&model_filter=6208&year_filter=6282


I didn't know there was an oem style upgrade, I will have to look into this one. Thanks!!

  • Like 1
Posted

Attached are my particular notes on what I did. The part numbers outlined in red are terminals that I got from Mouser. Blue and orange are comments to myself. In the schematic, blue outlined part numbers are noted there to keep me from having to go back and forth between the schematic and the pinout. I got most from my local dealership. I might have found terminal equivalents to those now; however, I haven't had a chance to order some and try them out. So, no clue on the loose terminal part number yet. 


On the X50A X4 to X50A X4 portion, it looks really weird, but apparently what happens is a jump from one circuit to another has to occur. I was able to find the mentioned open spot in my trucks build. So I used those mentioned locations. I will say I do think that a later year mentioned another location, but that left the X4 connector and went into the X3 or something like that, and mine didnt have that pin in the fuse box. I have had this running for a handful of months now without issue. 

I didn't take any pictures of the locations that all this stuff happens as I am bad at that. May go get a picture of the X138 to show you what to look for.


Hope this all helps ya. 


BACK UP CAMERA NOTES.pdf

  • Like 1
  • 2 months later...
Posted

SPRING PROJECTS HAVE BEGUN!


First off, time to get a properly painted bumper. The wrap looked good but after 2 years and 2 Minnesota winters it was showing signs of age. So rather than re-wrap it I decided to dive in and get it painted. 


Painting chrome is a task itself. The bumper was completely stripped to bare metal then will do some light body work and paint. 


AiH9OkA.jpg


I should hopefully have it back from the shop this week!


Next was something I have wanted to do for awhile!

https://www.autoledtech.com/products/copy-of-illuminated-gmc-led-emblem-logo-rgb-flow-series?currency=USD&variant=43912907718914&utm_medium=cpc&utm_source=google&utm_campaign=Google Shopping&stkn=78b1662f4198&gclid=CjwKCAiAx_GqBhBQEiwAlDNAZjCu66arA1jSyLb-mx8Nn5eyFYfFNnnnmR4HL4Os-sp3ZRDiCl6oXhoCec0QAvD_BwE


I am a huge fan of Chevy's "Glowtie" and the newer GMC illuminated emblem. GM doesn't make one for the 07-18 style "GMC" grille emblem. I ordered the one above but one thing I really disliked is how exposed the dioads are. It looked odd to me


x68IbpU.jpg


So the plan of attack was some spray can lens tint. I used VHT in the past and results were mixed. But I am very very happy how this Rustoleum lens tint laid down! It looks super glossy and the LEDs shine through bright! I will get photos of it illuminated when I get the truck back together.


U11OsKU.jpg


N55QPEu.jpg


All assembled!


6GN0sw5.jpg


  • Like 3

Create an account or sign in to comment

You need to be a member in order to leave a comment

Create an account

Sign up for a new account in our community. It's easy!

Register a new account

Sign in

Already have an account? Sign in here.

Sign In Now
  • Recently Browsing   0 members

    • No registered users viewing this page.
  • Forum Statistics

    250.3k
    Total Topics
    2.7m
    Total Posts
  • Member Statistics

    342,728
    Total Members
    8,960
    Most Online
    Disabled Mike
    Newest Member
    Disabled Mike
    Joined
  • Who's Online   4 Members, 0 Anonymous, 719 Guests (See full list)


×
×
  • Create New...