Leaderboard


.thumb.JPG.2c573de60d3a3a4407c7d92298db46dd.JPG)
Popular Content
Showing content with the highest reputation on 07/13/2021 in all areas
-
Absolutely... Who doesn't like dyno charts?
 3 points
 -
Does it occur at 1200-1400rpm so lets say at low speeds, and then say 45-50mph? If so expand and read below: In short, loosen and re-set the cat Y pipe and install a vibration damper on the end of the Y pipe, maybe check the cab mounts.2 points
-
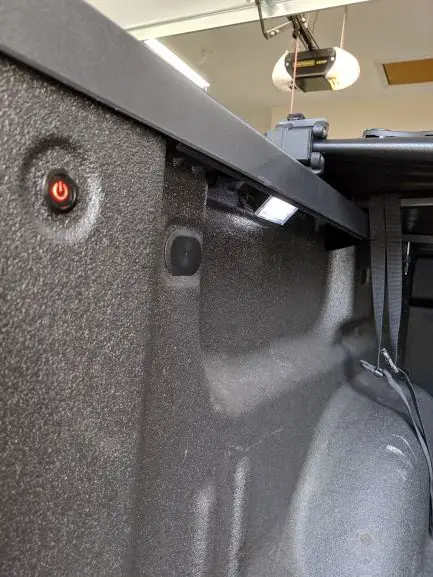
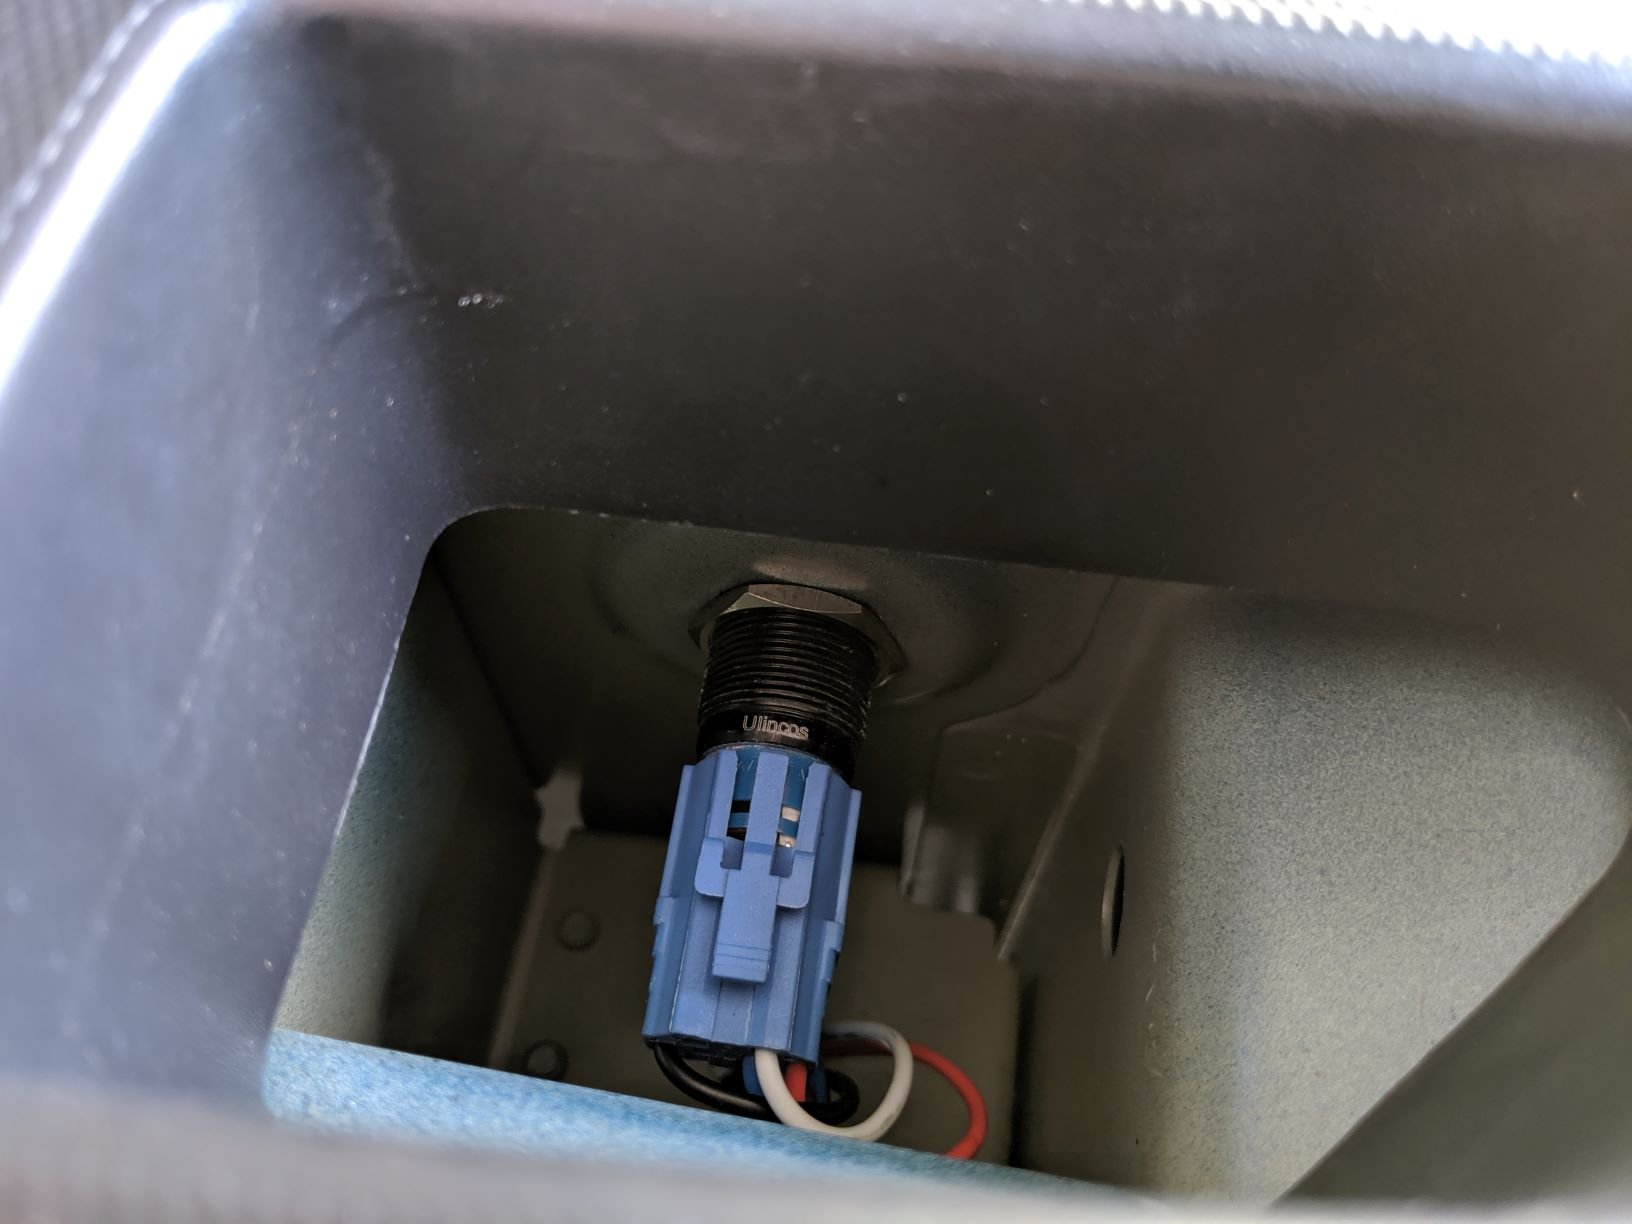
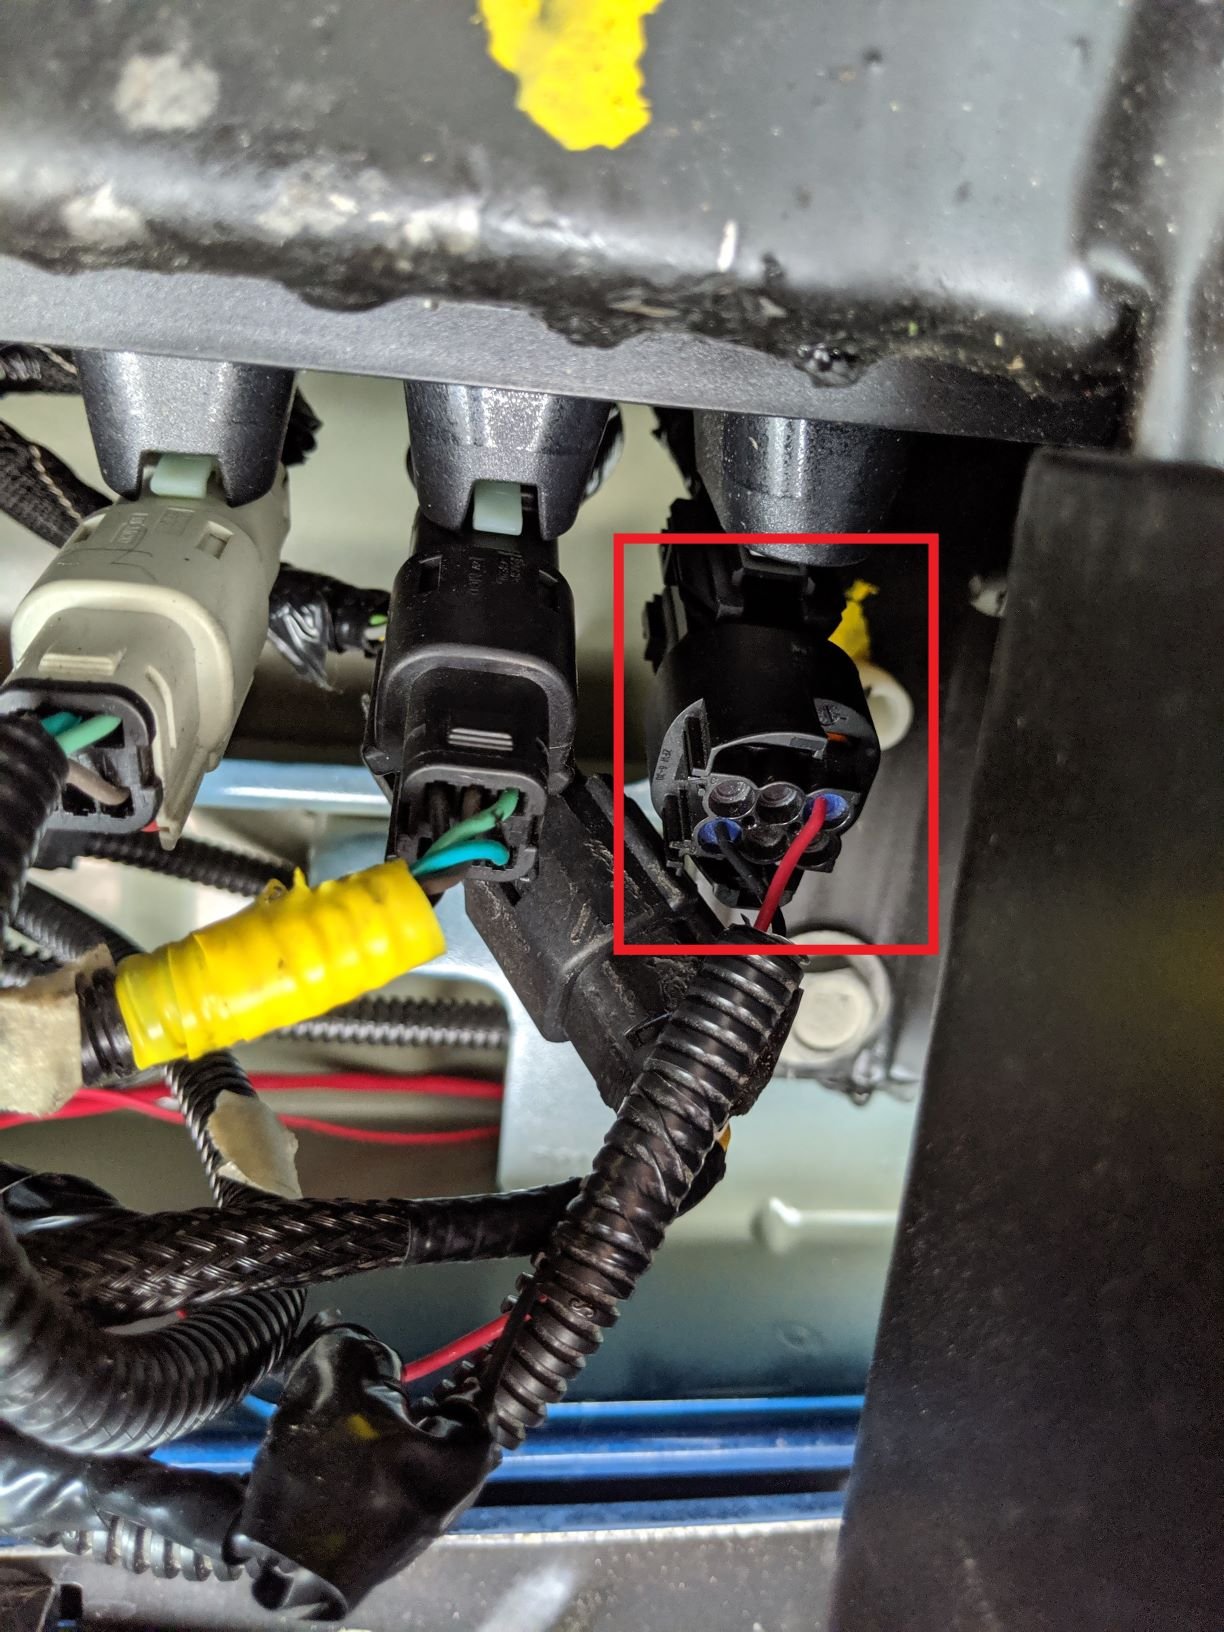
This is a mod that I did on my Canyon a few years ago before I traded it in for my new 2018 Silverado. When I added it to my Canyon, I knew I would like it, but it quickly became one of my favorite mods. It makes the bed light much more functional since I usually need the light in my bed when my truck is parked. Having to go into the cab to turn the bed lights on is inconvenient. Having a switch in the bed to turn the bed lights on is a must-have for me on any truck going forward. This mod does not impact the functionality of the cargo light switch in the cab, it merely adds the ability to turn the lights on from the bed in addition to the in-cab switch. Needed parts: Switch (1NO1NC SPDT) - https://www.amazon.com/dp/B017KP67GI/ref=cm_sw_em_r_mt_dp_U_Zv6hDb5QSWA67 Switch Pig Tail - https://www.amazon.com/dp/B01H5BXC0G/ref=cm_sw_em_r_mt_dp_U_Rv6hDb6T81SZV Stake Pocket Covers - https://www.amazon.com/dp/B07L8BJXTD/ref=cm_sw_em_r_mt_dp_U_xz6hDbX64C8WD Quick Splice T-Tap Wire Connectors Heat Shrink Butt Connectors Wire Loom **DISCLAIMER** This is performed at your own risk, I am not liable for any damage caused by attempting this mod...yada yada yada **DISCLAIMER** Process (Note, this assumes you already have the factory bed lights installed, if not, you will need to procure a factory pig-tail for the bed lights to use as an alternate power to turn the bed lights on with the in-cab switch): Remove driver side tail light by removing bolts in the tailgate area. Taillight will pull straight out. There are retention clips, but pull straight out and the light will come free. Once the taillight is free, remove the bulbs from the light and set the tail light aside. You will now need to run 4 wires (3 black and 1 white, or whatever color scheme you prefer to work with) from the tail light area, down under the truck. I recommend labeling each end of the black wires so you know where you have connected them. Under the truck near the driver side of the spare tire, there is a plug area for wiring and powering a number of things at the rear of the truck (namely, the plug controlling the cargo and bed lights). This is the plug shown in the picture, it is the furthest towards the driver's side and only has 2 wires. This is where we will tap in to wire in an additional power source as well as splice into the neutral for our secondary power source. Remove the cargo light plug, this will make it easier to work with. Find the red wire coming out of the plug. You will cut this wire. Give yourself a few inches of wire back from the plug so you have some room to work with. Using heat shrink butt connectors, connect 2 of the black wires, one to each of the cut ends of the red wire out of the plug. Using a t-tap, connect the white wire to the black wire coming out of the cargo light plug. Now find the wiring going to your 7-pin trailer hookup. I found that lowering the spare tire gave me more room to work here. I didn't remove the tire, I just dropped it down and gave enough slack to slide it out of the way while I was working. You will be looking for the large 12v always on lead, it was red with a green stripe on my truck. It is one of 2 larger gauge wires in the harness. Use a t-tap and connect the remaining black wire. This will be your secondary power source allowing you to turn the lights on without having to use the in-cab switch. Route all 4 wires up and out through the stake hole pocket so you can connect them up to the switch pigtail. Connect the wires up as follows: Black Wire out from cargo light plug > Green (NC) Black wire to t-tap on hitch harness > Blue (NO) White wire to t-tap on the black wire in cargo light plug > Black (-) Black wire out to lights (other end of cut red wire) > Red (+) and White (C) - These are tied together in same butt connector Insert the switch into the small round hole on rear driver's side of the bed. There is a silver nut that should be removed before inserting the switch. From inside the stake pocket, get the silver nut threaded on by one or 2 spins, but not all of the way as you will need to be able to maneuver the switch. Pull wiring down through the holes in the tail light area to remove excess slack from the wiring and pigtail. Install pigtail on to the switch. This was a bit difficult due to the size of the stake pocket, but using some pliers and patience, you can get it on. Once the pigtail is installed, screw the silver nut tight to hold the switch in place. At this point, I put some silicone caulk around the pigtail connection point to help keep water out, but I also have stake pocket covers that keeps water out as well. Run wires through wire loom and use electric tape to secure all t-taps, butt connections, and any harnesses you had to cut open to access wires. Plug in the cargo light plug (if still unplugged) and raise the spare tire (if dropped). I still have some work to do on my wiring, as you can see from the pictures. I thought I had some loom leftover from when I did this on my canyon, but I must have thrown it away. It's in the mail though. I had this mod on my Canyon for 3 years and never had an issue. My next steps are to add additional LED lights near the rear of the bed so that I have light all the way back. It will be as simple as tapping the wires to the existing LED lights.
1 point
-
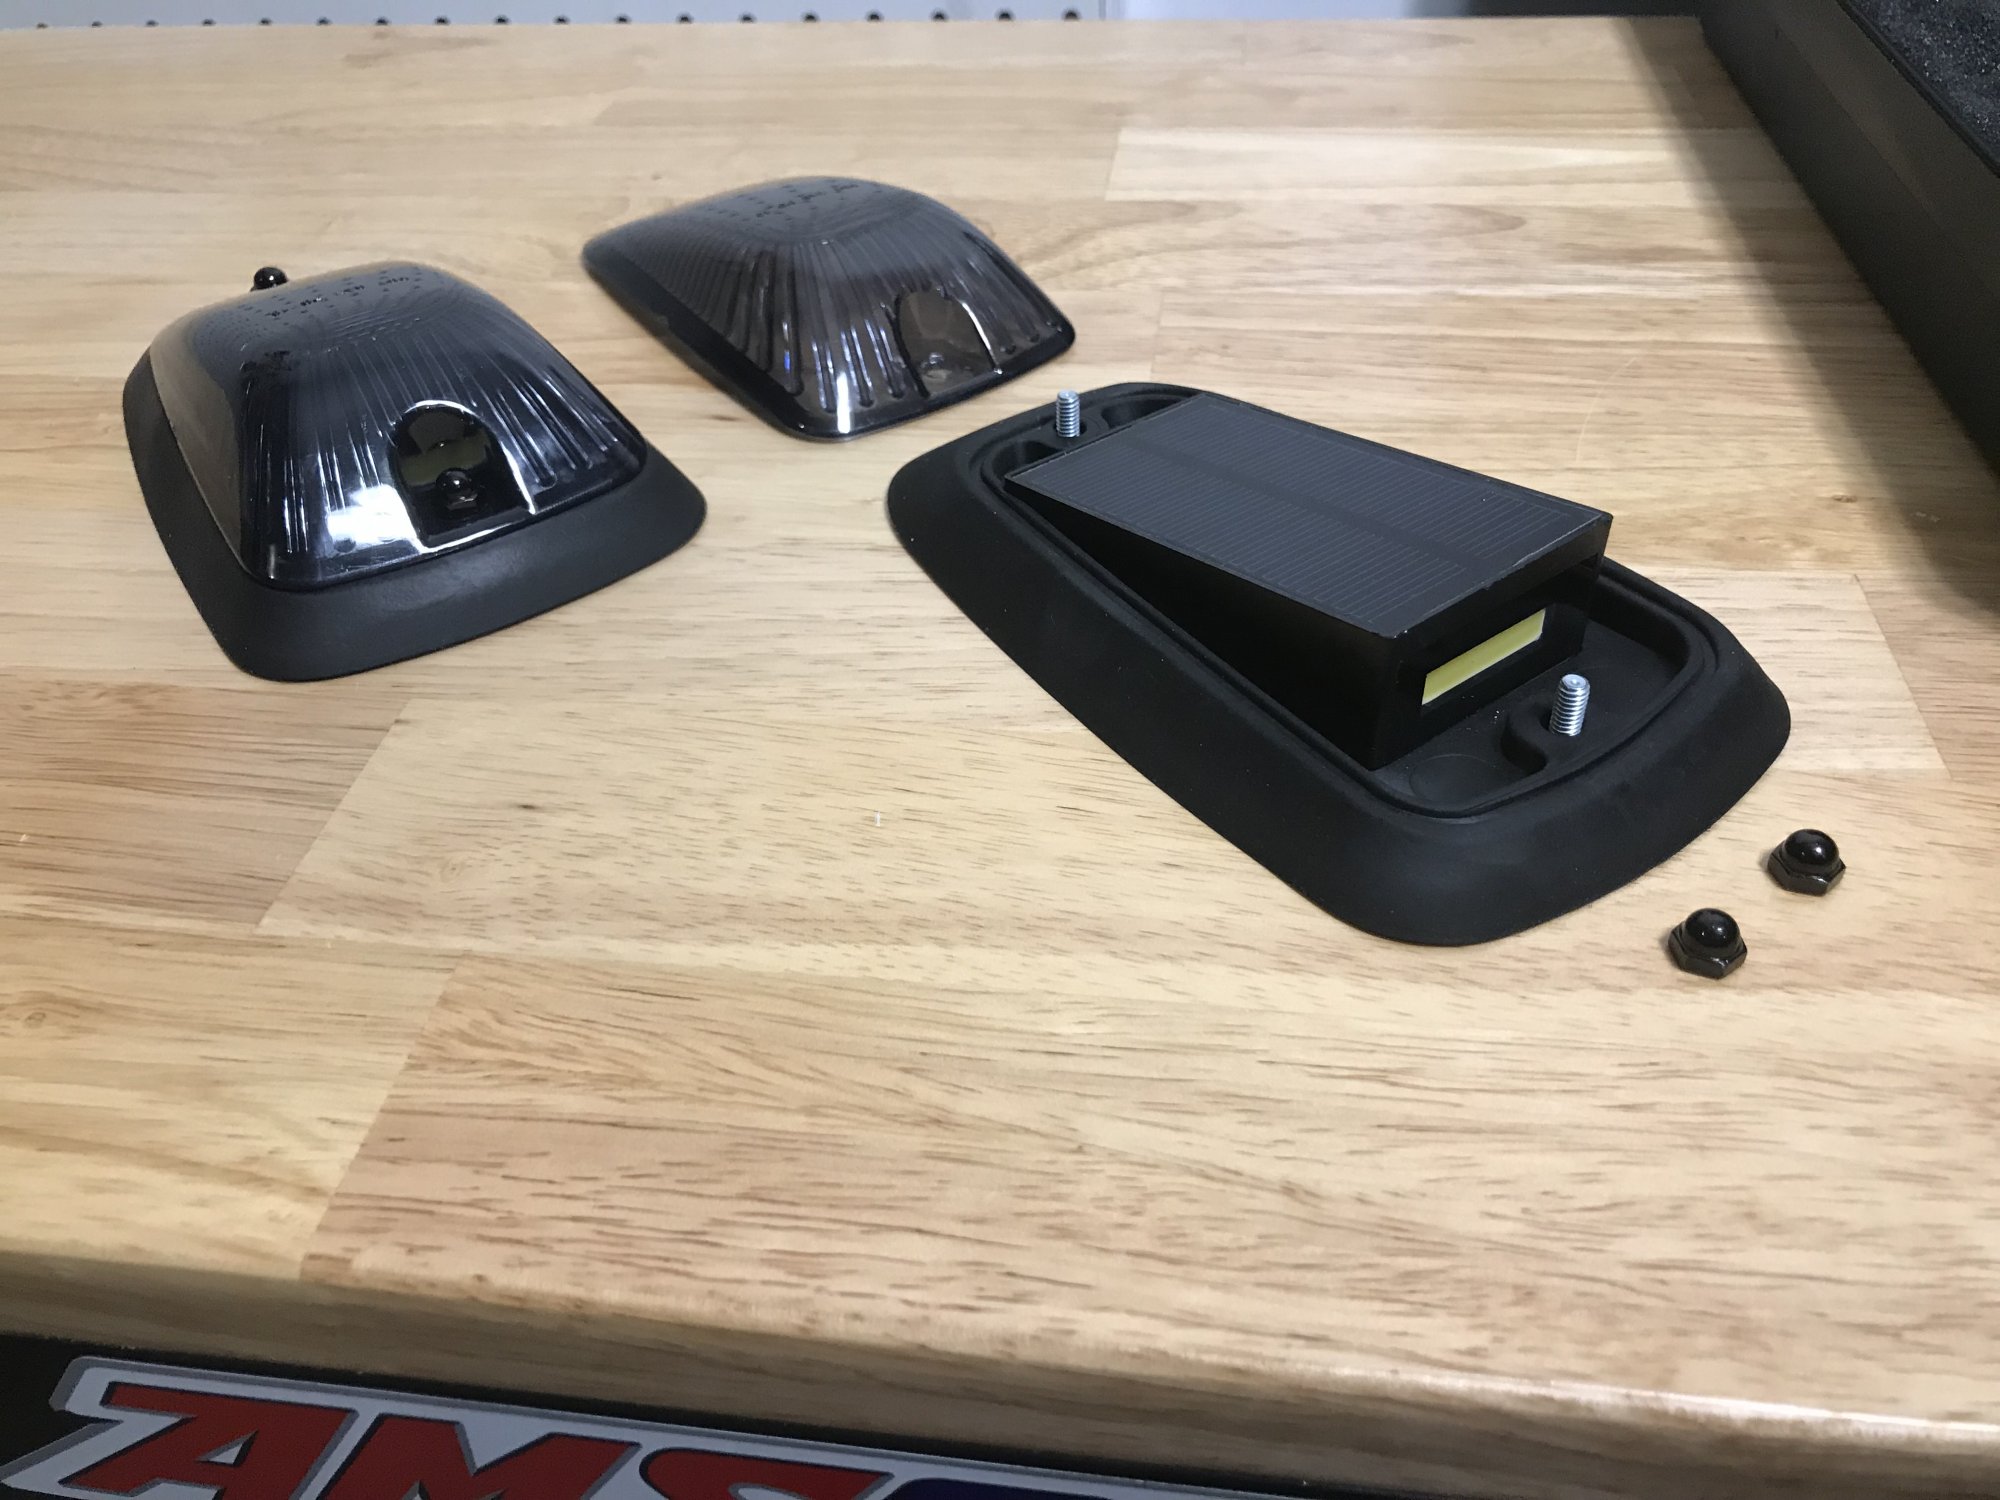
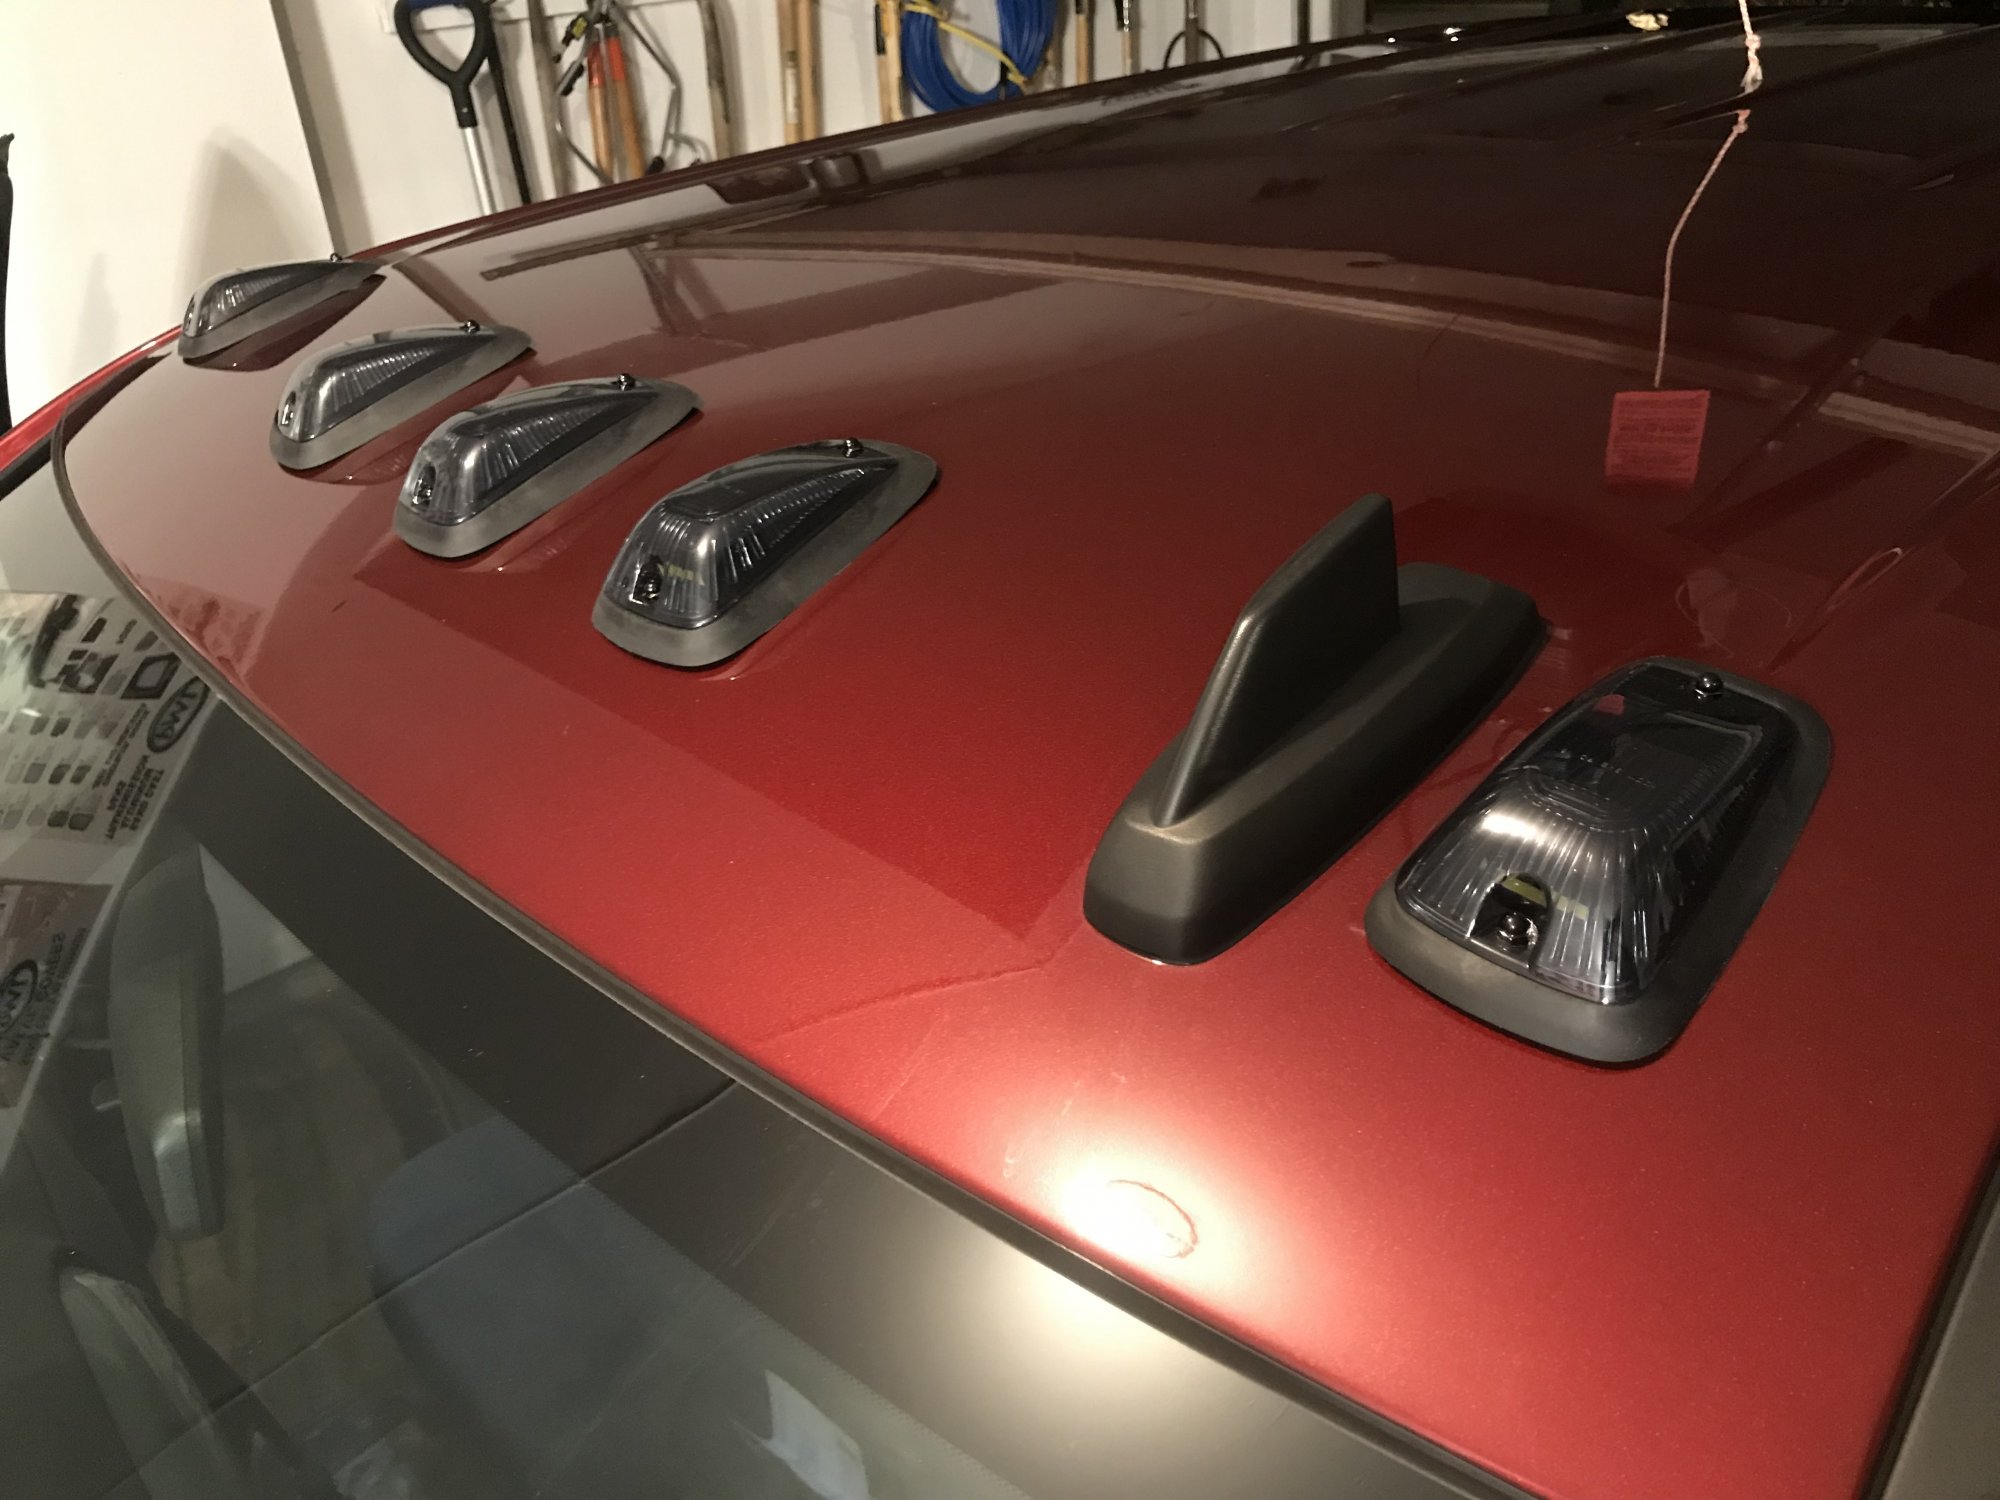
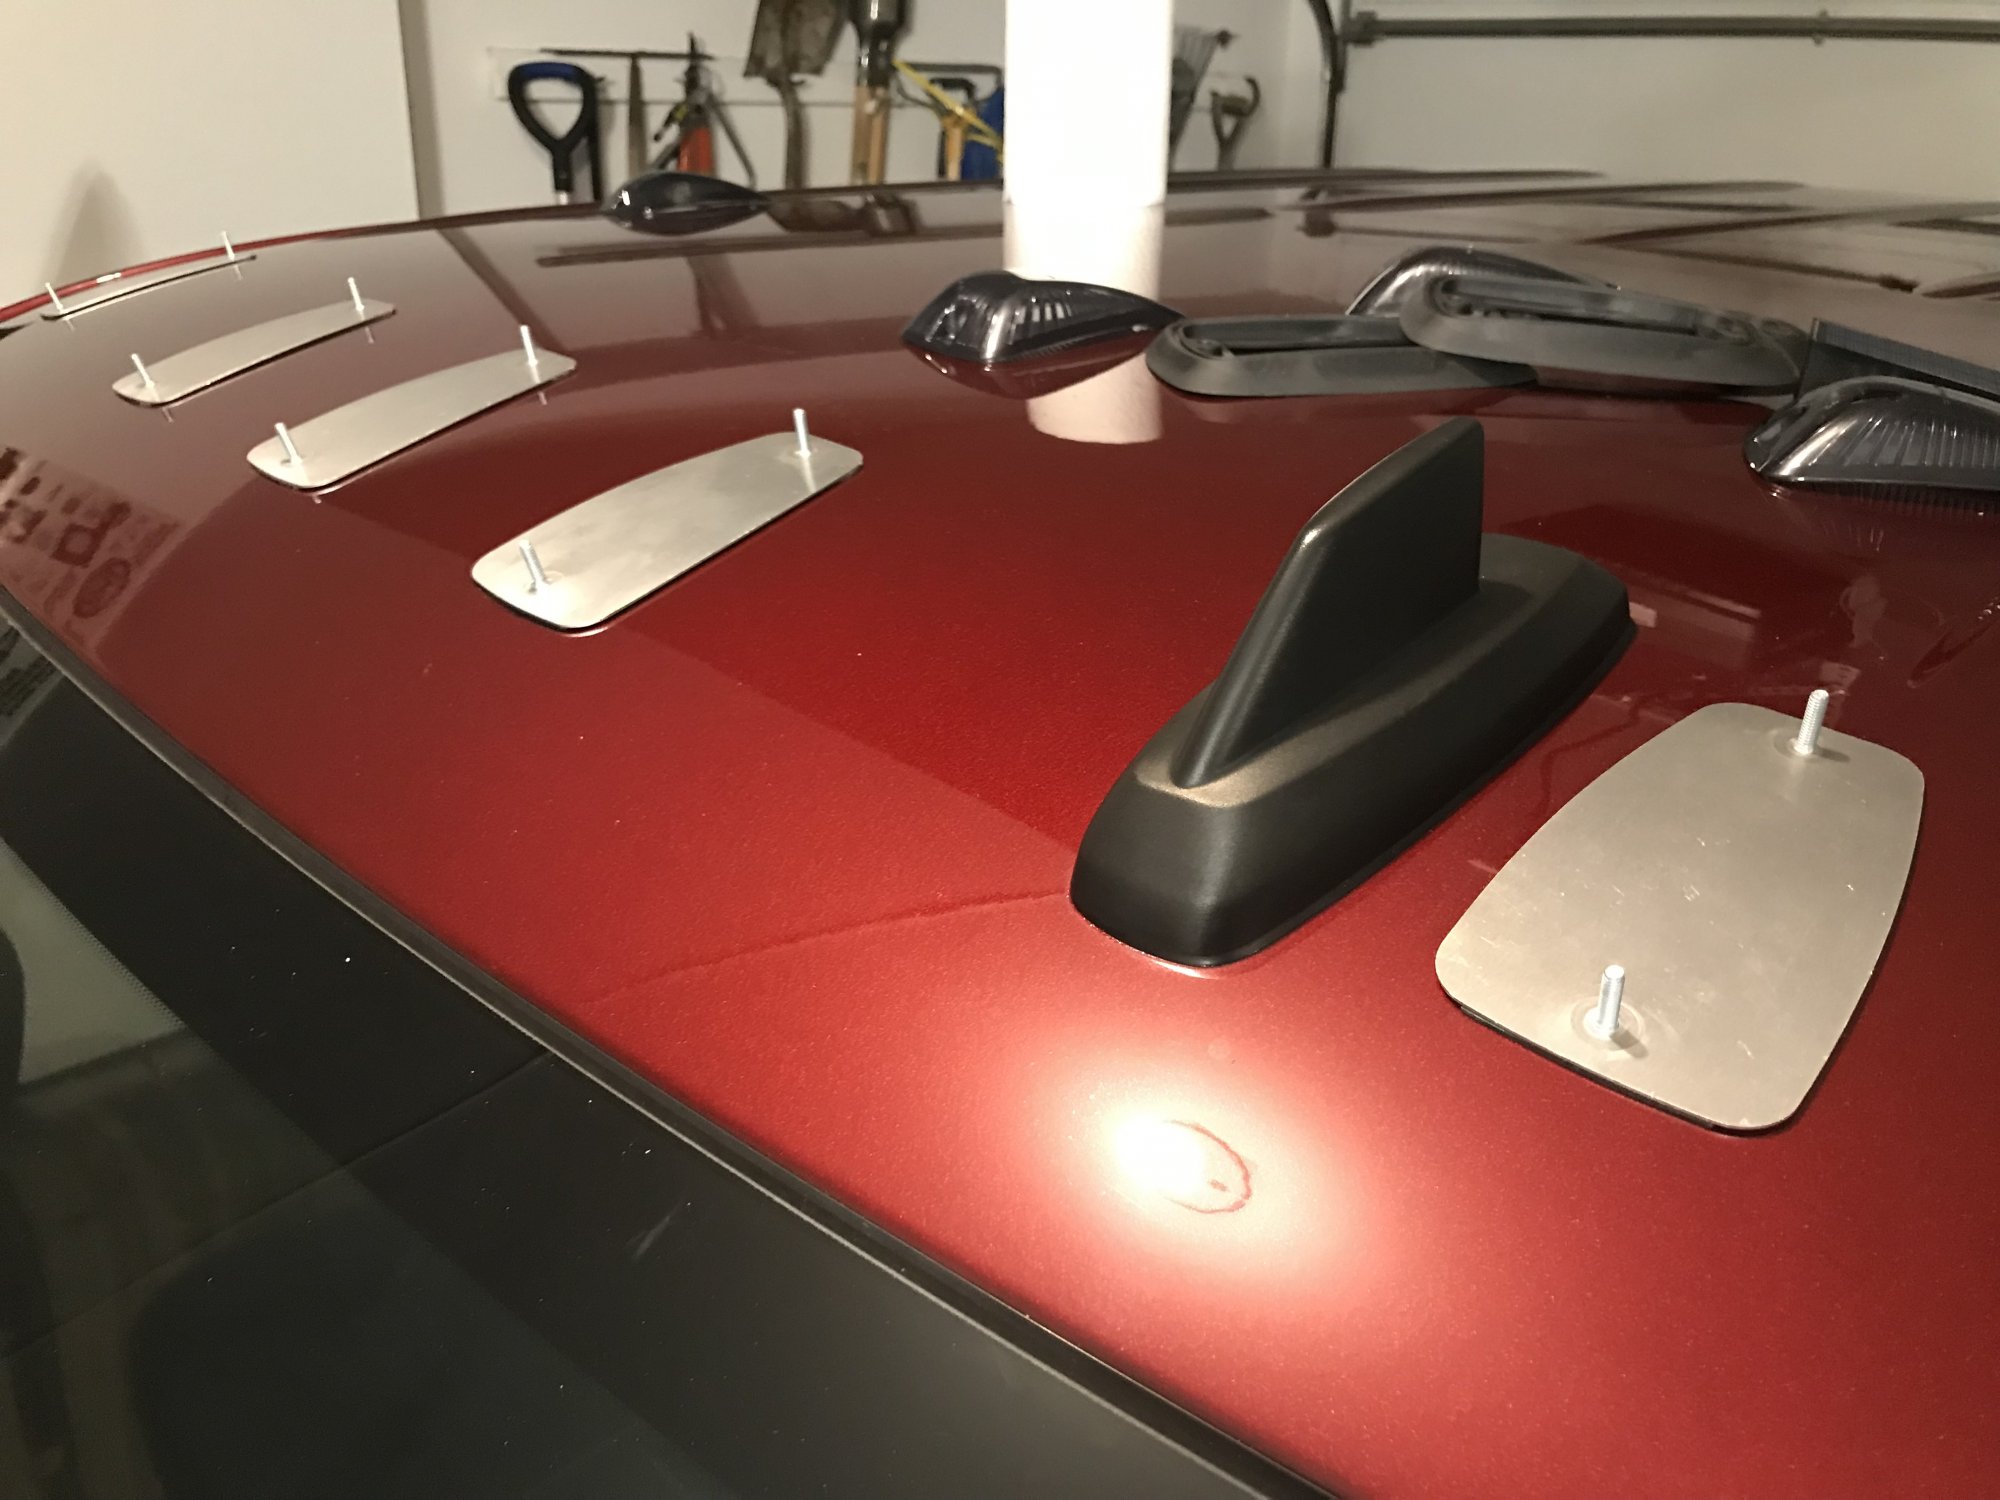
Quick how to and review of the Cab Over America wireless cab lights. Link to parts: https://caboveramerica.com/ The parts: For just under $400 you get a set of 5 battery powered wireless cab lights. Each light consists of 4 parts; the aluminum mounting plate, rubber gasket, LED/PV panel module, and the top lens. The top lenses can be had in clear, amber or smoke. In our case, we went with smoke. You also get two remotes to control the lights. Overall the quality is high and what I would expect from something in this price range. You also get some small lenses that can be place inside the cab lights to change the lights to amber while still using a clear or smoke outer lens. Lastly you are given a Cab Over America tape measure. We laid the tape out but ended up using a tape measure for all measurements. The install: First step was to decide on how you will be playing out the lights. We went with the two edge lights and 3 concentrated in the middle. Others may go with the even spacing all the way across, completely up to you. Here's a test fit. Also shows you the clearance with the shark fin. Remove the two nuts, lens, LED, and gasket so you are just left with the aluminum bracket with screw posts. It was easier to measure and mount the brackets without all the extra parts. We also bent the brackets a bit to fit the counter of the roof in the location they'd be installed. Here they are laid out in position. Wipe down the front 10" of your cab with Isopropyl alcohol. This is to prep the surface for better adhesion. Starting with the cab light nearest to the shark fin, measure 4.5" up from the windshield and 4.5" from the rain gutter to the front stud. This will locate the front mounting post. The rear post of the drivers side cab light should also be 4.5" from the gutter. Using a marker to make temp markings so when you remove the tape backing you can guide the bracket into position. Remove the tape backing, heat up the double stick tape, and install using your guidelines. Repeat for the passenger side light. Find the center of the windshield, measure 4.5" straight back, this will locate the front stud of the center light. Make sure the mounting bracket is straight and mark guide lined with a marker, remove tape backing, heat up the tape, then install. For the side center lights, we offset the lights 7.5" from the center light centerline. Measuring 7.5" from the center light's stud to the side light studs we were able to locate the side lights. Both the front and back studs of the side cab lights are 7.5" from the respective studs on the center light bracket. After all the metal brackets were installed the rubber gaskets were reinstalled, LED modules installed, and the lenses were screwed down. Last step was to sit back and enjoy the lights. They look great with the switchback mirrors! Here is a video of the install if you don't like reading! Thanks! WF41
1 point
-
Repost from the general troubleshooting board, they recommended I come over here... 2014 LT Z71 with 4.3. When the cylinder deactivation kicks in and the truck switches into V4 mode, it has a very noticeable vibration or shake. Not unlike driving on a washboard road. This is not a wheel balance / driveline issue, it's definitely when the cylinders are deactivated and it's pretty much like a light switch. Anytime, any speed, the truck is in V4 it's shaking. Engine is totally smooth in V6 mode with all cylinders firing. The shaking occurs the entire time the truck is running in V4 mode, NOT as it transitions in and out of it (as most of the other guys seem to have indicated). The entire time the truck is in V4 mode, it feels like it's driving on a washboard road at all speeds and under all driving conditions. V6 is perfect. DIsclaimer: I "inherited" the truck from my dad, who swears it never had any vibration, but I felt it driving the truck home from his house for the first time. My dad also doesn't know how to put gas in his own car, and is the sort of person who goes into a dealership and says, "I would like one car, please." Thanks, Darel1 point
-
Try different cable, try different phone, if all fails try reprogram the HMI.1 point
-
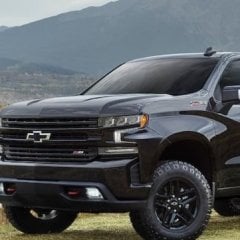
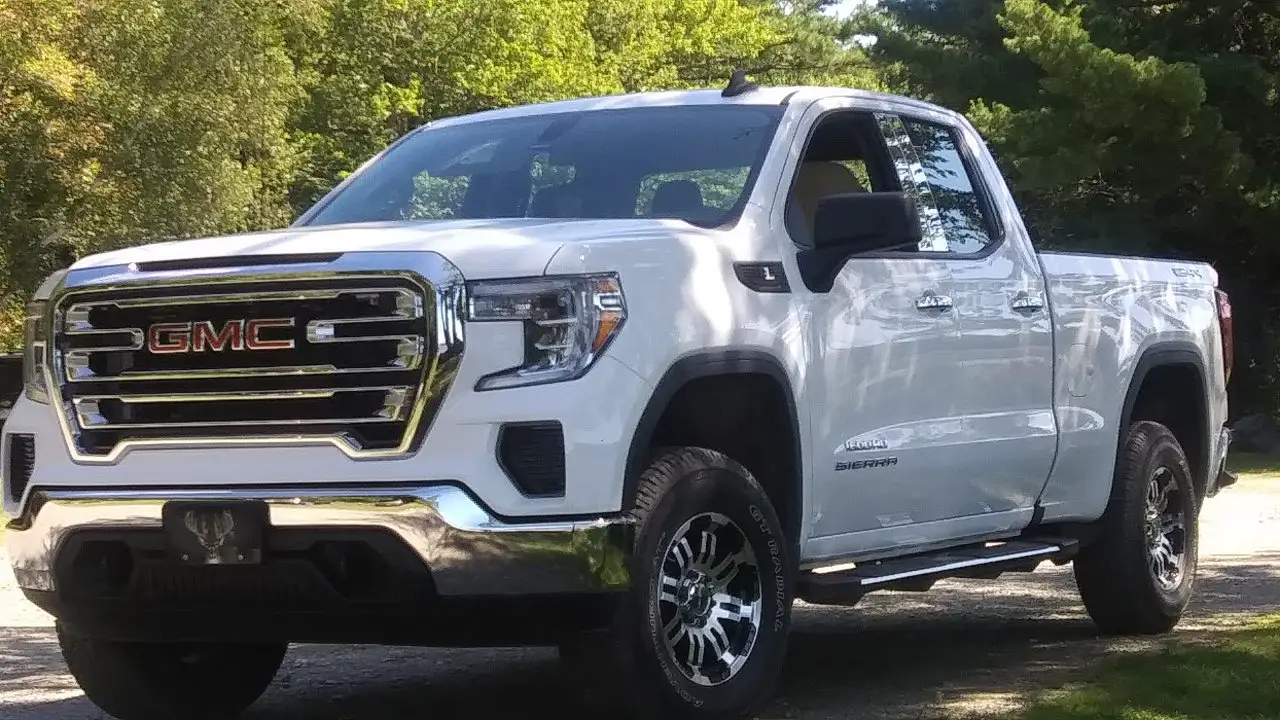
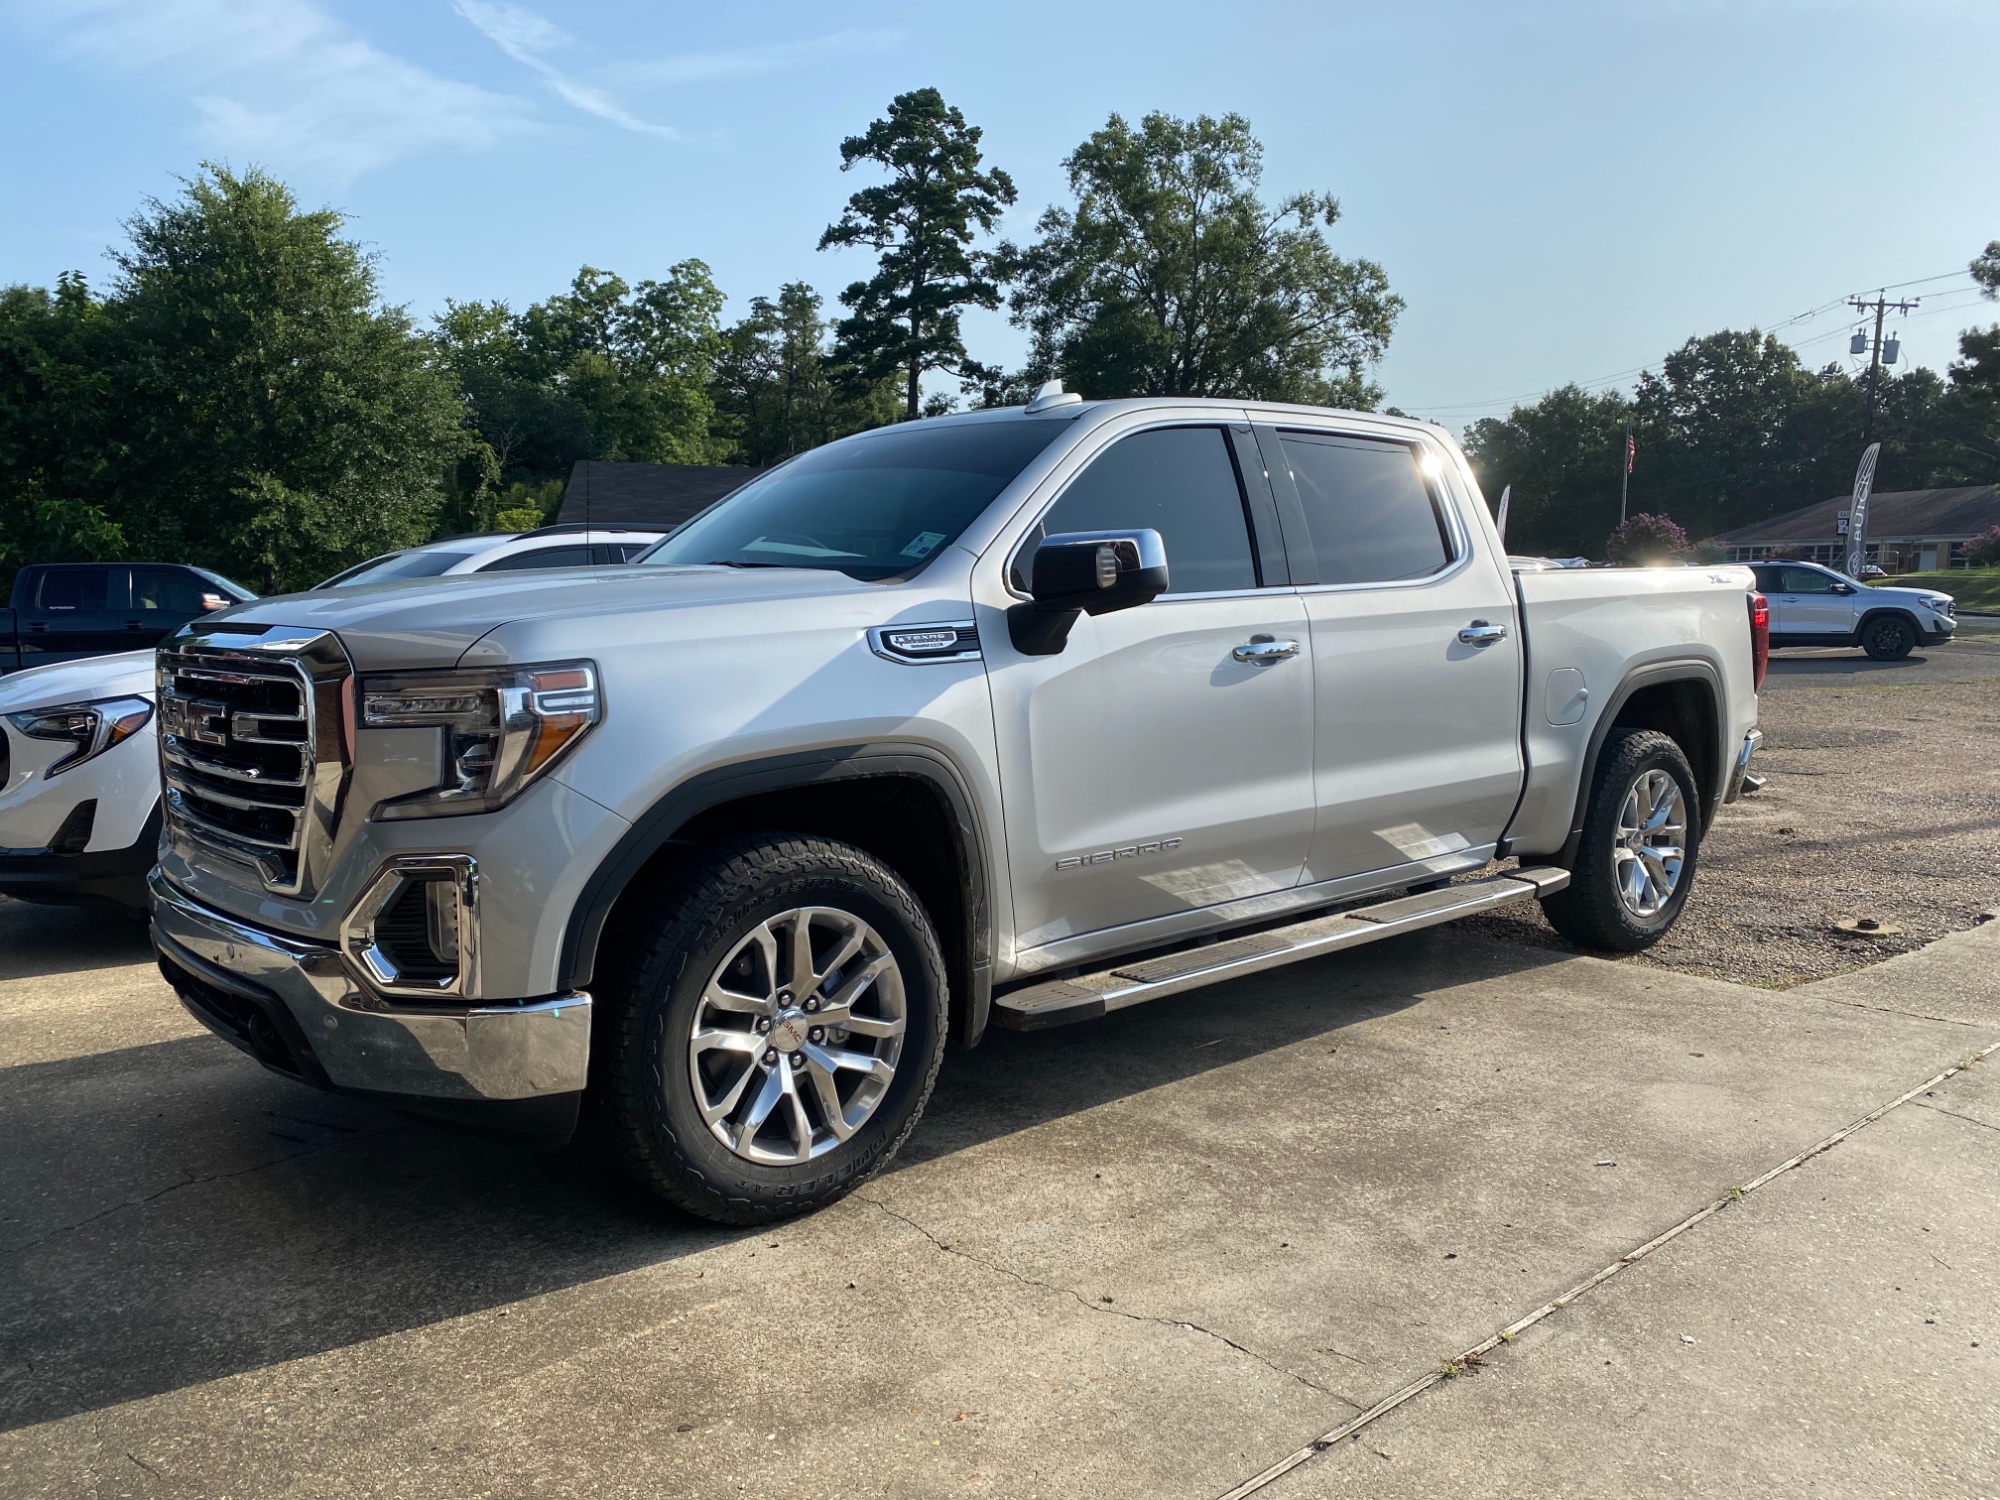
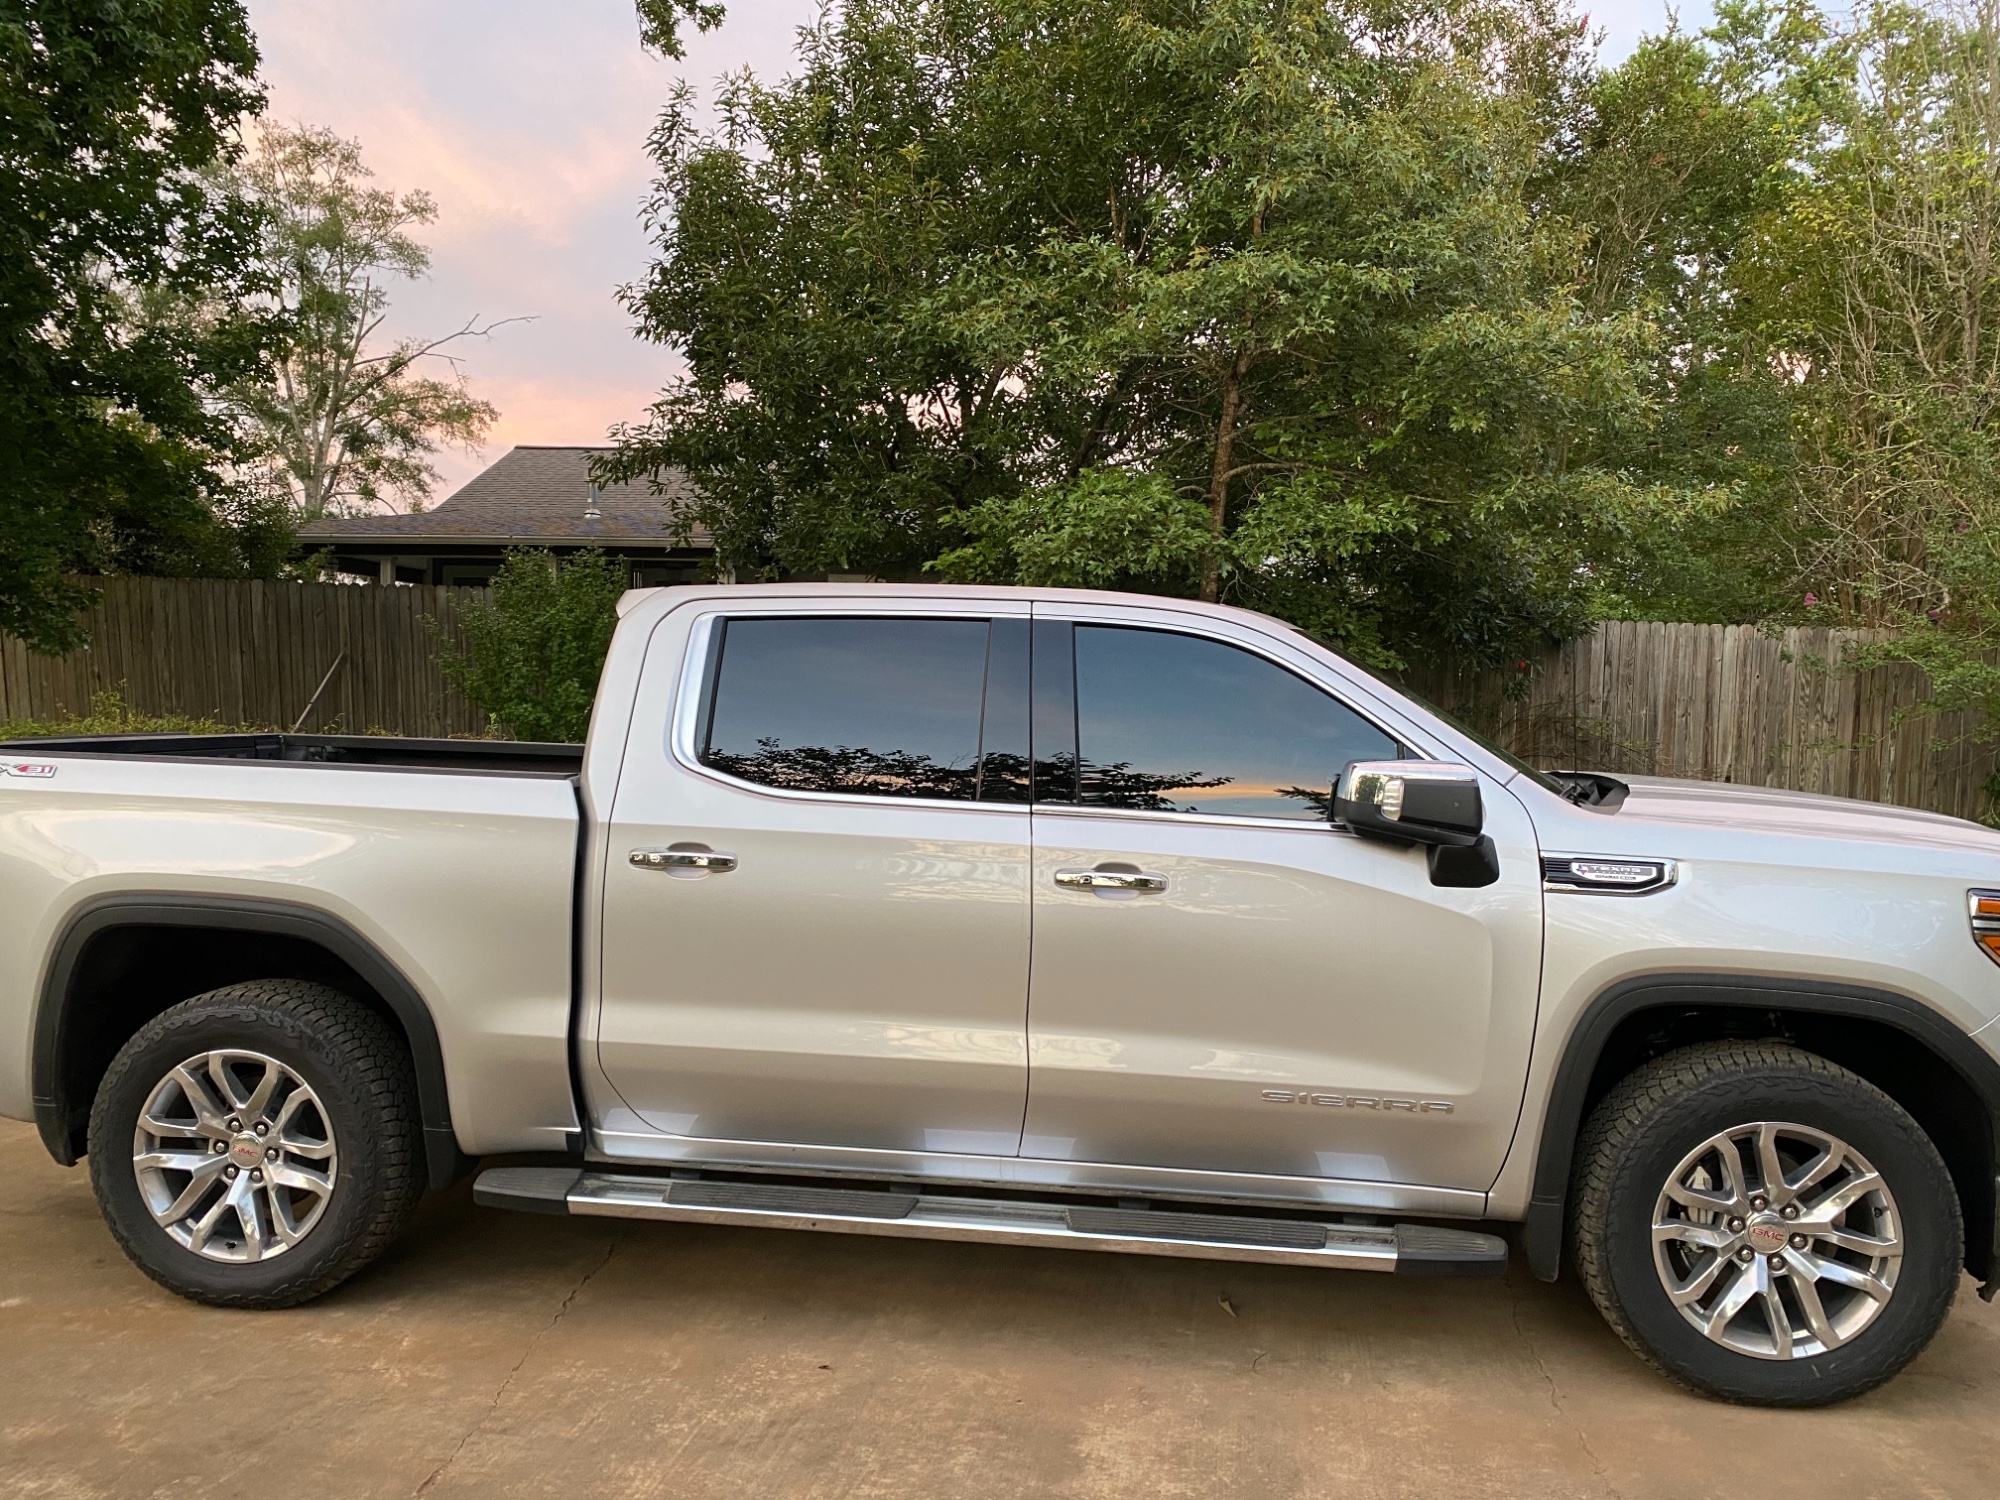
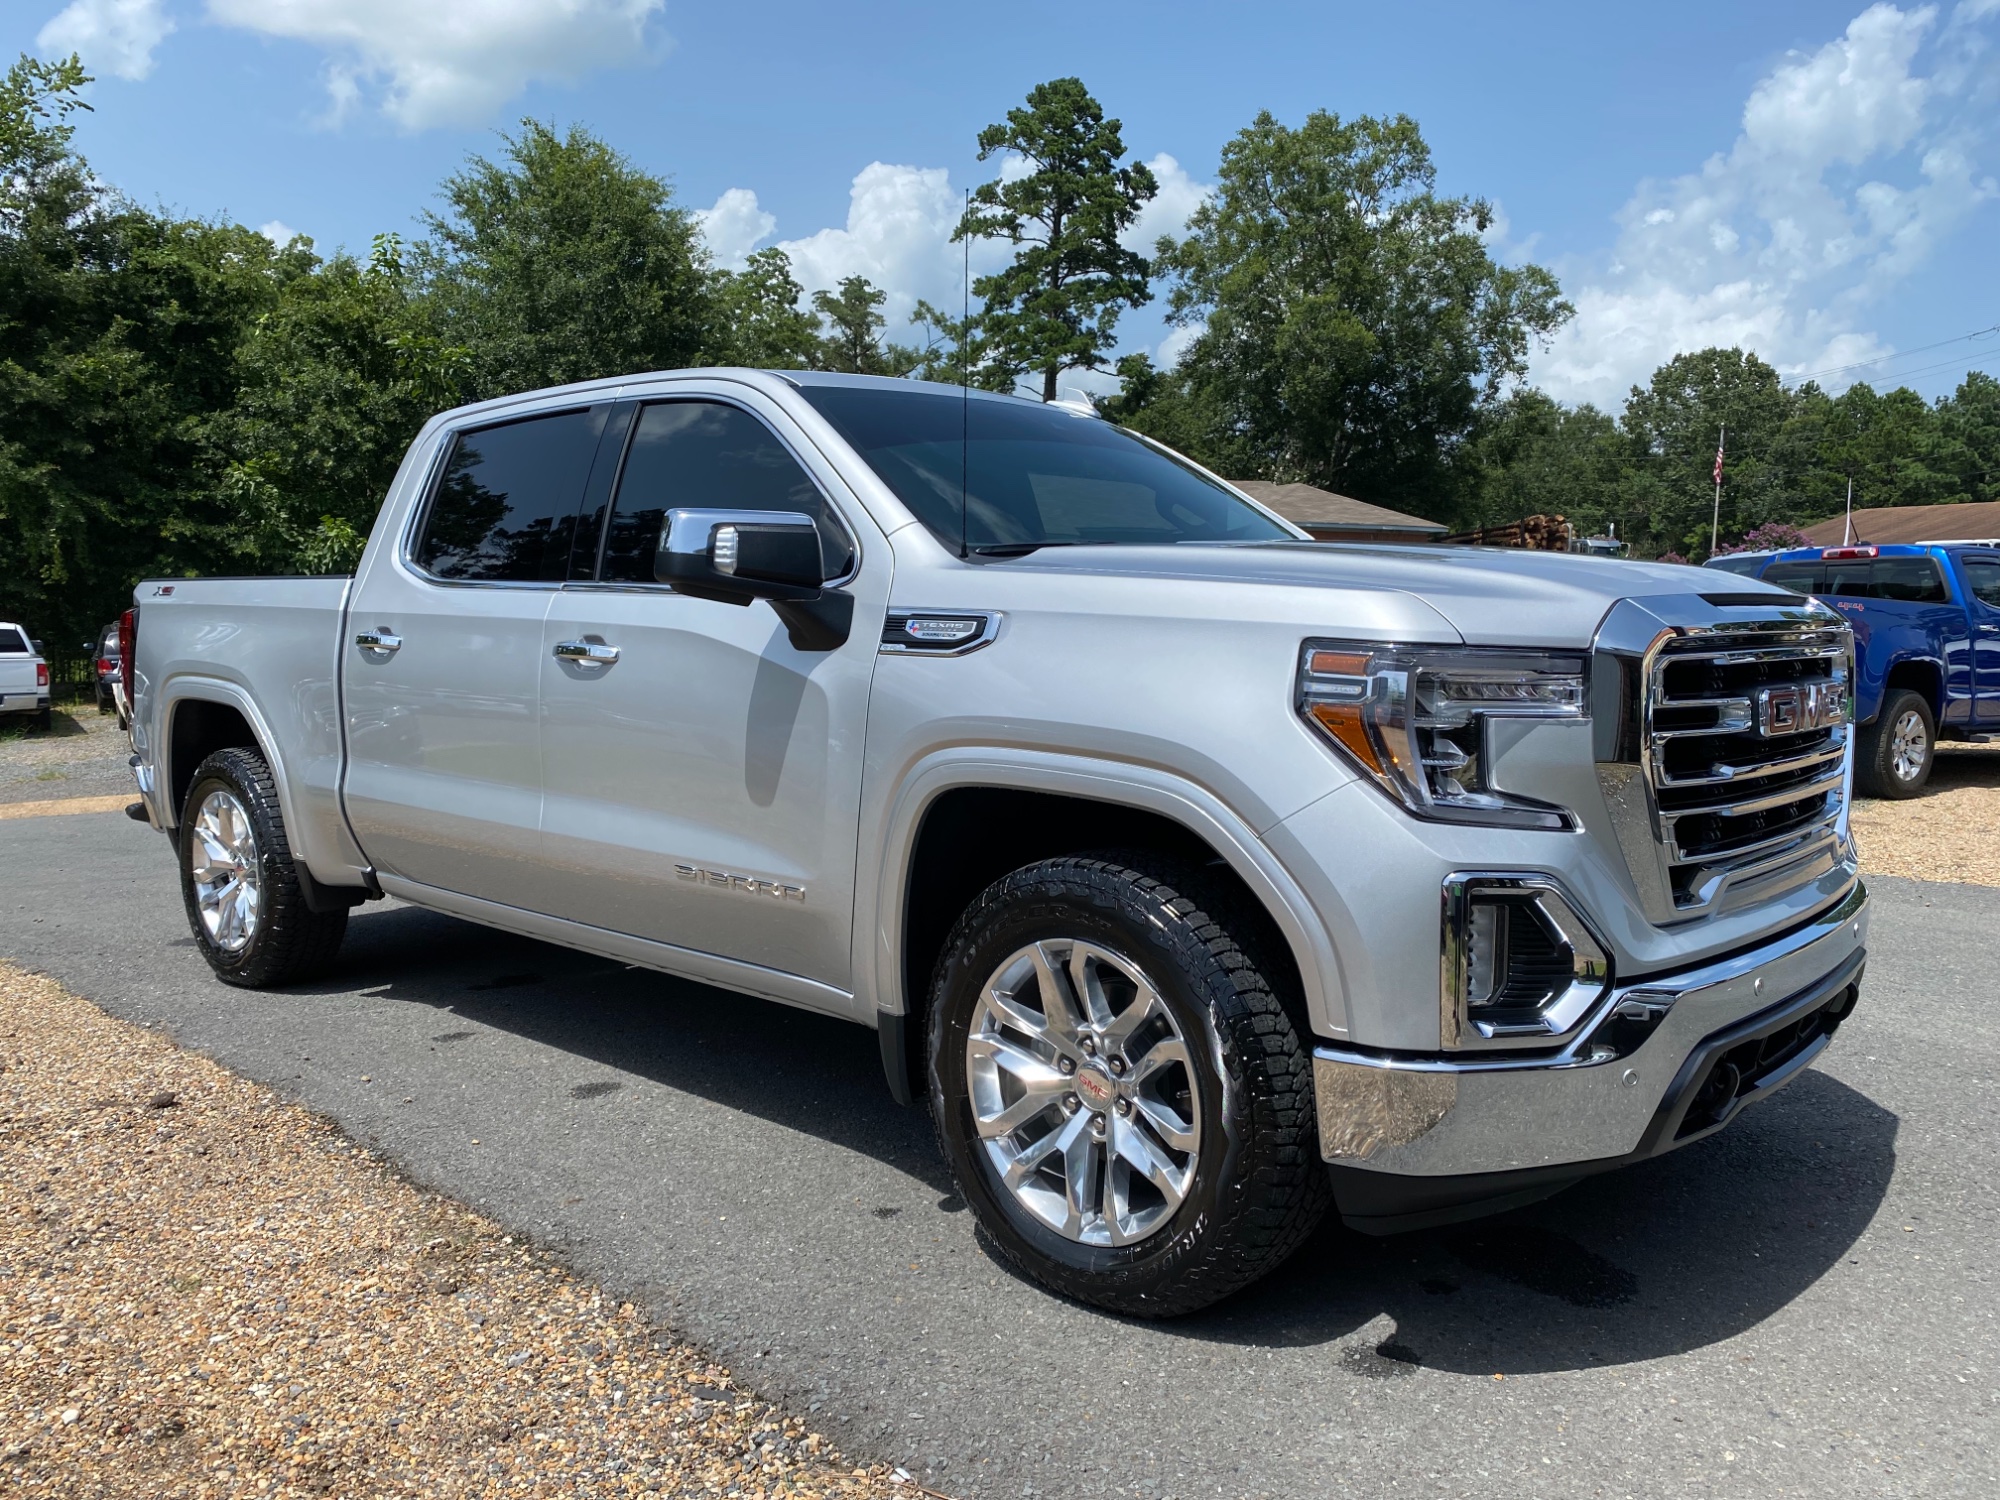
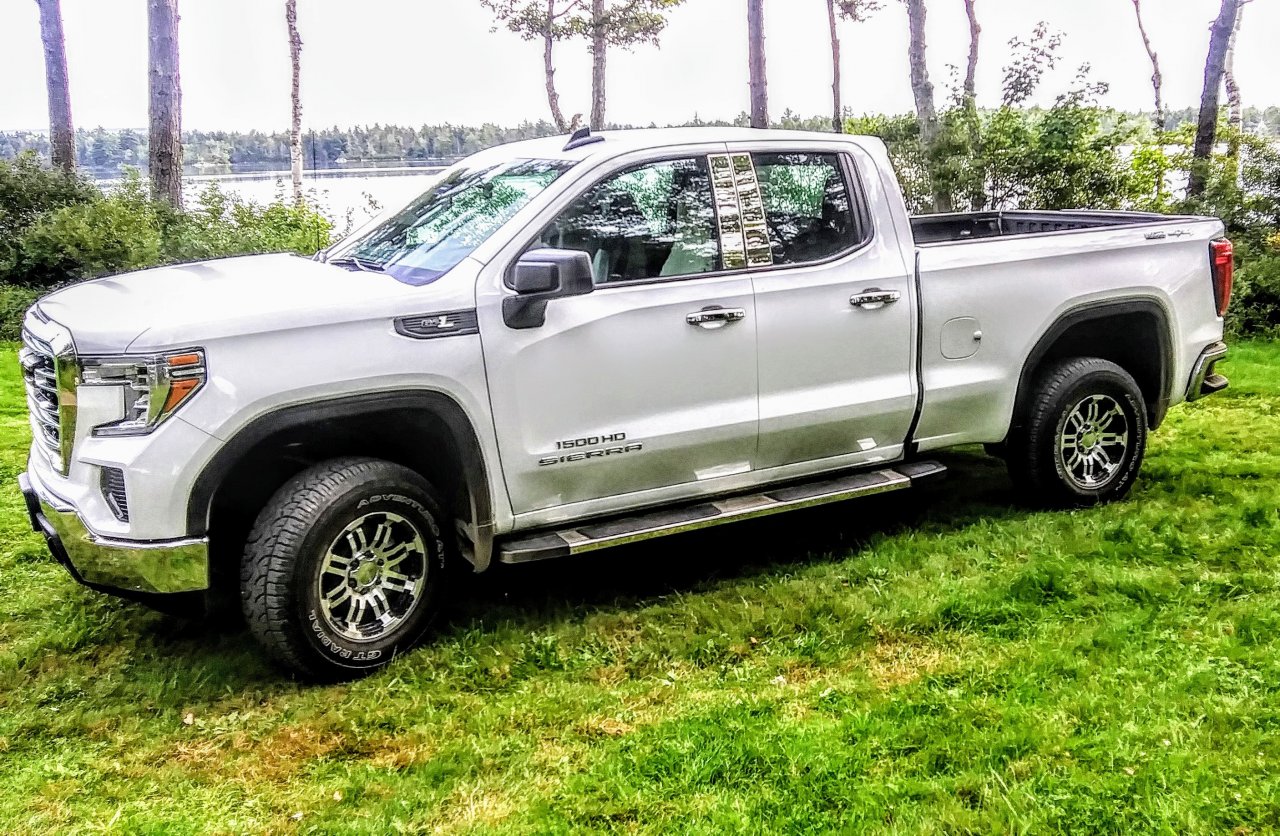
Finally made the choice on a truck! Went with this ‘21 Sierra Premium Plus with the 3.0L Duramax! Deciding factor was the features of the premium plus over the preferred package AT4 that we have coming in! Few things done to it in the first couple of days have been full tint, removed the running boards, and added color matched fender trim! Next up is a leveling kit, and trying to decide if I want to upgrade to a 22” GM wheel with 33” Toyo or Nitto AT tires. Let me know what y’all think so far! Thanks!
1 point
-
I'm not aware of the app letting you learn only one tire, so my guess is that's you'd just have to relearn the three older tires and learn the new tire. Just follow the normal relearn sequence. No need to delete and re-add your trailer.1 point
-
Yep... had this whole mess in there the other day. Lovely smell too! Had the same issue with my Toyota Sienna where the critter had also dragged a plastic bag in there reducing my AC airflow to practically zero!
1 point
-
Huh? So much unbacked up assumptions. So if a small percentage of trucks have AFM issues they all do regardless of the years and it sounds like you say they all fail before 130k or it is an anomality if they don't? Then you go on to say it won't change your gas mileage unless it is running in 4 cylinder mode which is exactly when it saves fuel and raises your gas mileage...Shesh, so basically it works as advertised and as independent testing has showed saves fuel and it has a low failure rate which is on par with anything that built by humans and machines made up of thousands of parts sold in mass quantities. Thanks! We got some good unbiased info there! We understand some people get burned by a failure or don't like something new such as AFM, a turbo four cylinder or auto start stop; but then they have to come in every thread and talk about how bad they think it is in their eyes which doesn't help and is completely unrealistic from reality. Tyler1 point
-
Yeah the '07 is around 200k and no issues at all (other than the rear fenders falling off). The '14 only has 40k and shakes like a leaf. Supposedly the earlier GMT900s were fine (like mine) but then they changed something that kinda ruined the system. I had a boss with a '13 that burned 2 quarts every 500 miles until he programmed it out.1 point
-
The current 5.3 paired with the 10 speed is a pretty strong combo. Nothing like the GMT900 you have now. I would at least give it a test drive. The 6.2 is a thirsty bastard, no way around it. I’m lucky to get 18 highway and 12-13 around town. The power is awesome but if you value economy, forget it.1 point
-
Looks like you need rpo PDJ Driver Alert Pkg II and rpo CWM Technology Package which includes (UVS) HD Surround Vision, (DRZ) Rear Camera Mirror, (UVN) Bed View Camera and (UV6) Multicolor 15" Diagonal Head-Up Display. Available on SLT, AT4 and Denali. Cannot be added, its part of a bigger puzzle which your truck does not appear to have.1 point
-
Delete all the trailer profiles, and set up a new one for your trailer. Should be ok then. The system remembers parameters from trailers connected, and likely thinks your trailer has incandescent lights. When you connect any other trailers, either set up another profile or choose guest.1 point
-
Tge GM doesn't need a "camper pkg" its payload and GVWR are already higher than either Ford or Ram for like equipped trucks.1 point
-
I wouldn’t “get use to it”, but I’d be very clear with the dealer that you don’t want the window removed without your knowledge. It may be something with the sliding window part that doesn’t require touching the main outer frame. I agree though, I would be very apprehensive about having the window replaced. If that’s needed, I’d probably wait until the window doesn’t operate or until you get a leak.1 point
-
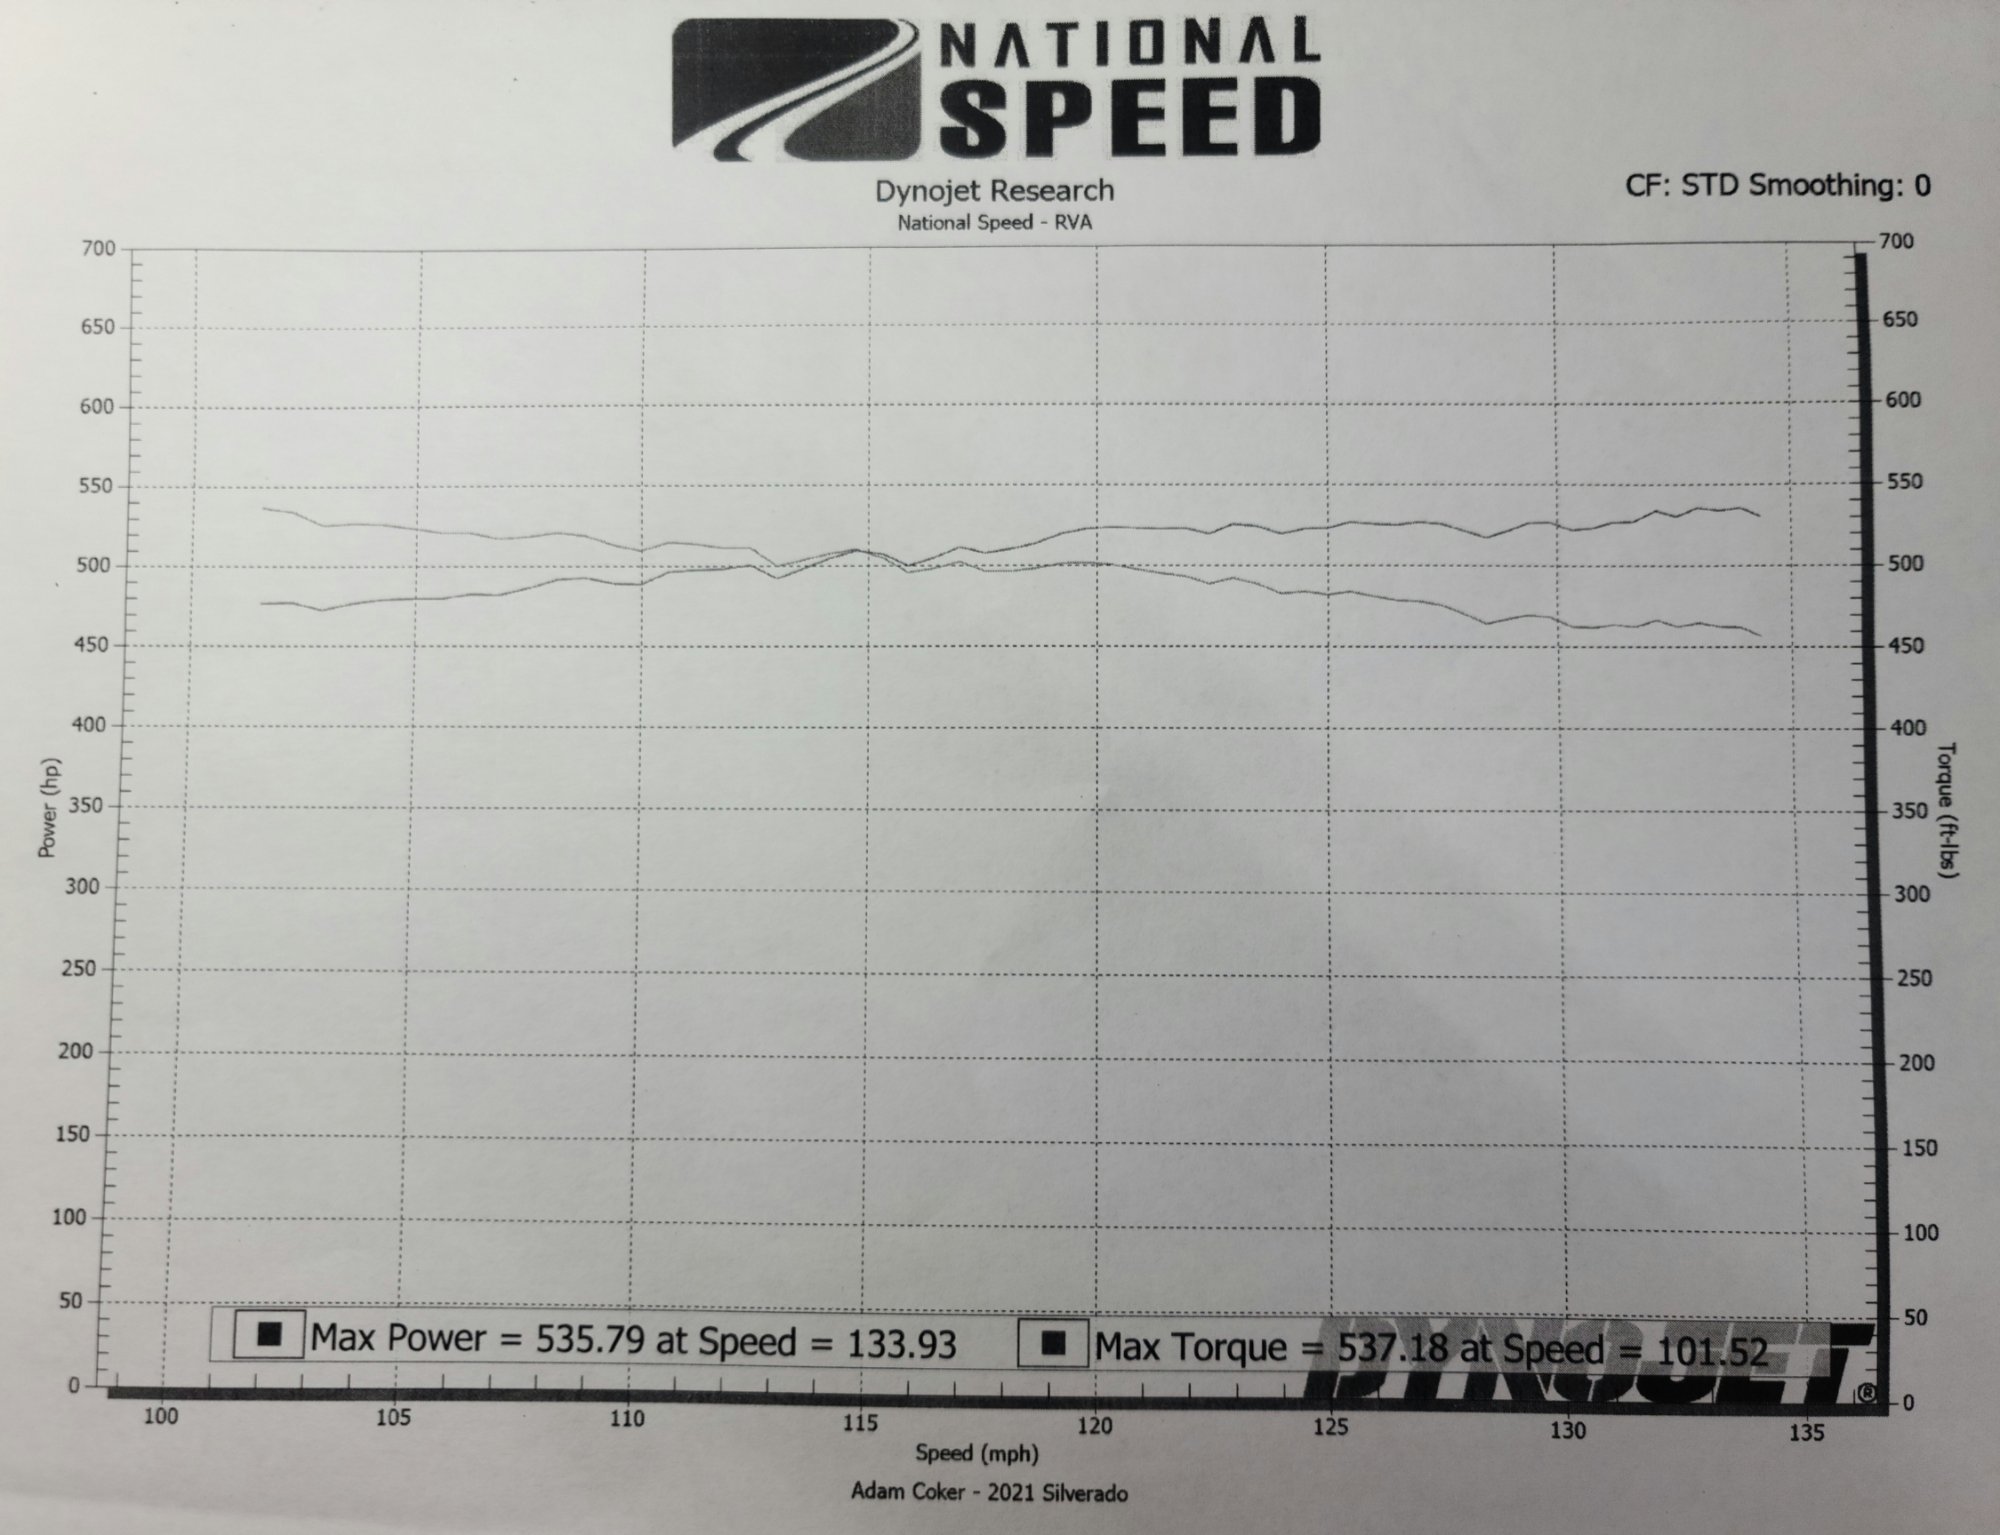
Here's my dyno print out... 535whp and 537lbft.
1 point
-
Idk this or that. Like x3?lol1 point
-
I also have the pro truck kit with the upgraded coil springs. I got kryptonite UCAs and I love the setup. My brother liked it so much he got the same suspension but went with motofab UCAs. Both very pleased with Eibach. I would imagine the coilovers are going to be great.1 point
-
Finally did @jaeisber bed/cargo light switch mod. Very nice to be able to turn the cargo lights on without getting my dirty hands in the truck at night.1 point
-
I'll do that, thank you!1 point
-
Any chance you have the dyno chart? Love me some dyno charts.... Awesome on going 12's though!1 point
-
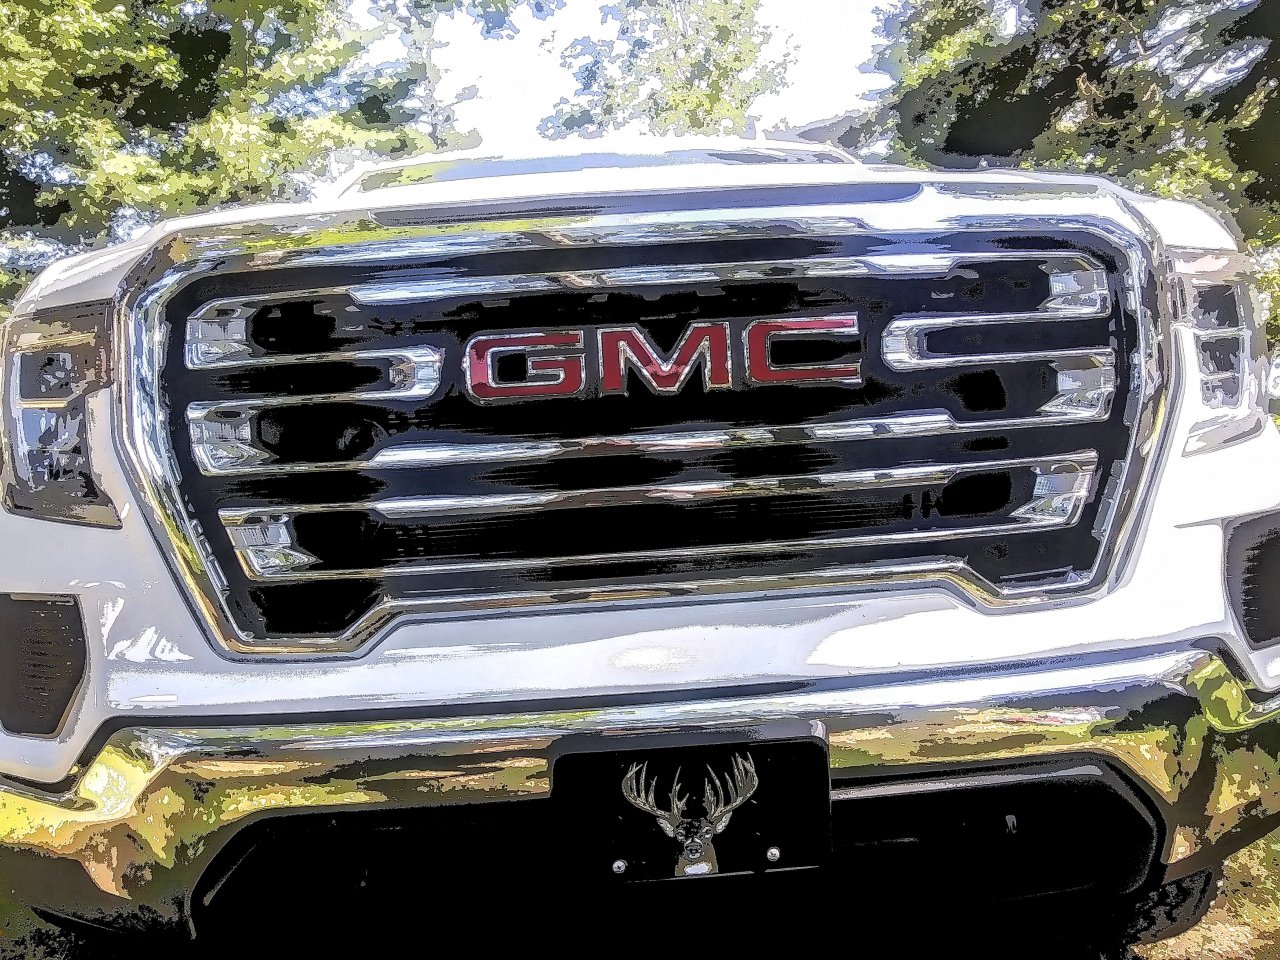
Gm Reps 22" Nitto NT420V 285/45/22
1 point
-
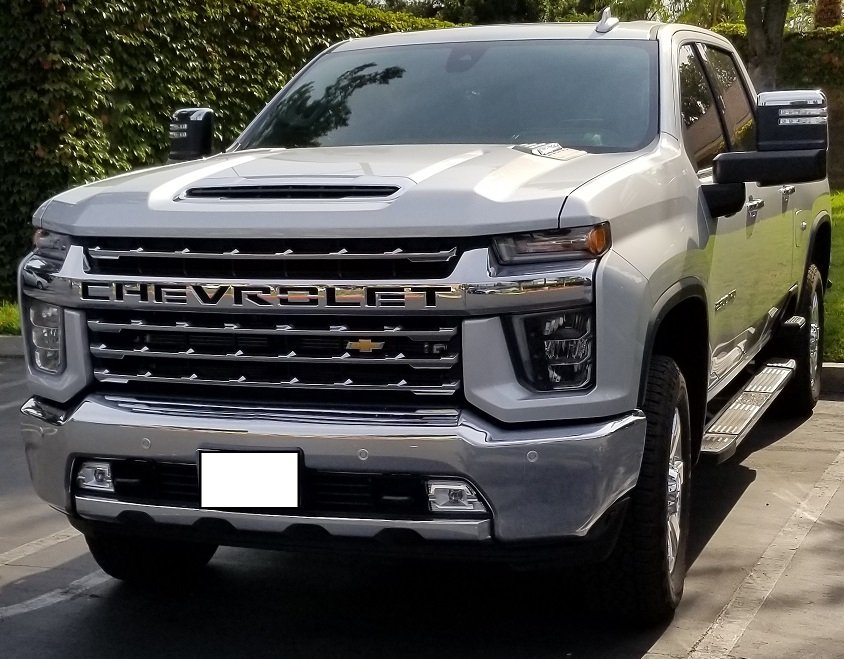
Picked this up at the beginning of the month. Dealer has no idea how it was built, as it has features that they haven't been able to order for months.
1 point
-
Still check in every now and then but just not posting that much anymore. Had a work provided vehicle for a couple years and wasn't driving the Sierra all that much. Changed jobs recently and I'm back to driving the Sierra daily. It's still running well but probably getting close to needing new brakes (on the original pads and rotors still). Has developed a noticeable pulse so I assume the rotors are warped. Other than needing a good cleaning, it's sill a solid vehicle.1 point
-
I got the same setup, really like the dash cam. I'm surprise at how well it shows on the back window with a 5% tint..1 point
-
What?? (My best surprised face)1 point
-
144,002 miles. (5 minutes ago) AFM operation is...well...perfect! 6K more and it completes a 'legal' lifetime of service. Will it make it? As least I will be able to exhale.1 point
-
Guys like Grumpy make these forums great. it's guys like you that are over sensitive and need to thicken up your skin..1 point
-
My 2017 Silverado had some problems. Downshift was hard. Driving on straight roads at highway speeds, when I let off the gas to slow down I'd get the rumble strip effect. When I accelerated back to speed, upshift felt like the rear end was going to drop out. Towing my 20' enclosed trailer was no fun. At 9,000 miles I'd had enough. Took it to the dealer. Service had it overnight. Next day got a call from service. Seems while the tech was road testing, the trans overheated and went to limp mode. Took them two days for GM to ok repair on a truck still under warranty. The fix, drain fluid, flush, remove metal from pan, replace torque converter, replace filter, replace some valves. Road test good. It took a week to get a torque converter since no one had one in stock. Supposedly GM to one off the assembly line. I should say when I took the truck in I stopped to talk to my salesman who is also a very good friend. He immediately knew what the deal was and told me it was a known problem. Got the truck back. It ran fine for about two months then the same problems started over. Dealer service said they could do nothing more w/o GM ok. In October 2019, I traded it in. I told the salesman exactly what happened ans showed him my copy of the repair. They still paid off the remaining loan and kicked in another $5,000 on the new Sierra.1 point
-
There has been a 3/4 ton aka 2500 Suburban for retail purchase from I'll say 1973 all the way to 2012 or 2013 (could go further back but not sure). The fleet/govt. version was available 2016-2019 for government/fleet use. The 2016-2019 versions can most likely be had via government surplus auctions or old fleet vehicle auctions second hand.1 point
-
Replaced the cargo and reverse lights with 720lm LEDs. Man are they ever bright lol. Also had the vacuum pump replaced under warranty. Stops much better than when I got her in March for sure. Soon there will be a tranny fluid change and a new hard tri fold tonneau cover.1 point
-
I used hypertec. Somewhere buried here is my write up on it.1 point
-
Why not? Doesn't hurt anything. Easy, cheap.1 point
-
Added a little color contrast to the door panels. The picture does not show the true color which is orange. I had some piping leftover from doing my 1500 SLT. I may order some red and replace the orange.
1 point
-
What brand did you try? I have a Truxedo Lopro and don't experience any of the issues you talk about when opening and closing mine by myself. I installed it myself in maybe 1 hour. I would never want any other folding cover that blocks more of my bed when open.1 point
-
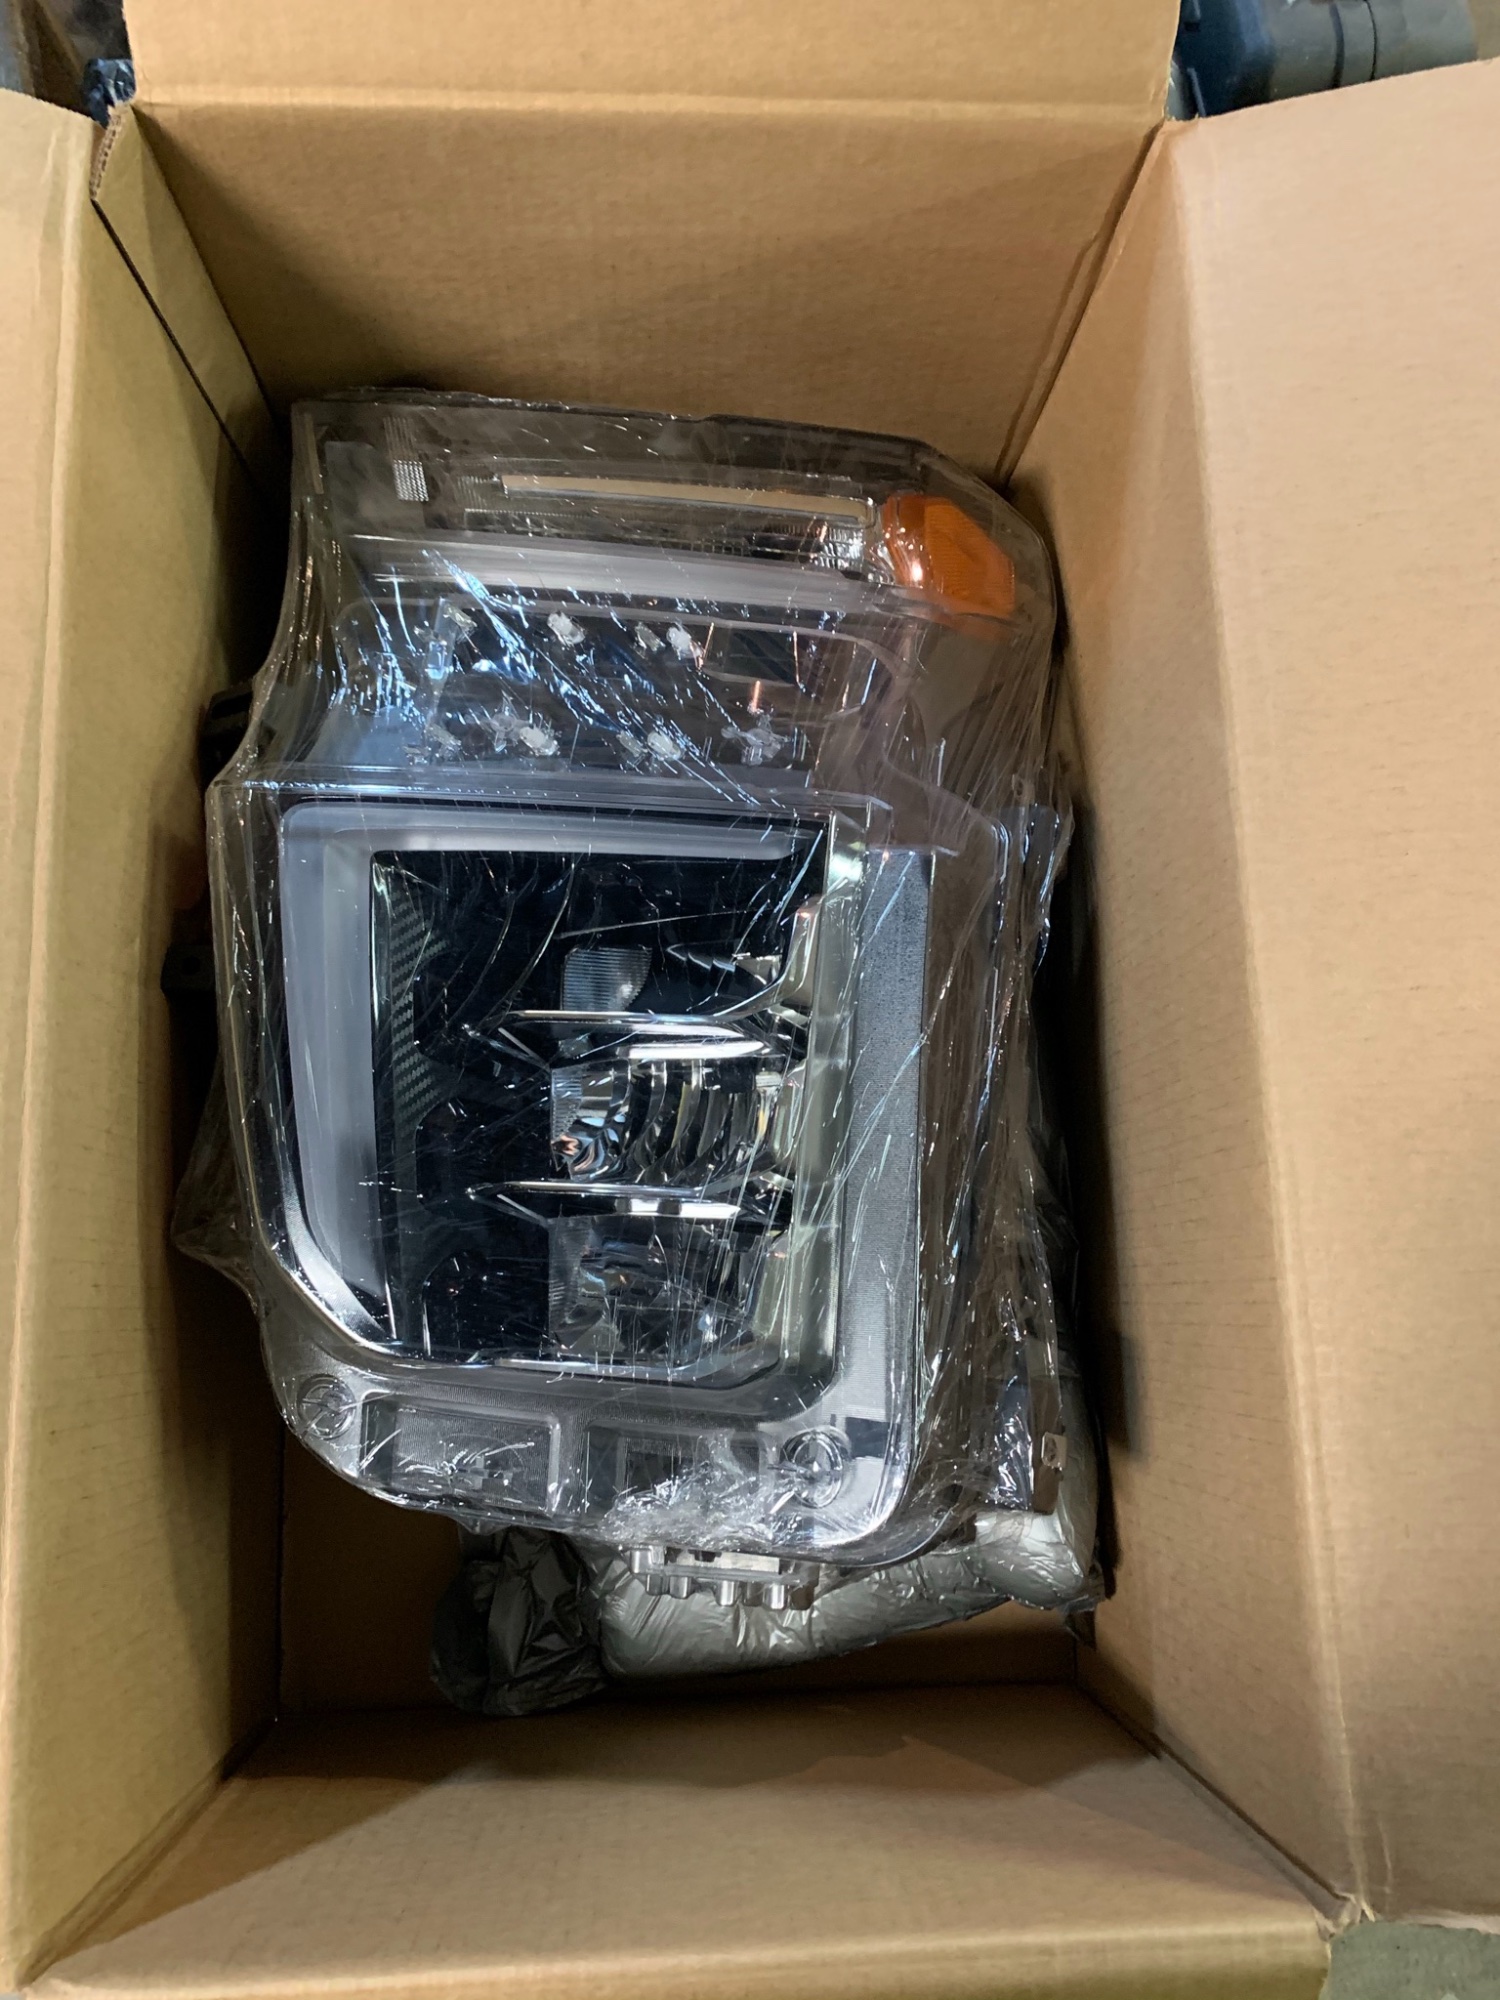
Replaced the halogen headlights with headlights from a high country using the Gen5diy wiring kit. The headlights were sourced from eBay
1 point
-
I have a 2021 6.2L TrailBoss with the 3.0L Whipple. GM performance upgrade package which was the air intake and cat-back exhaust. I had the work done by National Speed Inc. They dyno tuned it to 535whp. I too have the trans issues with the truck. Nothing major but a little stumble once in awhile. Until we can get the 10 speed unlocked I believe it is what it is. I really have no complaints. The truck runs the ¼ mile just as fast as my 2015 C7 Corvette Stingray and that's on the stock 265/60R20 tires. A full size (5,300+ lbs) truck running the ¼ mile in the 12s is an awesome experience. The truck just rolled over 2,000 miles.1 point
-
I guess I'm in the minority but I like Chrome and stock wheels
1 point
-
My 2020 Silverado has similar weight limits. You're going to receive several responses to your query, but for my two cents worth I will say that is too much trailer for your truck. The reasons are several. First, and foremost, the dry tongue weight listed on most/many travel trailers is light in that it does not include filled propane tanks nor the weight of the battery, or batteries if it comes with more than one. The tongue weight of the trailer is included in your truck's payload capacity. Plus the weight of all passengers, luggage, accessories, anything that didn't come with your truck off the assembly line (pets). Half ton trucks often will run out of payload before they get to the sticker limits you quoted above. Some weight can be placed in the trailer to help offset that to some extent. You didn't state how long that trailer is, but I will guess it's around 26 feet long, or thereabouts, and that it a big sail behind your truck subject to crosswinds and buffeting from large trucks, etc. Some on this forum will suggest that the "sweet spot" for a half ton truck is somewhere between 5k and 6.5k for a fully loaded trailer, and I will agree with that position, but I'm the cautious type, maybe to a fault. You would certainly need a WDH with that trailer. And if you plan on taking a trailer over mountainous terrain/passes, that's another factor to consider. Bottomline, I honestly feel that trailer is more appropriate for a three quarter ton truck, but yes, you could pull it, but I wouldn't. Having said all that, you see trucks pulling loads they shouldn't all of the time.1 point
-
Ya'll worry too much. A little annoying. I'd deny my warranty if i was GM. I boosted intake pressure by 8lbs. Unlocked an ecm that was specifically hard to crack, and retuned parameters specifically meant to not be changed. Gm doesnt owe you a thing. Modify it. Or leave it stock. But don't act like its gm's fault if you break something. Thats ignorance. That said, hope they find a way to tune the t93. I know a lot of camaro guys wanting it more than me.1 point
-
Old thread but this looks like a good option.to keep out rodents and debris:1 point
-
 Here it is with the 3" lift in front only. Fitted with new rims and bigger AT 33" tires! This makes it Almost 40" from the top of wheel wells down to the ground.?1 point
 -


This leaderboard is set to New York/GMT-04:00