Heated steering wheel
-
Recently Browsing 0 members
- No registered users viewing this page.
-
Forum Statistics
250.5k
Total Topics2.7m
Total Posts -
Member Statistics
342,873
Total Members8,960
Most Online
-
Who's Online 7 Members, 0 Anonymous, 638 Guests (See full list)
-
Latest Articles
-
Posts
-
 This one is pretty easy. Its basically if you have traction control/ Stabilitrac (RPO JL4) or not. If you do, there'll be a TC button on the dash and an amber indicator in the instrument cluster. Additionally, there will be if there are two separate brake lines at the rear axle coming from the frame, as opposed to one brake line that T's off at the rear axle to feed both wheels.
 -
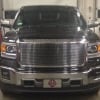
 If you’re interested in any cowl pod lights, I can recommend the Parkwood Welding mounts. Offhand, I only recall one other option from a place in Arizona that was waaayyy more expensive. I have a pic of my truck with the lights in a post, here.
 -
Yes; I have a Banks rear cover, and a PPE front with sensors. This weekend I hope to get them heated-up. I’m not planning any towing in the near future, but when I do (and anything notable is observed), I’ll make mention of it.
-
 No, because GM still doesn't sell the programming update that allows it to work for trucks that didn't come with it from the factory.
 -
 I put one in my 21 sierra. Seems to work good so far
-
-
GM-Trucks.com Clubs
-

Black Truck Club
Open Club · 612 members
-

White Truck Club
Open Club · 380 members
-

Canadian Owners Club
Open Club · 282 members
-

Red Truck Club
Open Club · 157 members
-

diesel 3.0
Open Club · 281 members
-

Texas Owner's Group
Open Club · 371 members
-

NorthSky Blue Club
Open Club · 118 members
-

Midwest Owner's Group
Open Club · 213 members
-

2015 Custom Sport Club
Open Club · 5 members
-

GM Snow Plowing Club HD
Closed Club · 14 members
-
-
Popular Contributors
-
.thumb.JPG.2c573de60d3a3a4407c7d92298db46dd.JPG)


Recommended Posts
Create an account or sign in to comment
You need to be a member in order to leave a comment
Create an account
Sign up for a new account in our community. It's easy!
Register a new accountSign in
Already have an account? Sign in here.
Sign In Now