Leaderboard


Popular Content
Showing content with the highest reputation on 05/06/2019 in all areas
-
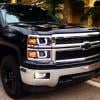
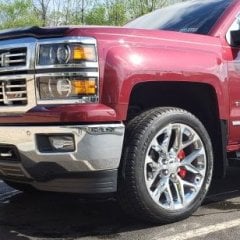
Got my gauges back from @US Dashworks They look great!
 4 points
 -
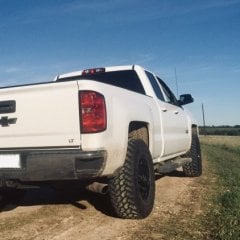
It was beautiful on the weekend, I spent some time cleaning up the rig.
3 points
-
carbon fiber style with blue numbers and blue needles. $240 plus about $12 to ship to him for the upgrade. He pays return shipping to you. Shipped it out last Monday and got it back today.2 points
-
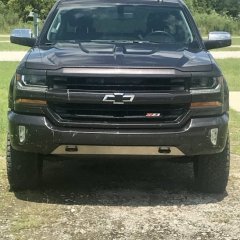
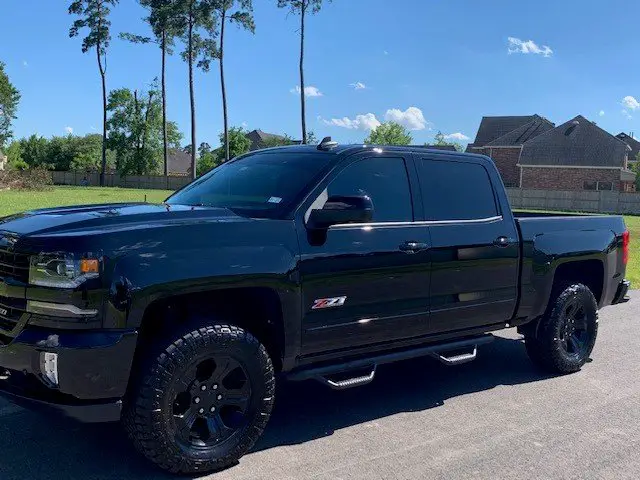
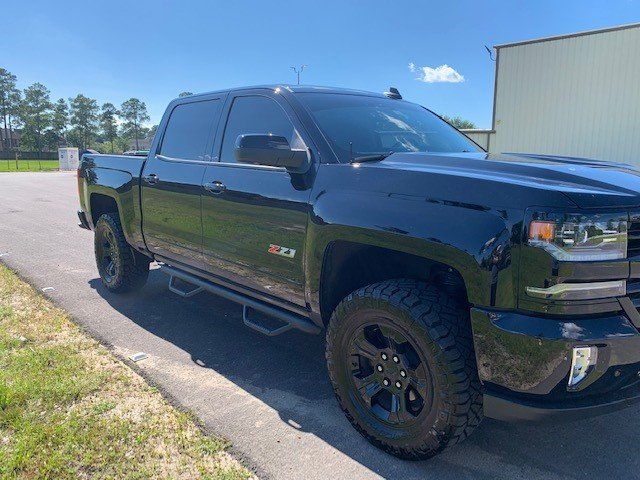
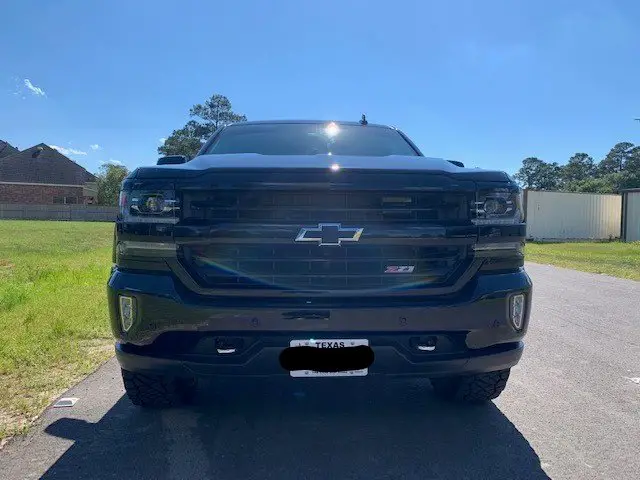
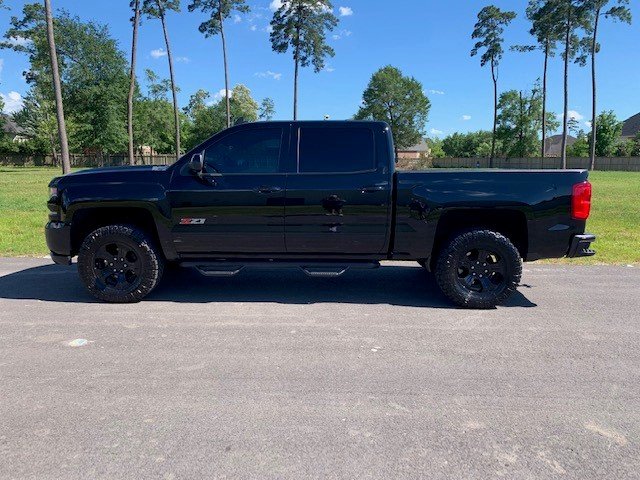
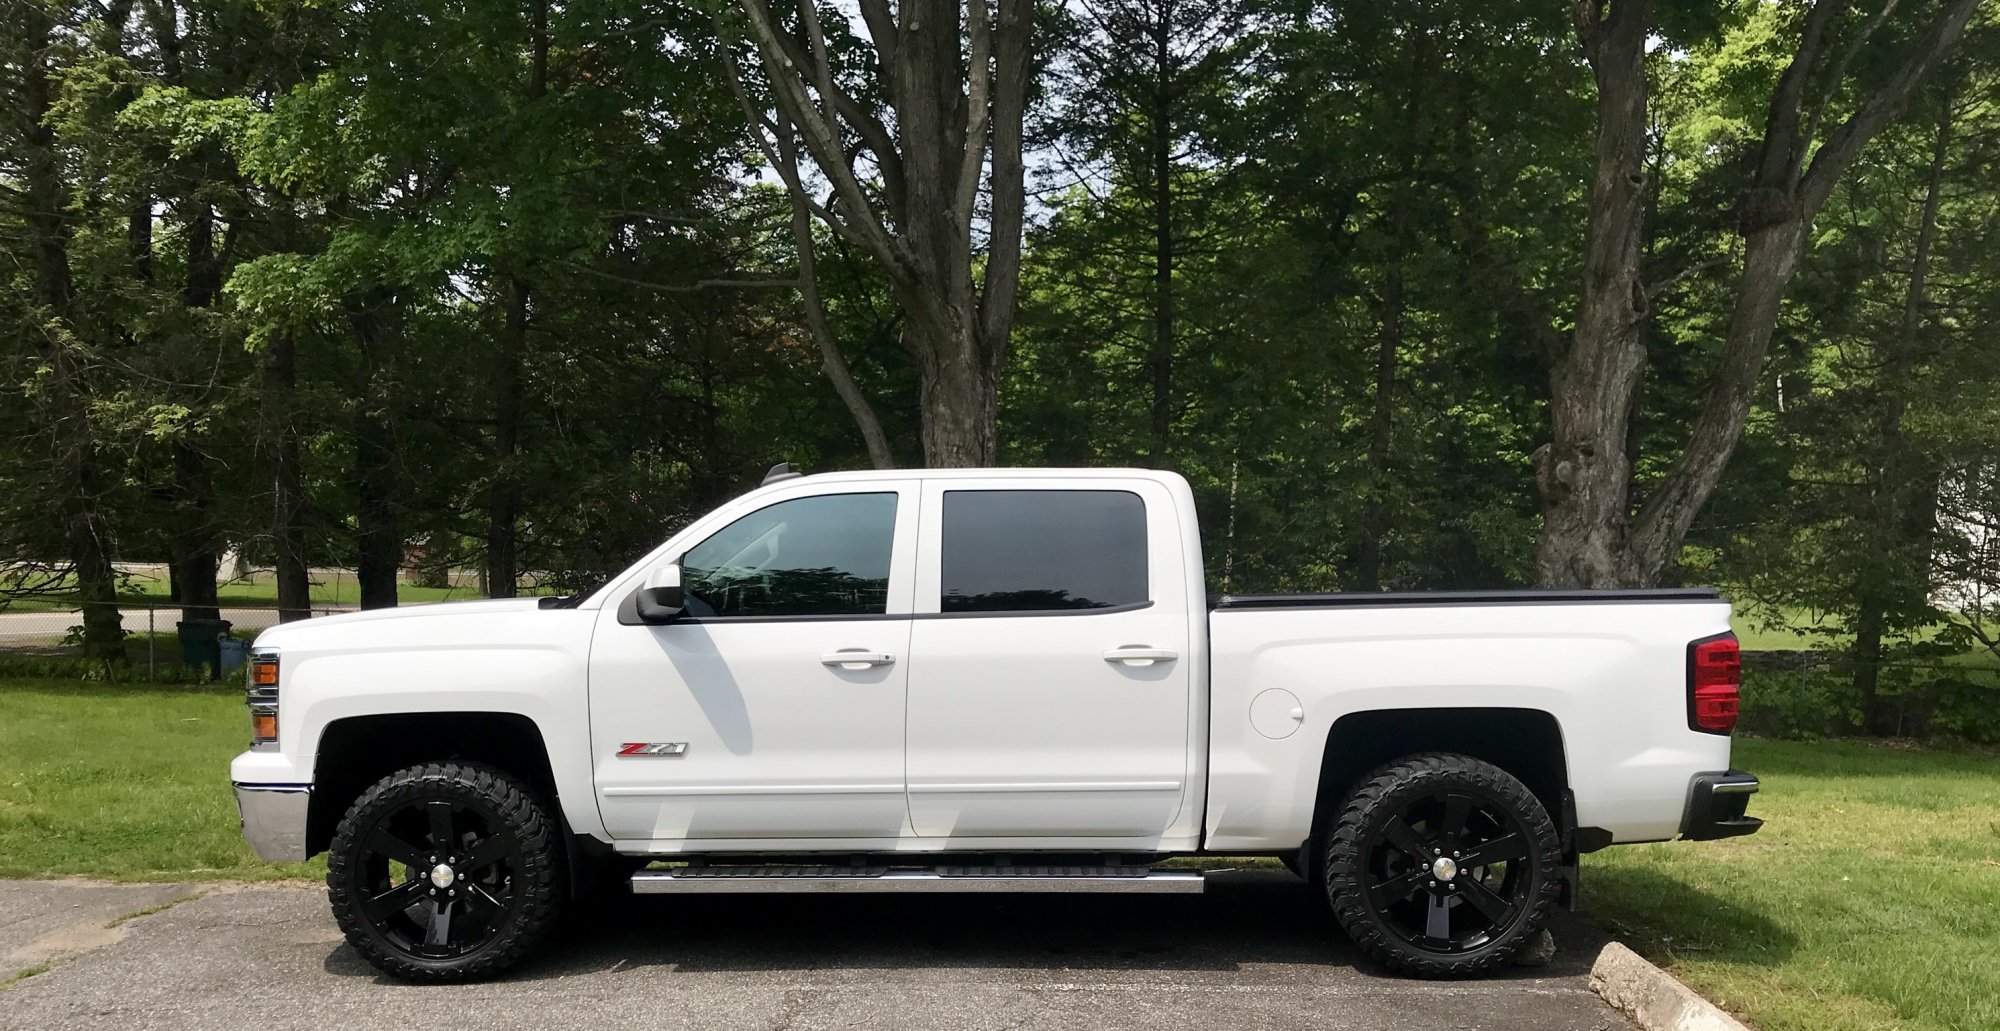
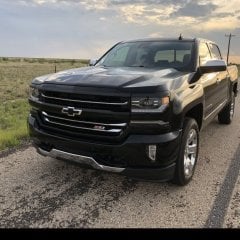
New black front end.
2 points
-
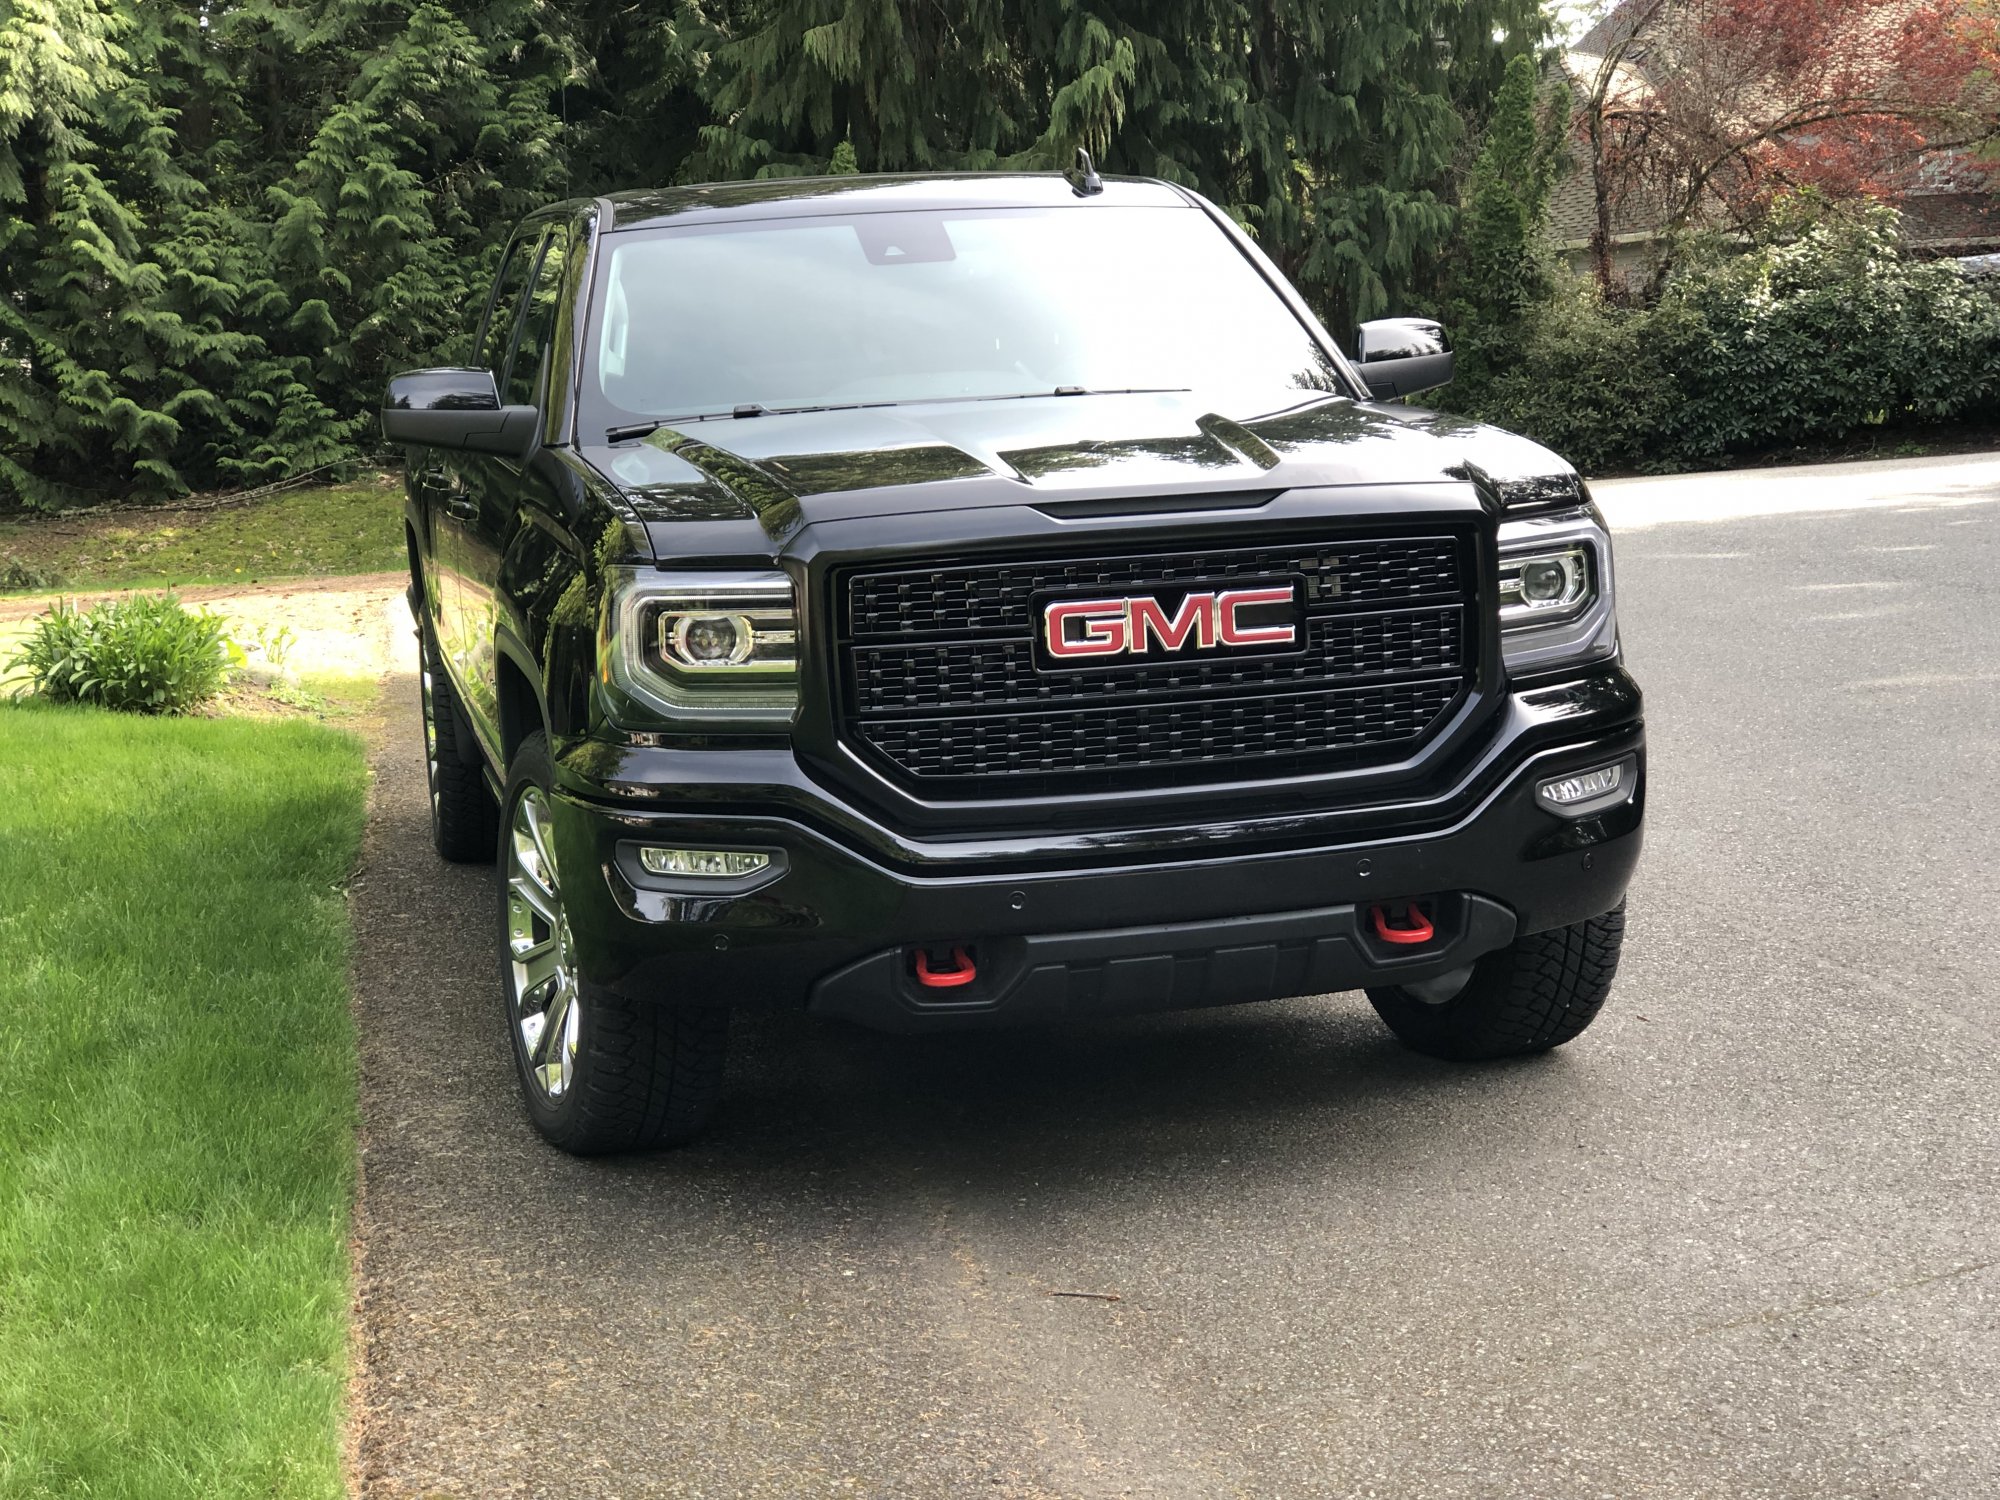
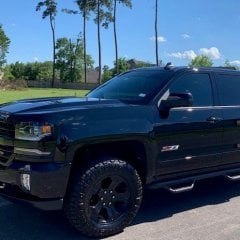
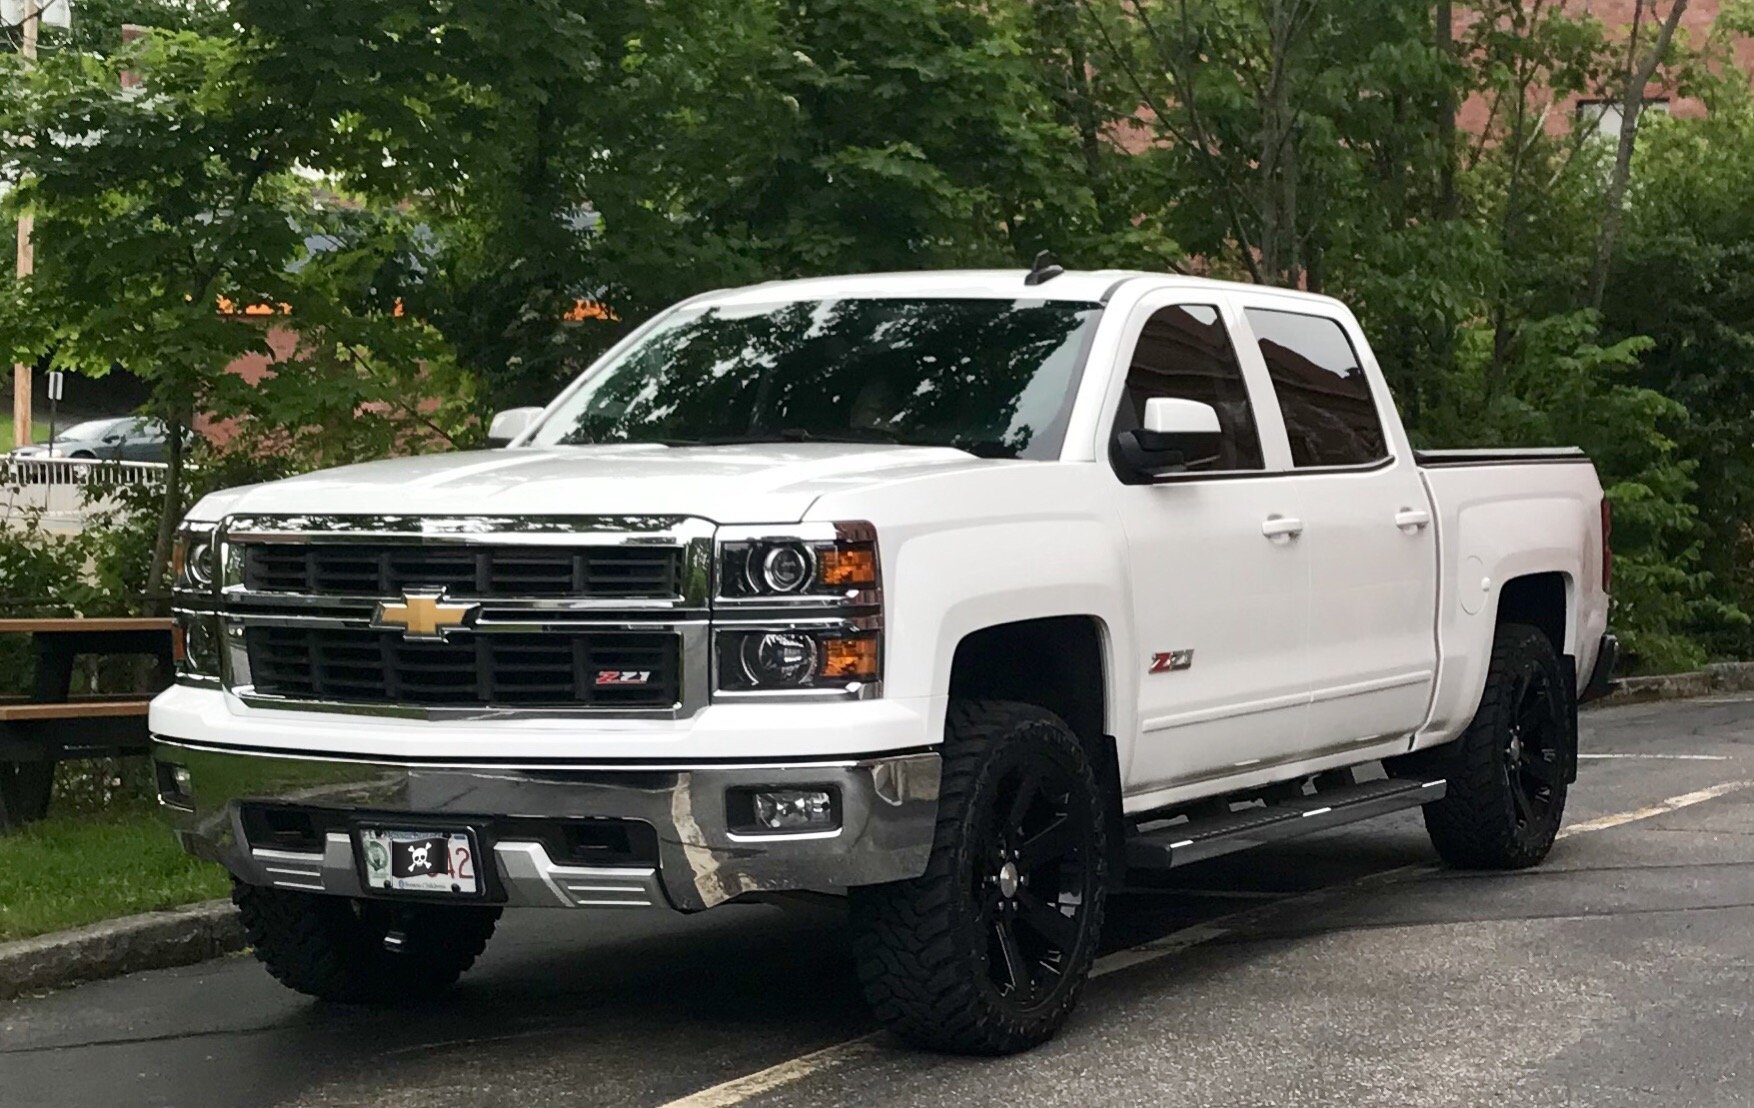
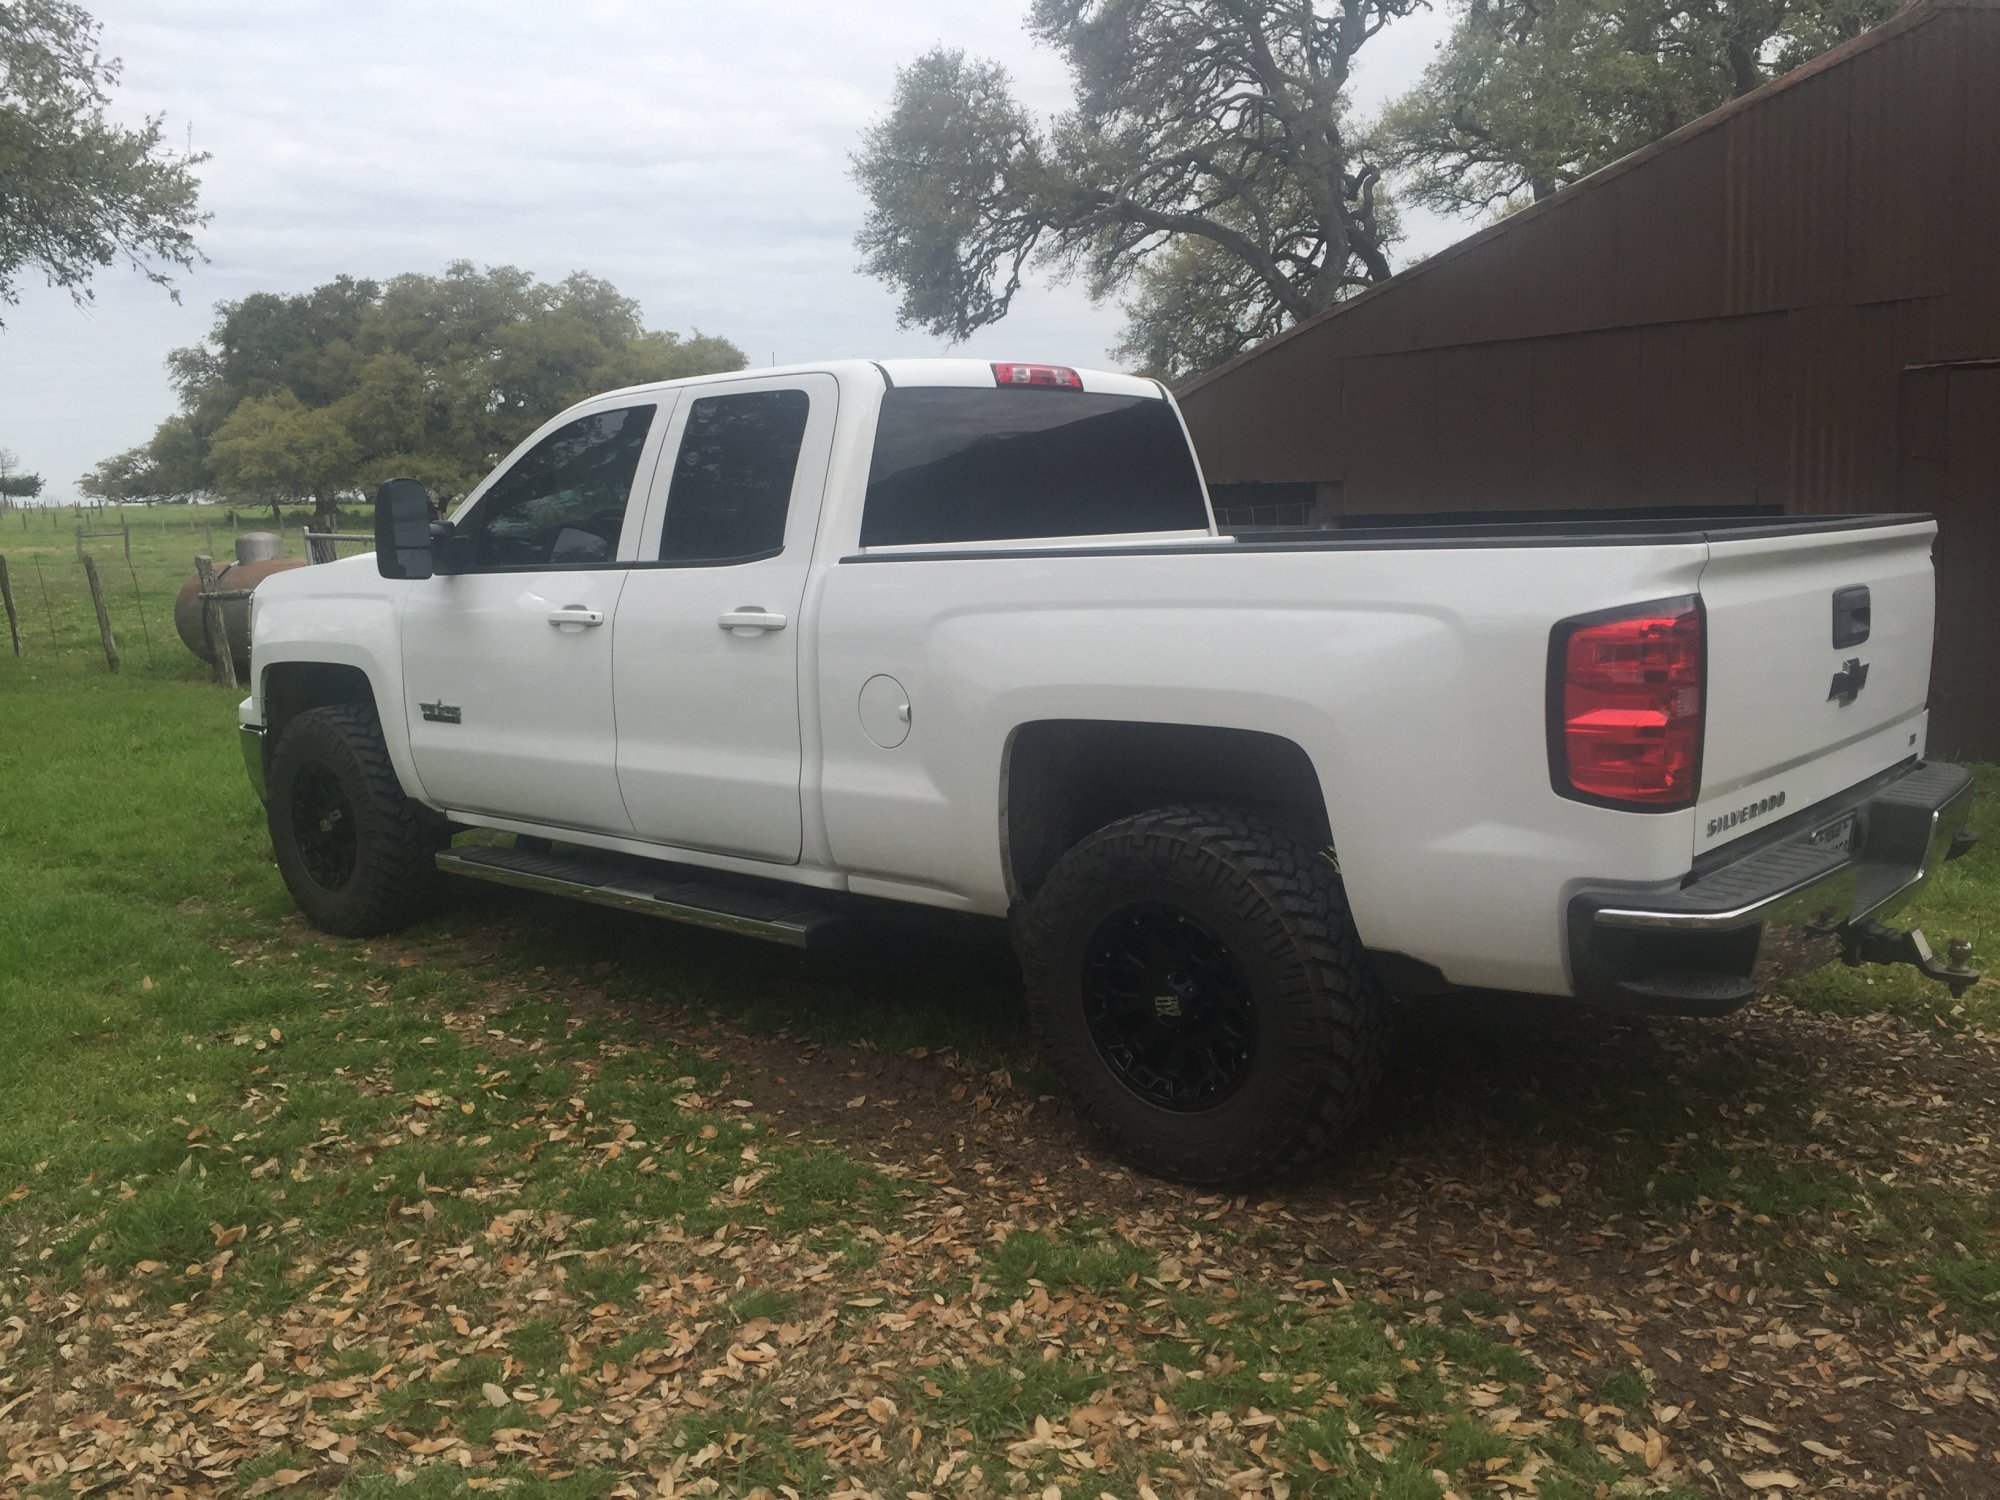
After working all day Saturday to put all my new black parts on - took it out for some pictures.
2 points
-
8k and 27ft. Did a good job Sent from my SM-G965U using Tapatalk2 points
-
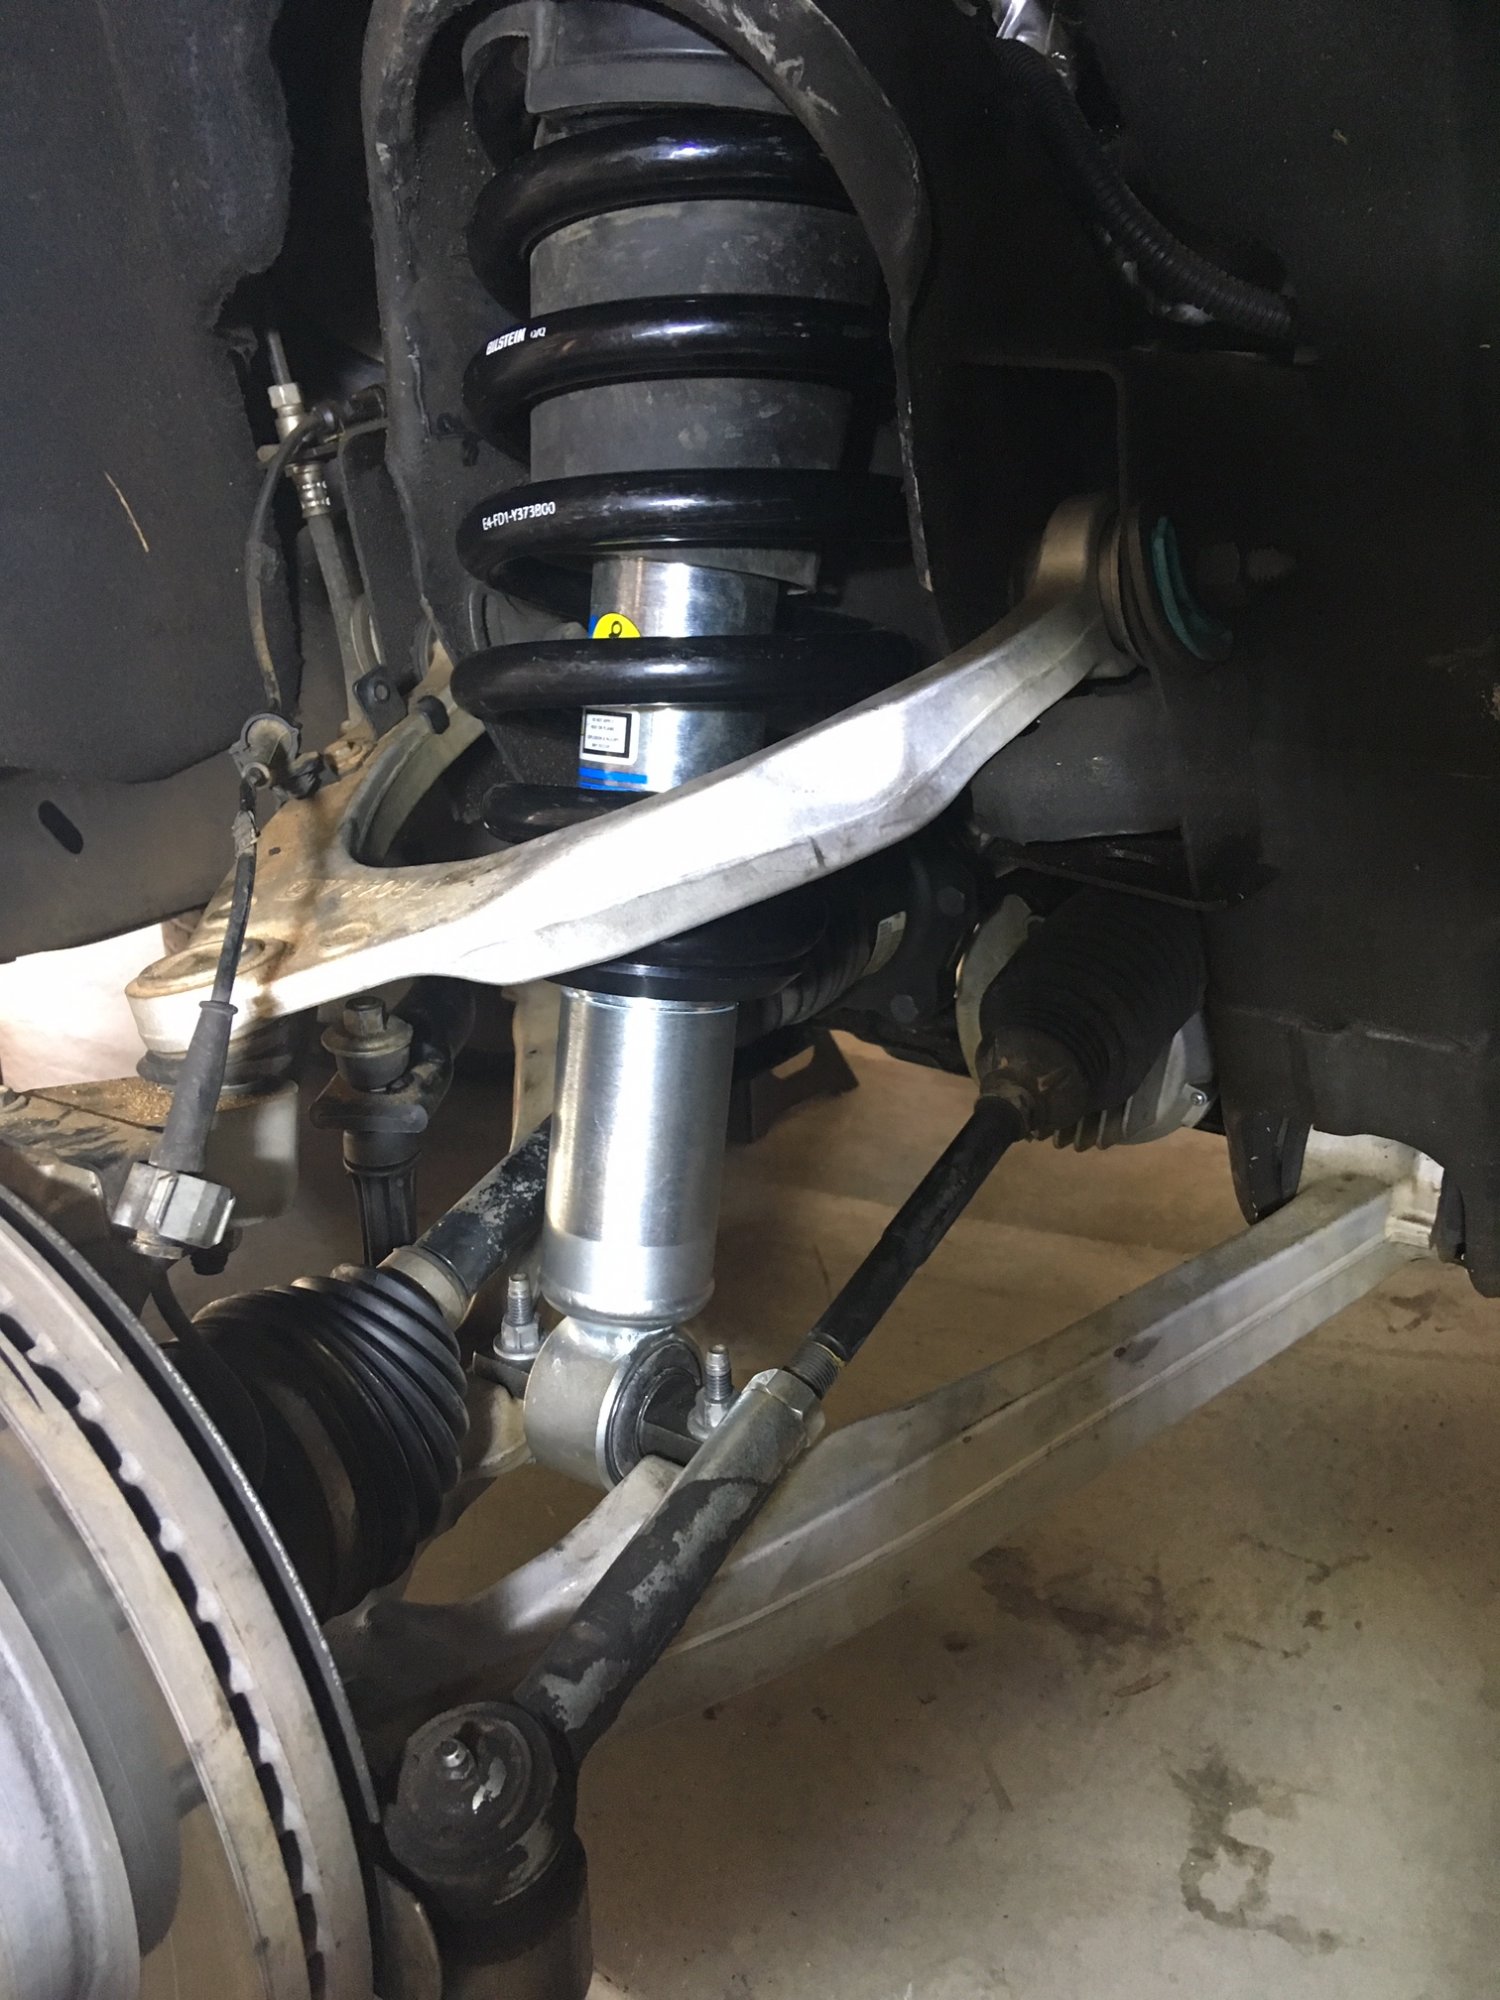
I just got done with installing my 6112's on my 2014 GMC Sierra Crew Cab. Reading some install guides on here really helped, along with printing some Chilton Repair guide torque specs that I got from my local library's online account. I think the hardest part was getting the new assembly into place, but using a pry bar to help lift the new unit up by the springs against the upper control arm, it eventually got into place and bolted on. I only lifted my truck 0.5" (1 rings space up from stock height). So far I've only driven around my neighborhood, about 1 mile. No problems at all so far. I hit a few bumps that would normally give me a bouncy rebound, and the recovery now is more plush and controlled. I'll have to spend some more time with it and give a follow up. But so far so good. Took just over 3 hours to complete the install too with 2 sets of hands working. Edit Updated +1 day: After driving for about 15 miles now, the comparison to stock is a huge improvement in ride over any condition. I am surprised that its not just how much better speed bumps feel (which is night and day different), its even freeway driving and smooth dips at 70mph where stock felt like you rebound too high/fast and loose adherence to the road, and now its more controlled. I can't wait see what the difference feels like on bumpy dirt roads where I would be tossed around before.
2 points
-
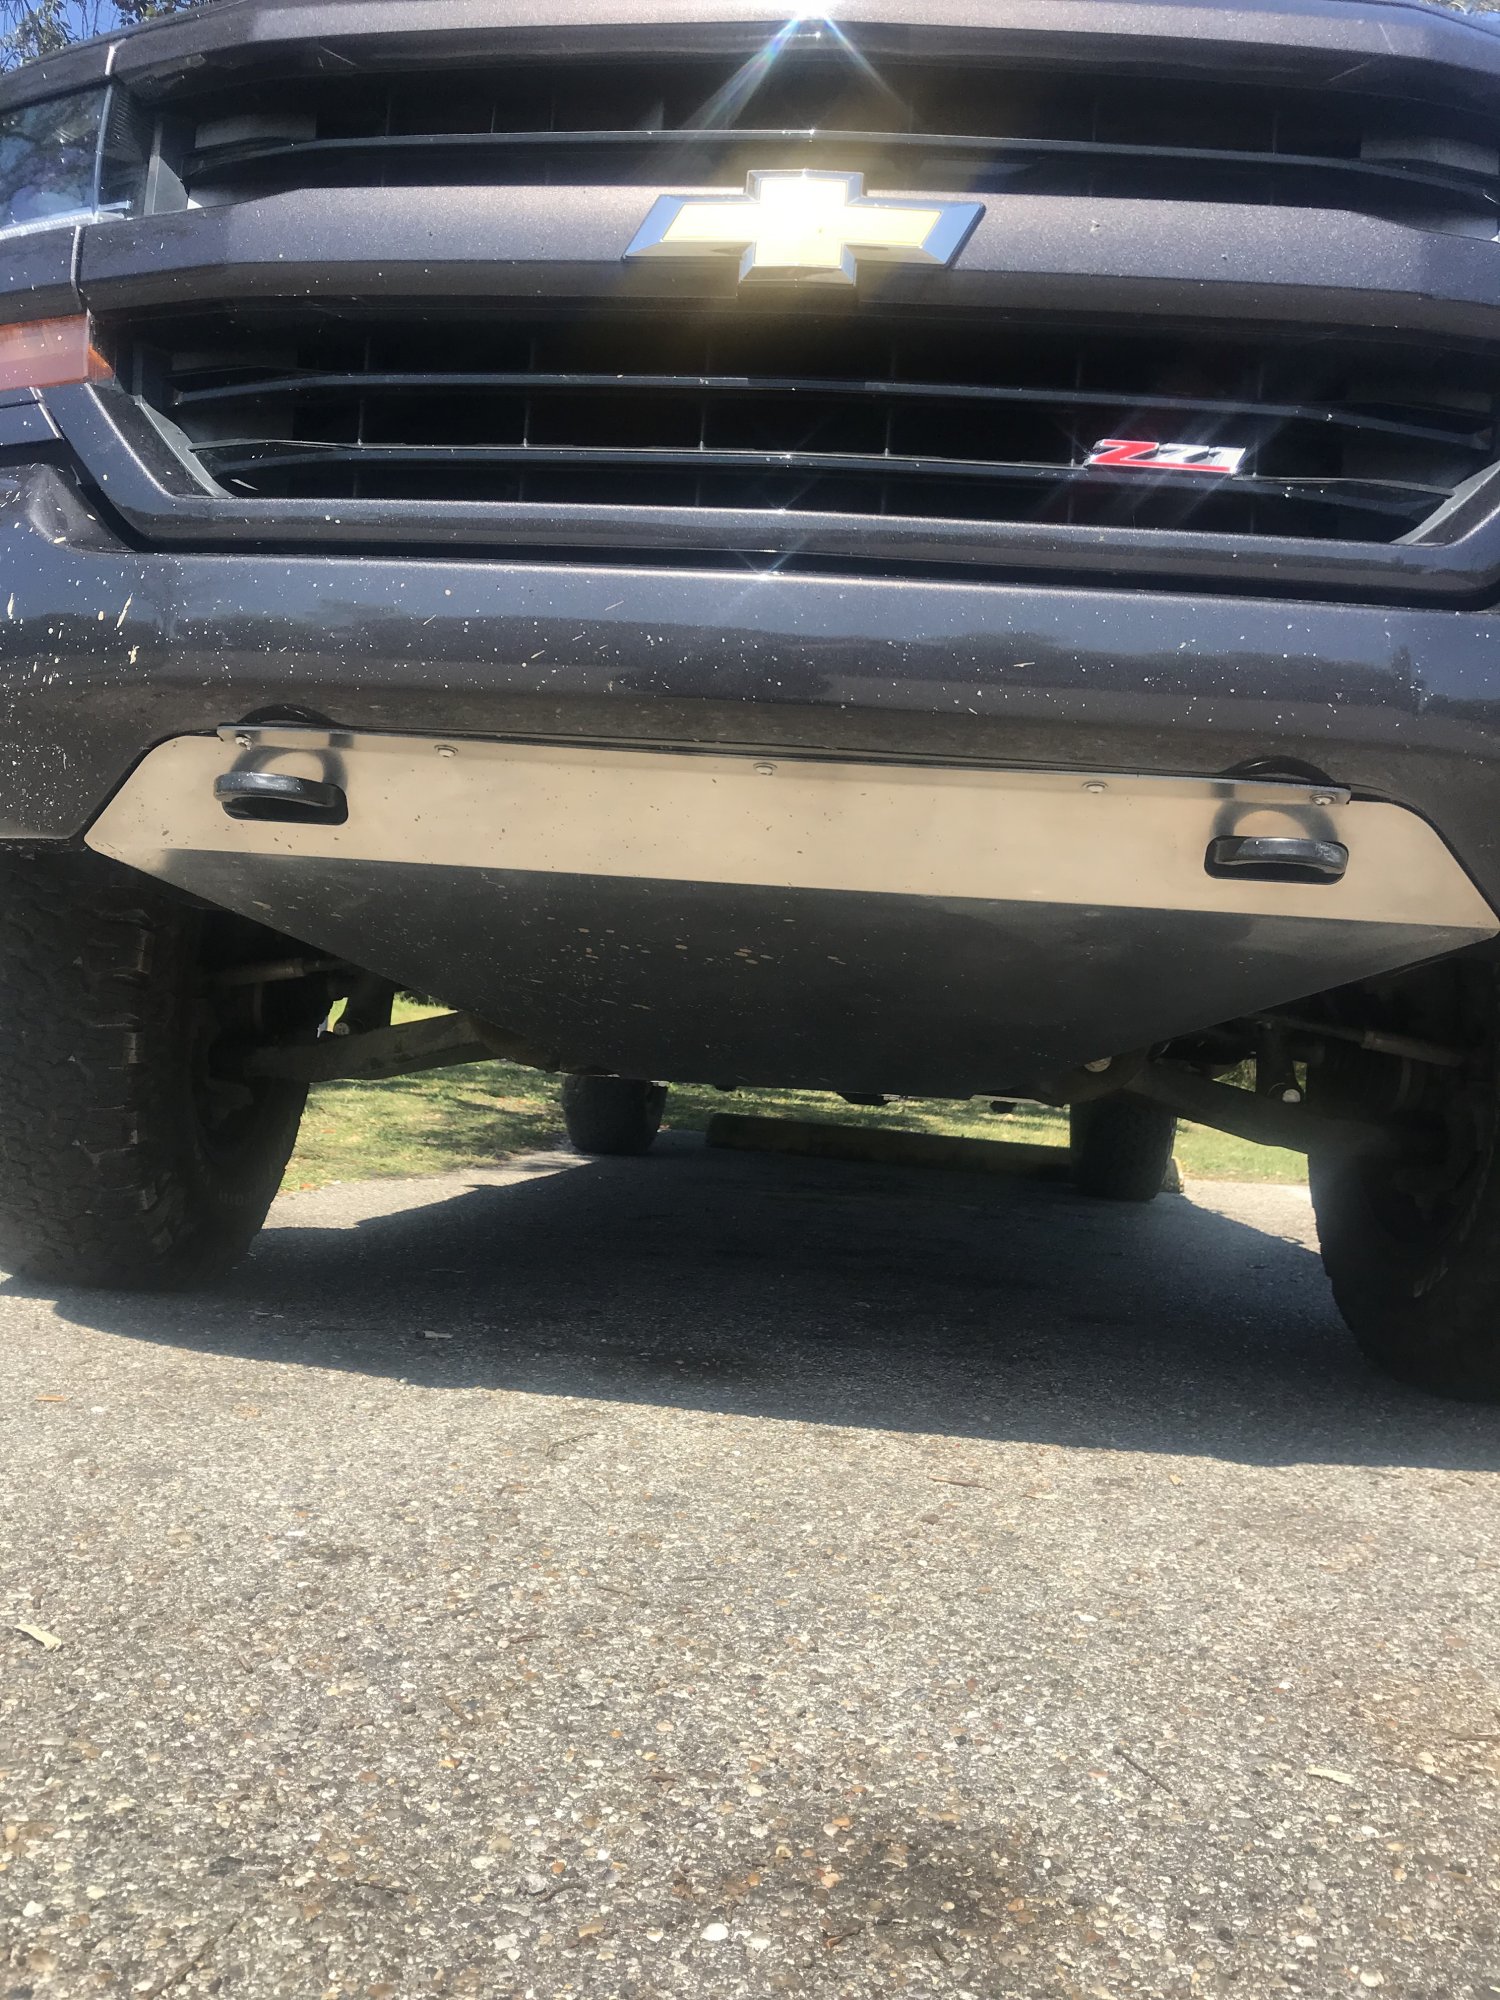
Sdhq skidplate
2 points
-
Oil change, tire rotation and balance, leveling kit installed, and alignment. I think it turned out good. Sent from my iPhone using Tapatalk2 points
-
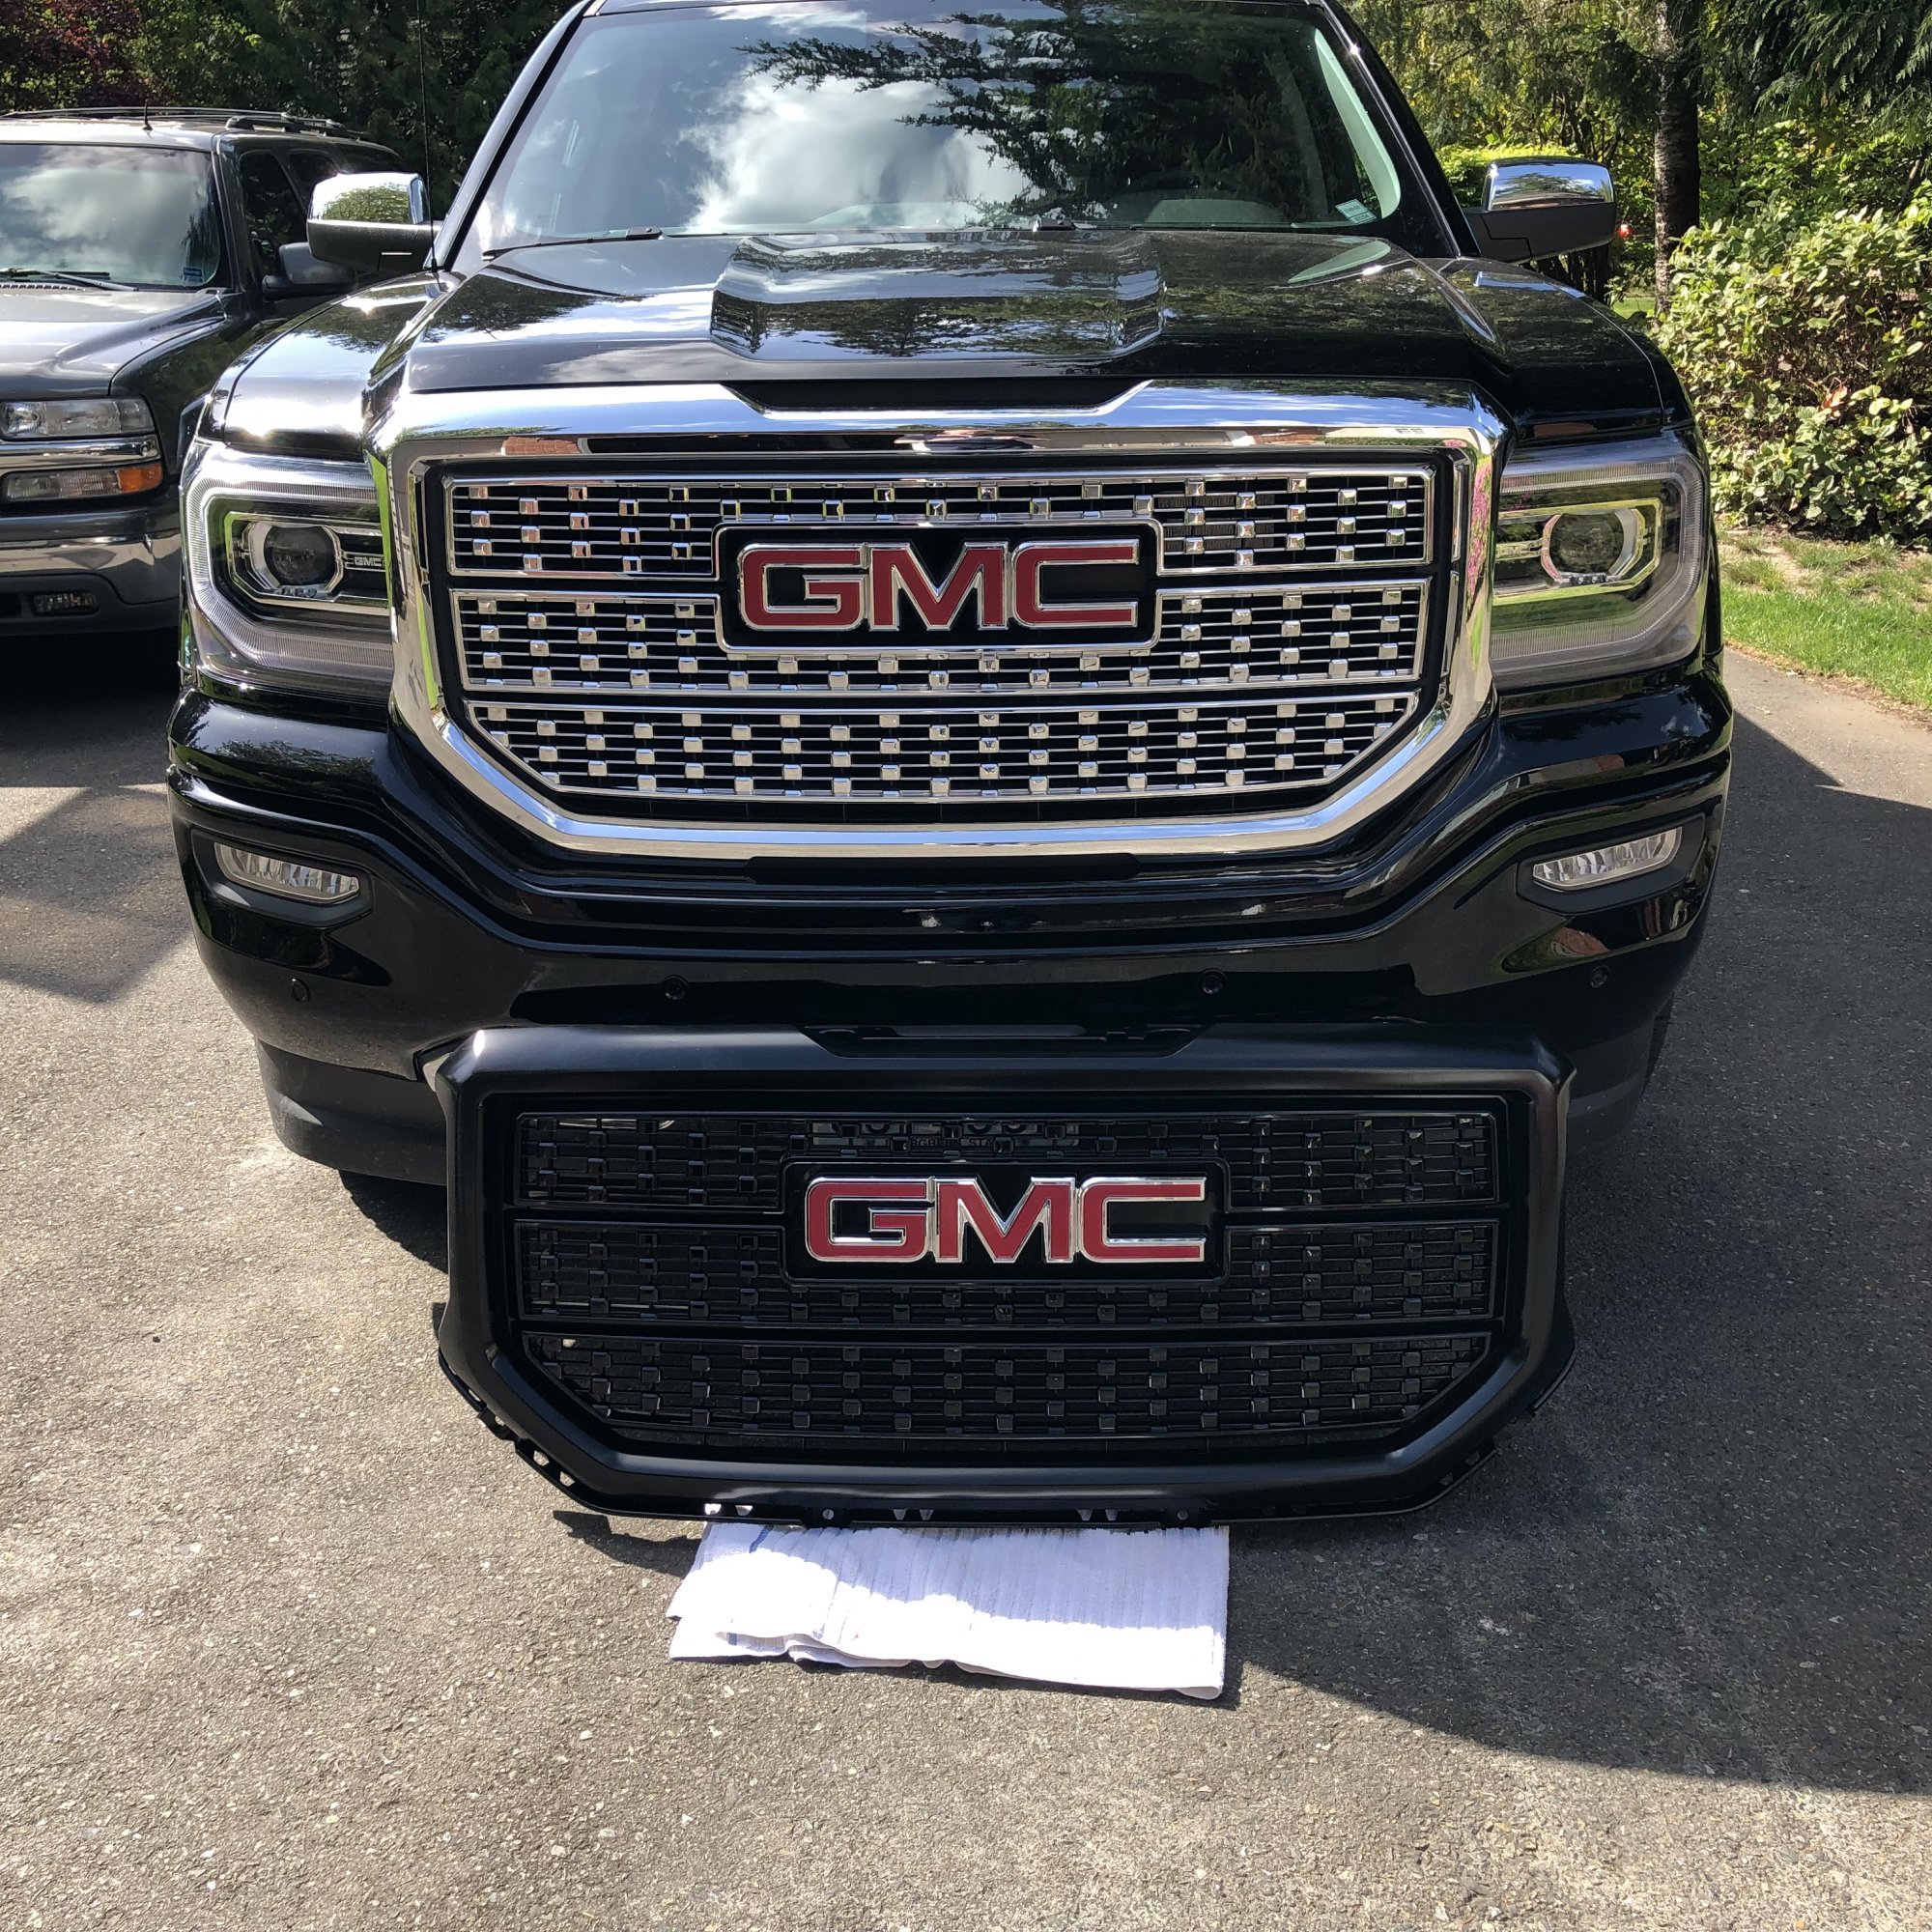
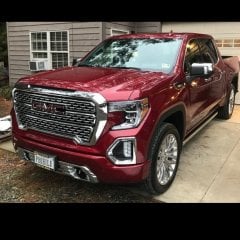
Got my extra grill back from the painter. Planning to put it on tomorrow. Midnight Denali.
2 points
-
Hello All, I got my truck back in January and have done some tinkering here and there but havent been able to throw up any pictures until this last week so I thought Id add to this thread to show off what Ive done so far. Threw on some N-Fab side steps 5% tint in rear, 20% on front two windows, and 5% eyebrow tailgate badge removal the bilstein 5100 suspension swap which leveled it out within 1/2" and allowed me to mount my 33" nitto ridge grapplers. Installed a flowmaster super 10 series and had it dumped right before the rear axle. Ronin Factory stubby antenna Frame Hole Plugs Bed rail plugs WeatherTech Floor Mats S&B Cold air Intake I ordered my gorecon blacked out LED tail lights for trucks that have factory LED's and they should be in by today!! Also have my 3M vinyl to black out the red on the Z71 badges just havent gotten to it yet. I still need to order the Bakflip folding bed cover. Also want to do a full grille swap and install the TREX x series. Also need to get the black powder coated SDHQ skid plate to do the full airdam removal(removed lower portion already).
2 points
-
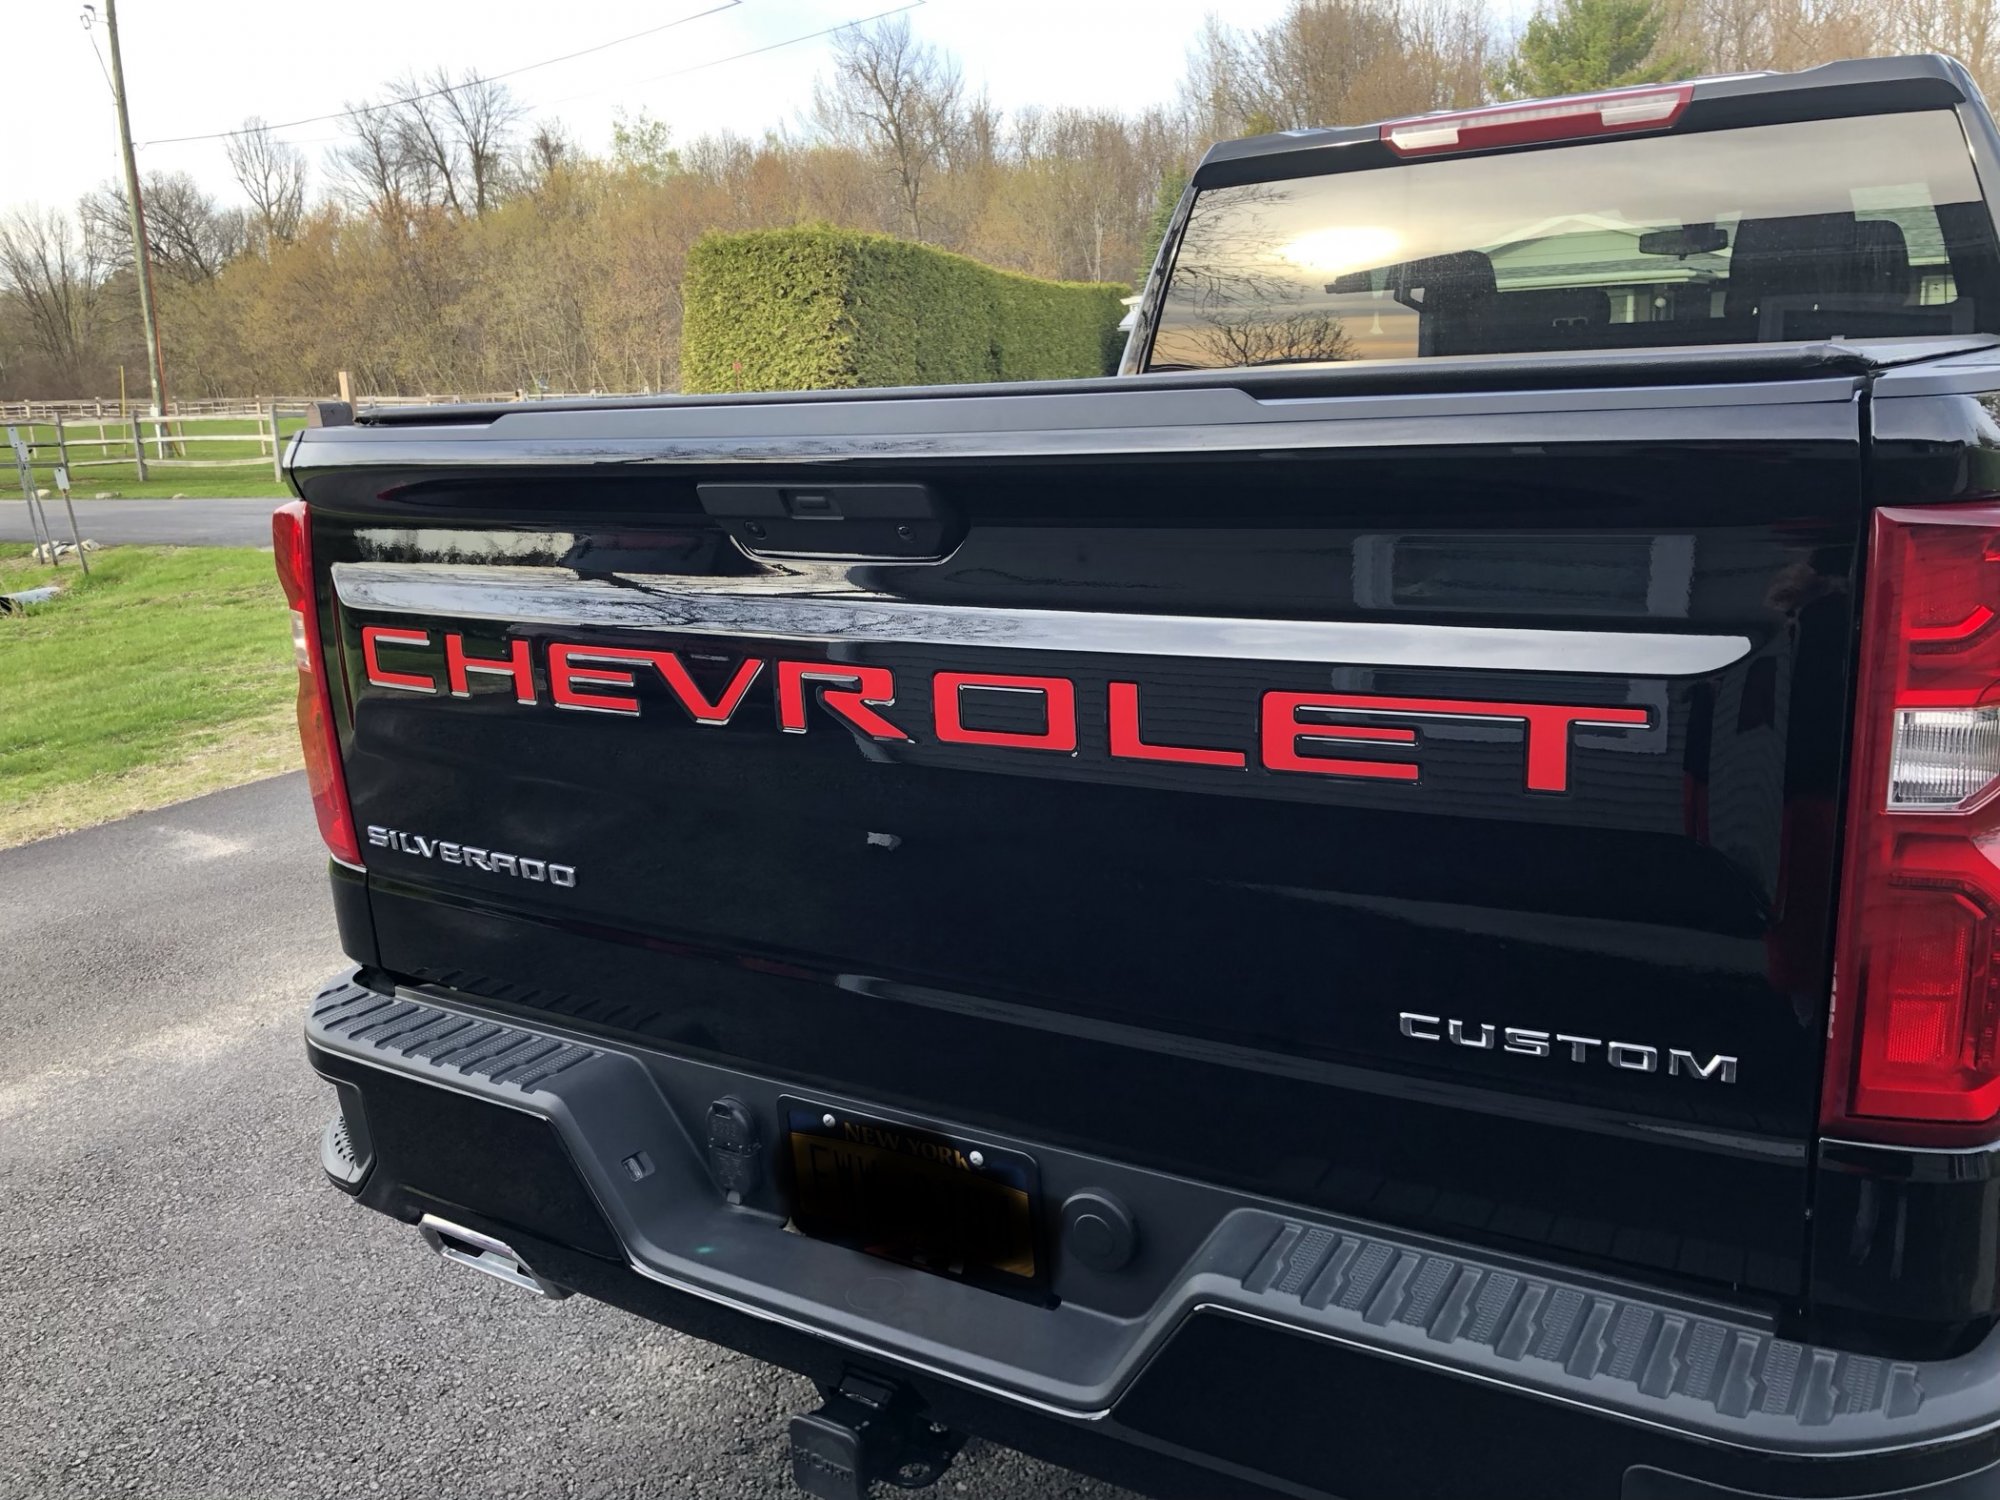
Added letters to the embossed tailgate on my trail boss custom, yay or na?
1 point
-
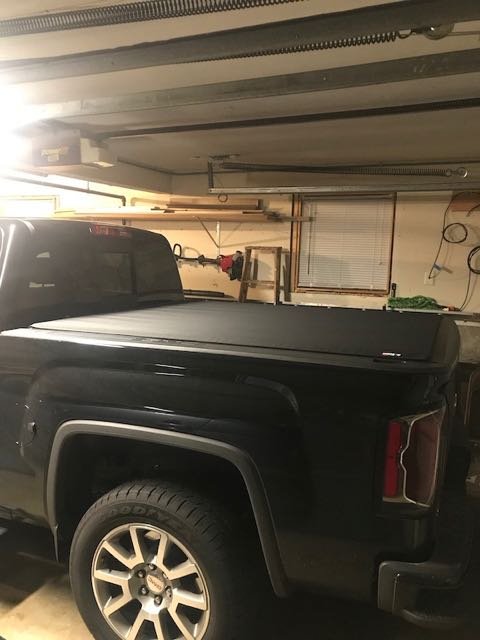
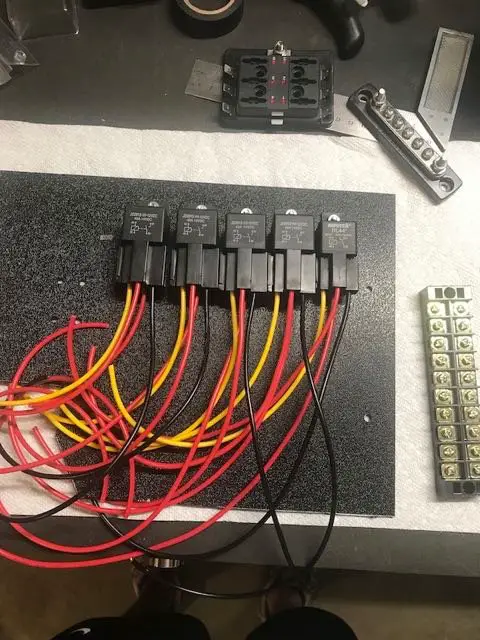
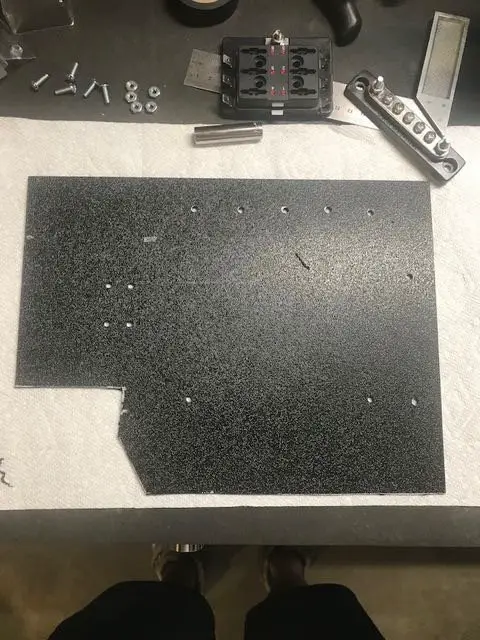
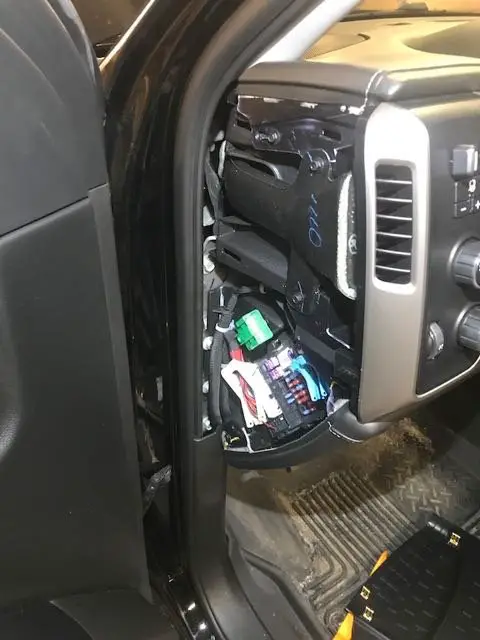
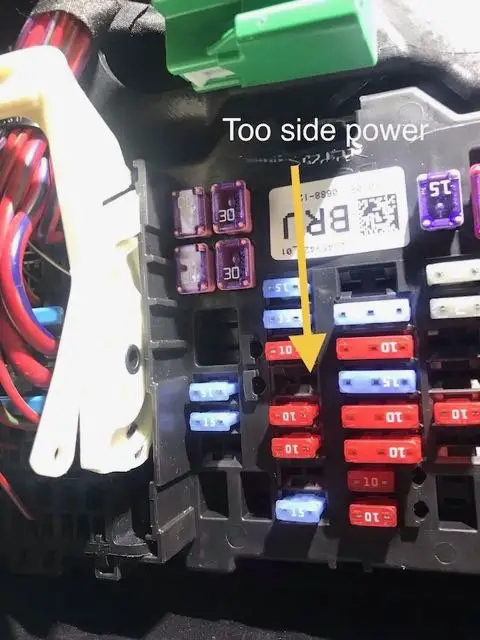
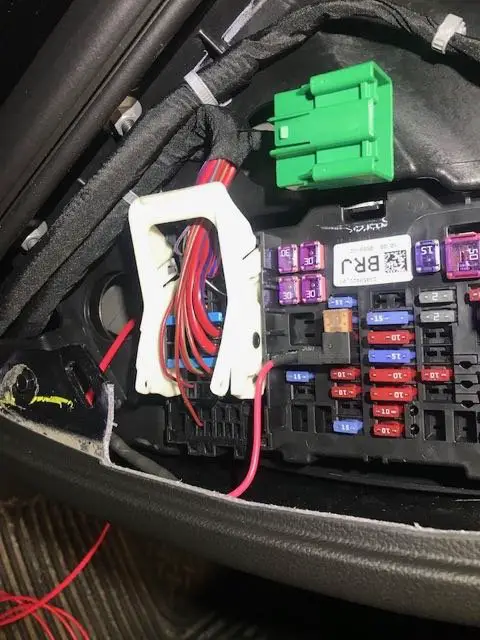
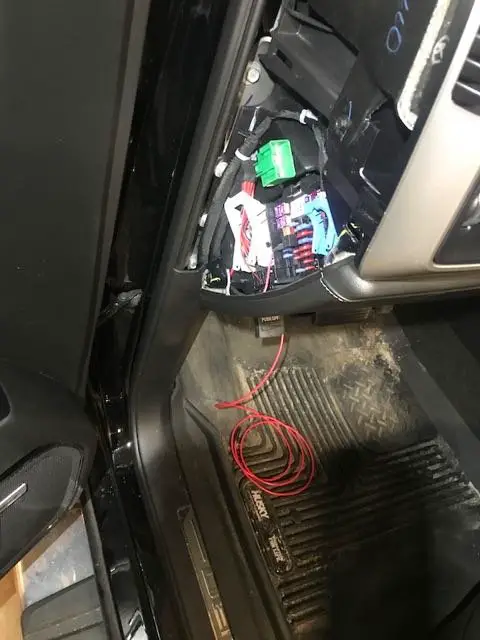
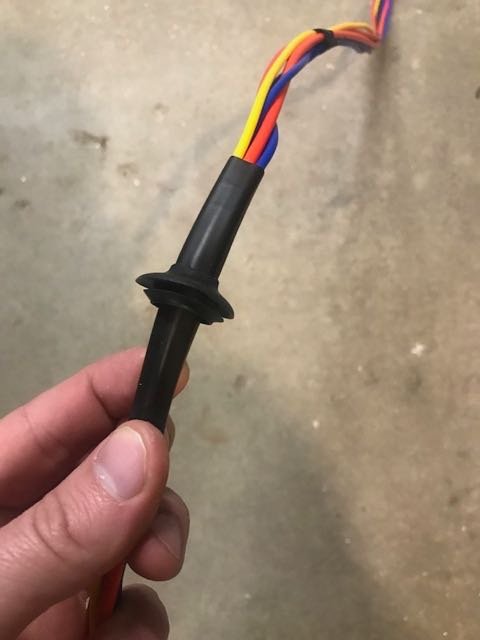
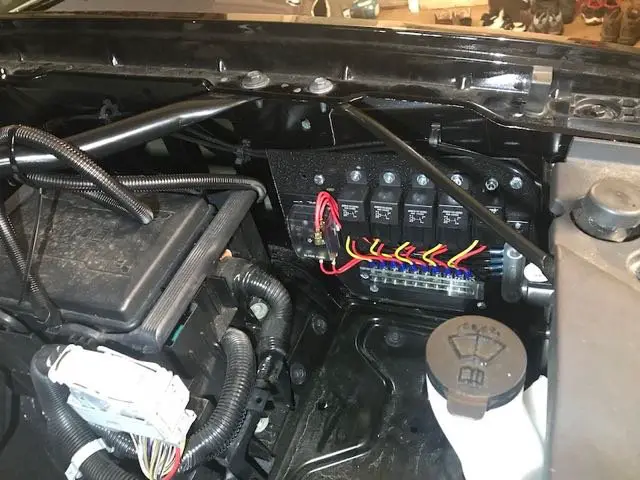
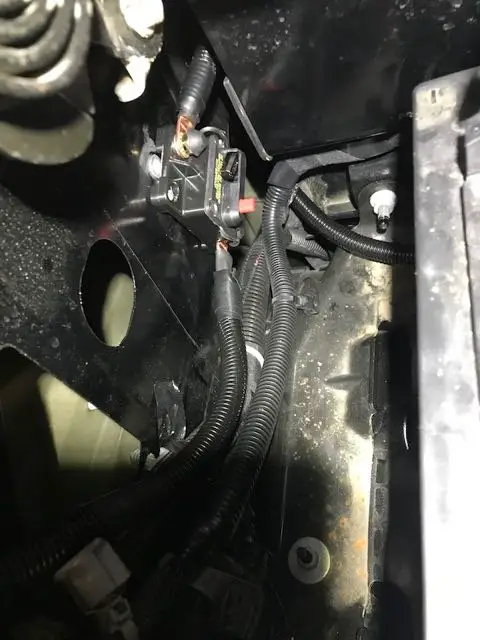
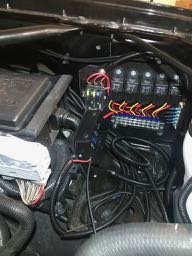
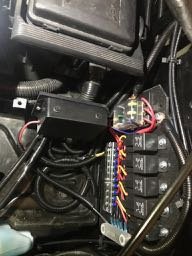
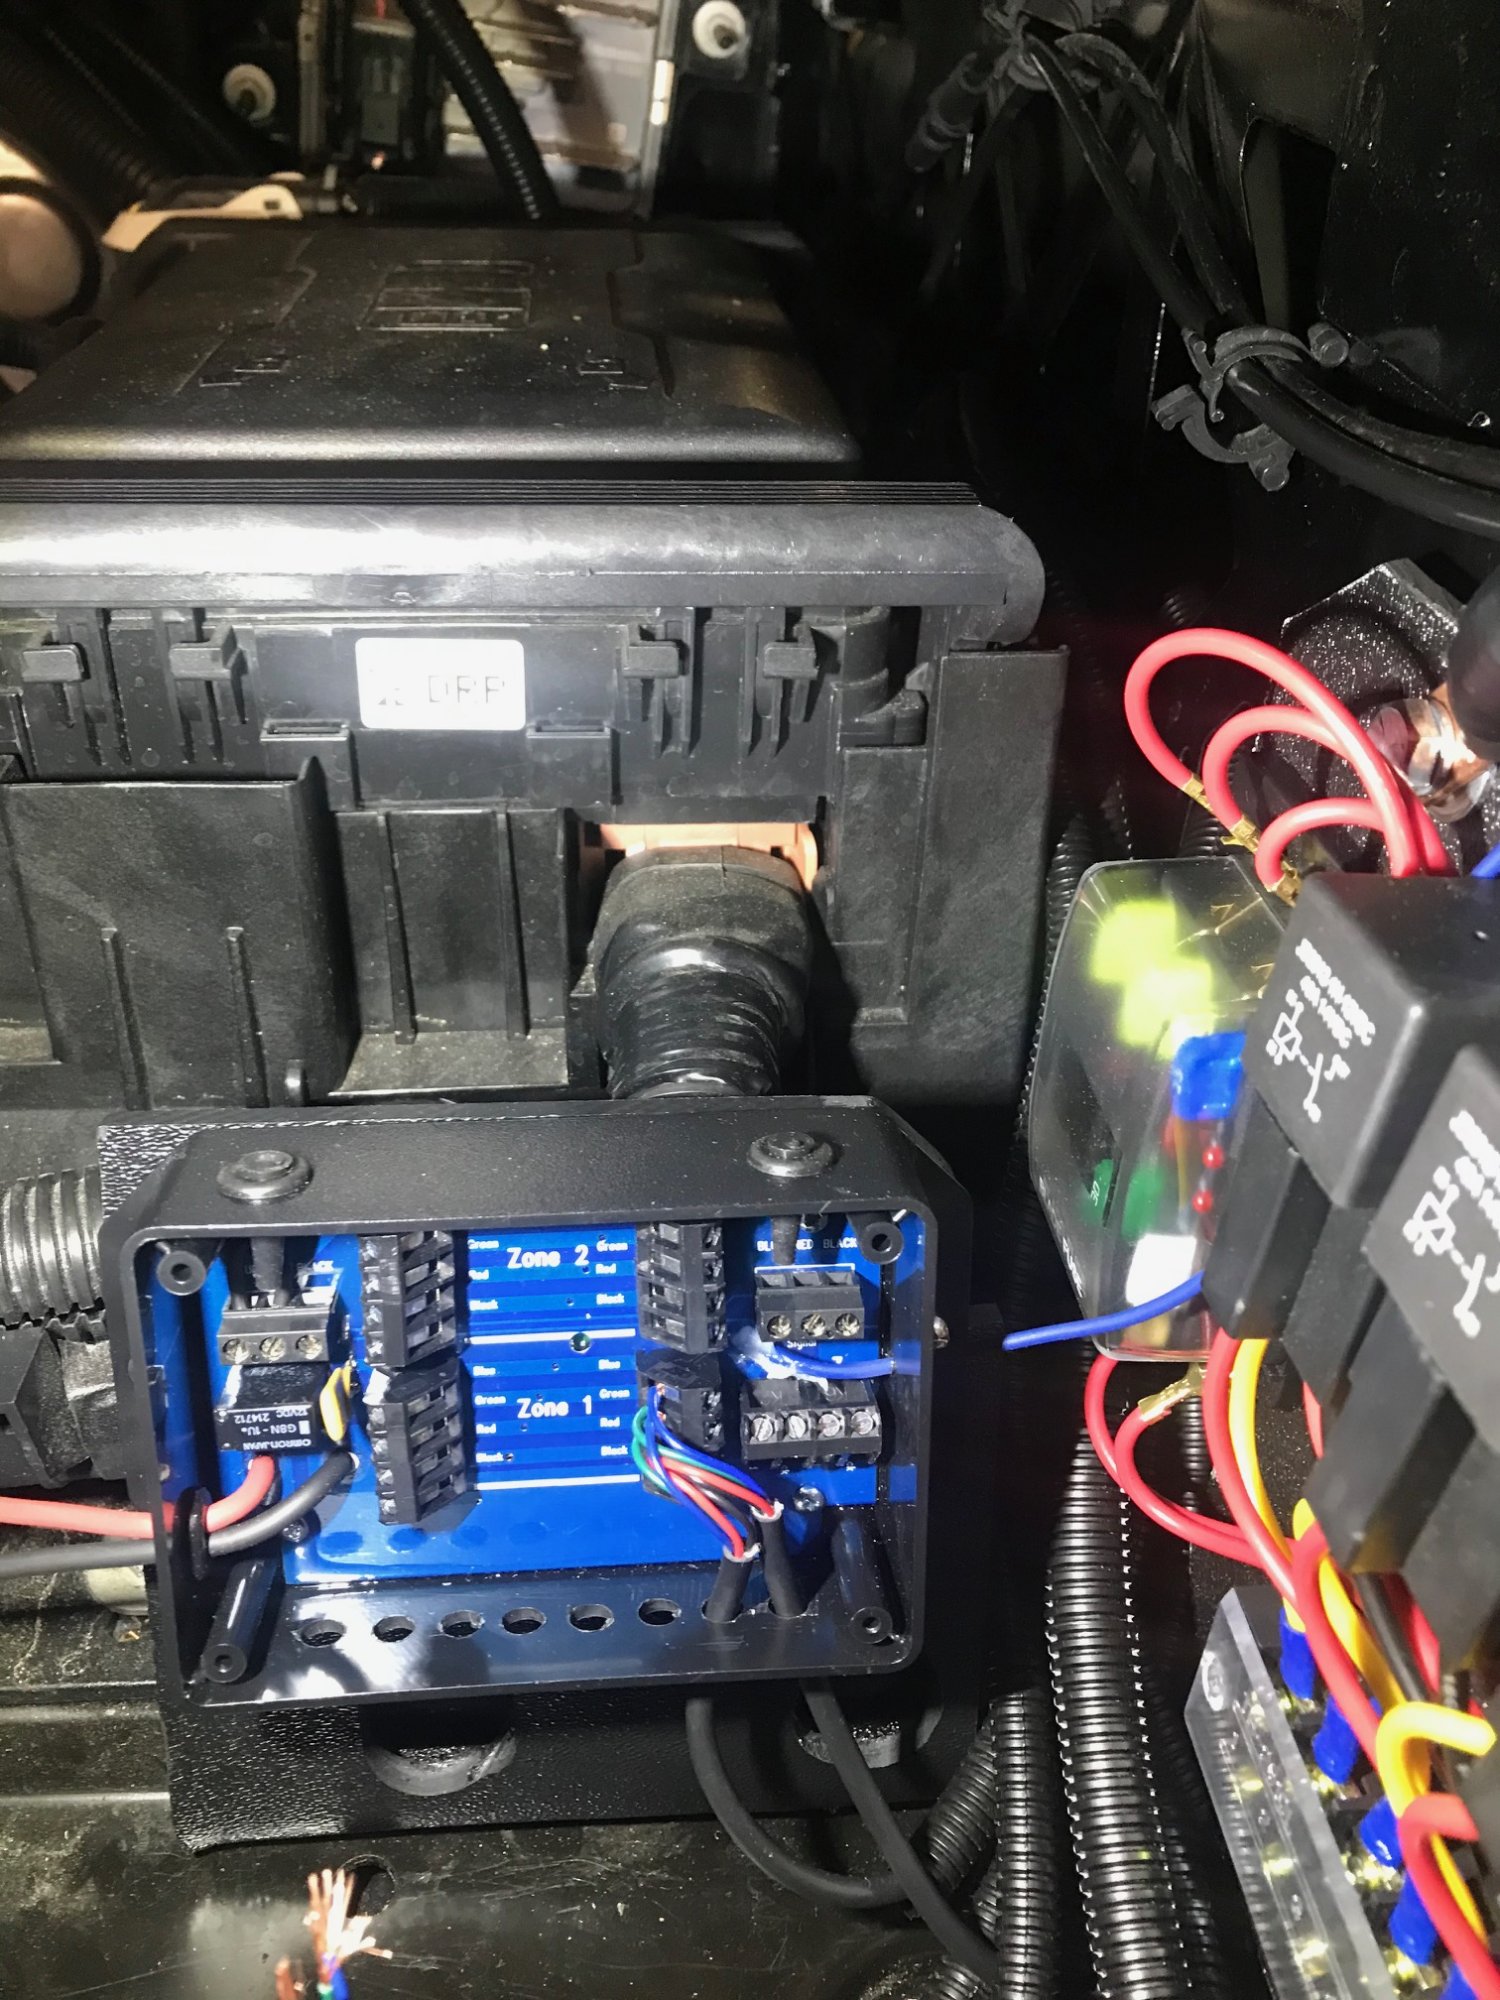
Hi everyone, It is my first time posting here and my first GM truck (2018 Sierra 1500). Before I jump into the topic here is what I have done to the truck to date: • Relay/Fuse Box install • LED RGB rock lights / ground effects and blue tooth controller • Rough Country 2” level • Black door handles and mirror caps (chrome delete) • TruXedo Pro X15 Soft Roll-up Truck Bed Tonneau • LED reverse and center high mount lights • Husky front and rear floor liners • Under seat storage box in the rear I love LED lighting, so once I got the truck I started researching what the best ways were to hook up AUX lighting or accessories. I did a few searches on power sources, switch mounting, and the best way to run wires from the engine bay to inside the cab. I was able to gather a few pieces of information, but still had multiple pieces of the build to develop to connect the dots. This is where I decided I was going to build a relay/fuse panel to control up to 5 aftermarket electrical accessories. Build detail (pictures below): • Create a relay/fuse panel with 5 relays. Mounting location is the opening for the second battery. I started with a 12”x12” piece of 1/8” thick ABS from amazon and laid out my parts then cut off the excess material with a dremel. Items I mounted to the panel – 6 output fuse block, 5 40 amp fuses, 10 position double row screw terminal block, and a 100 amp mini bus bar for the grounds. My relays came with 6 inch pigtail wires, but that was not enough length for all my runs so I removed all the wires and made new wires for each position to the required length to keep it clean. To connect the ABS fuse/relay panel to the truck I did not want to use self tapping screws as the holes become stripped after ~4 insertions so I ended up installing 4 rivnuts, which turned out to be awesome and allow me to use 4 bolts to install the panel so I can remove and install it as many times as I need. Highly recommend using these for mounting items in the engine bay. • Create a mount to hold my Bluetooth controller for my LED rock lights. Mounting location is the opening for the second battery. To connect this mount I used two existing bolts in the second battery pan so I wanted to use a thicker piece of ABS. I used 1/4” thick ABS and it is very strong. I cut the ABS with a dremel then used a heat gun to bend the mount into shape to keep the Bluetooth controller horizontal to the ground. • Use a fuse tap to tap into the heated steering wheel 7.5amp fuse located in the driver’s side fuse block to energize the relays. This fuse is only powered with the ignition on so if I forget to switch off lights they will automatically turn off when I shut off the truck. My relays only require .3amps each to energize them so with all 5 on at the same time they would only be pulling ~1.5amps • Create a wire harness with 6 wires that run from the engine bay to inside the cab using the cap located by the drivers door hinge on the drivers side. 5 16AWG wires for switches and 1 10AWG wire for potential powering switches if I want some accessories to not be limited to “ignition on” only. Wrap the wires in wire loom to protect them. I then sliced a hole in the cap and slid my wires through the insertion so that when the wires are back on the truck the cap still provides a weather tight seal. Where the wires go through the cap I used a piece of heat shrink so the cap would seal tightly against it. • Pull power direct from the battery into a 100amp circuit breaker then to my fuse panel. Mounted the circuit breaker with 2 more rivnuts. Used 4 gauge wire and created power cables and ran directly off the battery terminal nut. This should have been easy but GM scores the bolts to prevent the nuts from being removed from the terminal. I did not have the correct size die so I used a dremel to clean up the thread and was able to get the bolt off. If you cant get this to work you can cut the bolt completely off and order a new mounting bolt on amazon for $10.50 -> Battery Cable Tensioner Bolt 61128373946T With Lock Nut and Washer. • Rock lights and blue tooth controller – I used 8 LUX lighting systems lights and a Bluetooth controller they offer from XK Glow. I got 4 lights that are Monster RGB and have 10 foot wire leads and 4 lights that are Monster RGB XL which have longer wired leads (20 feet). The 4 20 footers I put towards the back of the truck and the 4 10 footers I put toward the front of the truck. The way I ran my wires under the truck still led me to have to solder 2 of the wires to add extra length to reach the controller. I just looked at their website now and see they offer a “daisy chain” series, which I definitely would have gotten instead if they were available when I bought mine (Jan 2018). This would have greatly reduced the amount of wires I would have had to run, which ended up being around ~175 feet of wire. The controller is great and allows for 2 zones where you can change colors and patterns independently or synchronized. There is a third zone as well for a solid color. You can set a default for lights so when you flip the switch in the cab they come on to your preset and then you can use the phone app if you want to change colors or patterns. 8 lights does a great job lighting under the truck!! I did 2 lights in the back on the tow hitch mount. 2 under each running board and then 2 on the front frame. I can take pictures if people are interested. https://luxlightingsystems.com/collections/monster • Still to be determined – where to mount my switches in the cab. Would love ideas/feedback. Ideally I would like to build a switch panel for 5 switches and connect it without drilling to the side of the center console. Since I currently only have 1 accessory hooked up I may wire a round toggle switch into the 12v outlet next to the USB connectors in the center console If anyone has any questions please let me know! I'd love to help! I am learning as I go. ------------------- Rough Country 2” level Black mirror caps Replacing the door handles i lost one of the nuts in the door and had to take the door panel off to get it. Take your time so this doesn't happen to you! LED light upgrade - Looks way better especially when you click unlock walking up to your truck at night TruXedo Pro X15 Soft Roll-up Truck Bed Tonneau Starting the fuse/relay panel. Cutting the ABS New wires added to the relays and then cut to length and mounted to ABS Wiring harness for 6 wires. 5 for switches and 1 potentially for switch power in the future. Notice going through the grommet with heat shrink to make sure its weather tight Fuse tap on the 7.5amp heated steering wheel fuse and fishing wires. Caption in picture is supposed to say "Top side is power(+)" 4 rivnuts installed to mount the panel to. This allows you to easily install and uninstall. If you've never used a rivnut, youtube it. there a lot of good videos test fit in the truck So many wires to run! Bluetooth controller mount bent to shape and test fit Bluetooth controller mounted and starting to wire in lights 100 Amp circuit breaker installed to the left of the battery. Rivnuts used again. After the circuit breaker I ran the power wire across the top of the engine bay and zip tied it to an existing harness. All 8 rock lights wired into 2 zones Complete and mounted! Pics of the finished product. Sorry for the bad pictures! I need to get better ones standing further back from the truck. They throw a lot of light!!
1 point
-
1 point
-
Thanks Chris for the comments. Yea, I was following the whole saga when your 2015 got totaled. She was definitely a good looking truck. My plan was to mount the 4' Firestik antenna with the heavy duty spring and quick disconnect centered on my front bed lip behind the cab. I have a GatorTrax retractable tonneau cover, so the stack pockets are out. I was on RightChannel Radios today and I'm starting to rethink my idea. They have a Firestik dome mount, I'm thinking of mounting that on the front non-retracting part of my tonneau and going with the Firestik 4' Firefly antenna, seeing how the aluminum tonneau cover isn't as strong as my bed lip. May just my stick with my original plan, seeing how its ordered already. As far as that filler piece to cover the area behind the CB, I purchased an external speaker to mount on top of the plexglass / lexan, seeing how the CB speaker will be under the plexiglass / lexan and there is adequate space behind the CB to mount it along with the Mike mount. I would love to run a Scanner underneath the CB, as you did. When I retired from the Fire Service, they were going to digital radios and going away from the analog radios that were able to be picked up on the older scanners. I remember I had a Realistic home scanner to follow police and fire when I was much younger. I'm sure there are digital scanners out there, but probably way out of my price range. Anyway, when I get the project all completed, I'll post some pics of the finished project. Good luck with outfitting the 2018.1 point
-
295/70/17 as well. Toyo Open Country MT's
1 point
-
Maybe the bed is correct and the cab is offset on it's mounts...1 point
-
Another fun trivia fact, only LTZ and HC get auto up on the passenger window. I can only imagine the bean counters calculating the savings on only making the driver window auto up on the lower trims.1 point
-
It’s a Weston HDX Grill Guard. Got it and had it installed at a truck accessory shop. Think it was $675 Sent from my iPhone using Tapatalk1 point
-
CST has a Coilover kit out. https://cstsuspension.com/2019-1500-2wd-p-u/385-csk-g52-1-2019-gm-1500-2-4wd-stage-1-system.html I asked them about AT4/TB? They said if you add just coilovers it will raise the front by 1.5", which would level the AT4/TB. https://cstsuspension.com/2019-1500-2wd-p-u/380-dirt-series-25-coil-overs-2019-gm-1500-2-4wd-1-35.html On my 2013 GMC 1500 I run CST coilover with 1" blocks in back. No problems with over 20,000 miles, ride is way better than stock. On the dirt it will swallow up high speed bumps, on the road it will rally corners. When I get my AT4 i'm going CST coilovers with 34/35 BFG KO2. Now Fuel just needs to come out with wheels that will clear calipers.1 point
-
Looks great, Good call on the red tow hooks!1 point
-
I looked around and don't see any sealant. Looks good so far.1 point
-
Eibach pro truck kit ( springs + shocks ) +2.5” front stock rear height 22” stock rims Atturo trail blade m/t 33X12.50R22
1 point
-
I went aftermarket. O'Reilly Auto Parts. Lifetime Warranty. Total delivered was $133. It was almost exact fit. The plastics on the side of the condenser didnt fit 100% because the trans cooler fittings were a bit different in length sticking out of the side of the condenser. I just used a razor blade to trim them. Took an extra 2 mins.1 point
-
Ill second that. Placed my order for a CC standard bed RST on 5/2. Salesman told me to check in with him weekly to see if we have a VIN and can then go from there. Still not sure how to track order even when I receive VIN Also, someone down the street from me has a Denali in Pacific Blue. Was so beautiful that I slowed down to eye it.1 point
-
I did mine when I first got it. I think it looks a lot better.
1 point
-
I’m pissed that I didn’t do it to my truck, my front bumper and hood is all chipped up already at 6k, I’m debating on having it painted then getting it covered up.1 point
-
They are a 305/45-22 Nitto Terra Grappler, they are basically the same height but 1” wider than OEM.1 point
-
I’m running the 295/70/17 also. Just like @jgraves13 I almost went with 285’s, but thought the 295’s looked better as well.
1 point
-
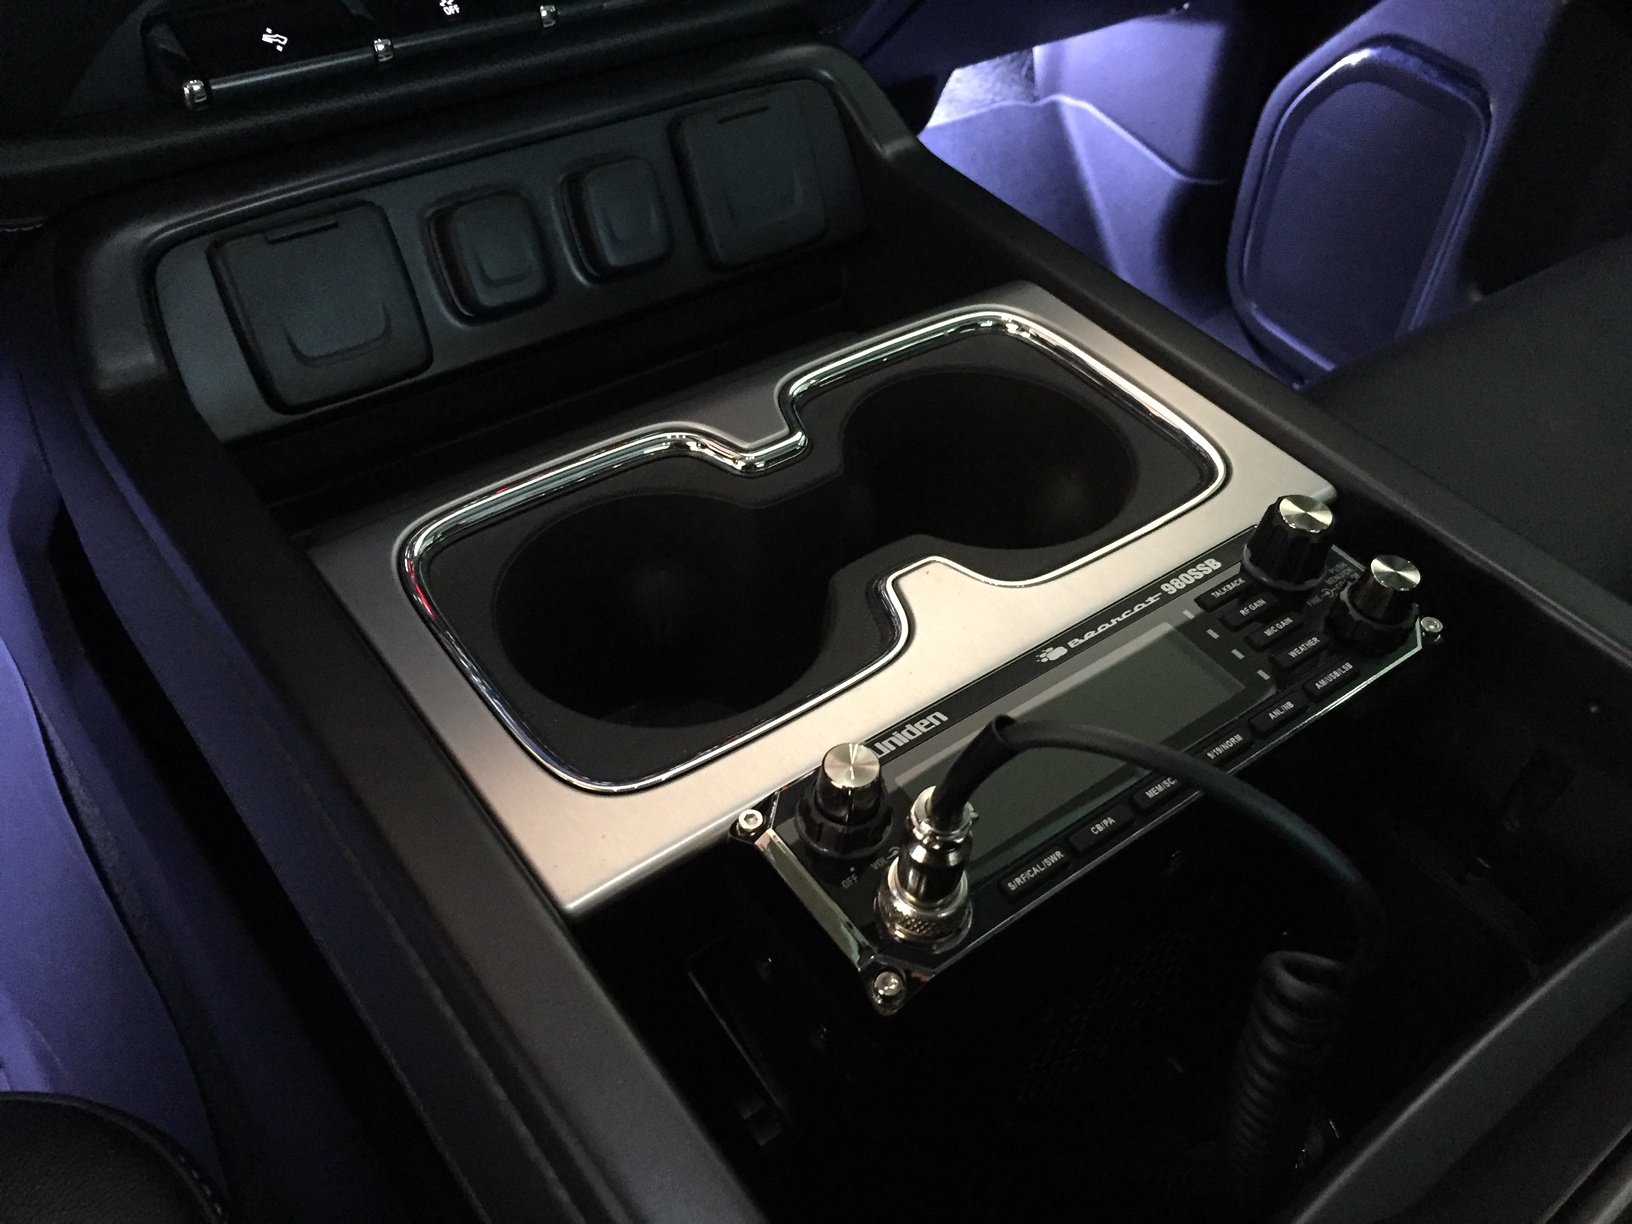
Test fit my new Uniden Bearcat 980SSB CB. Just waiting on my 4' Firestick antennae to arrive. Plan on fitting a piece of plexiglass with carbon fiber vinyl wrap to cover open space below CB.
1 point
-
So no one has installed the Bilstein 6112's yet? Lets hear some reviews if yes..1 point
-
1 point
-
285/70/171 point
-
The black Tenneco's are not bad. If you had Rancho's, you would've hated the factory ride guaranteed. Either way, Bilstein's are a necessary upgrade!1 point
-
Good luck with your new truck. Hopefully you have no problems.1 point
-
Detail day Only a few weeks until this is in the garage (for those who don’t follow the other threads) Sent from my iPad using Tapatalk Pro1 point
-
1 point
-
This is my goal! Just need a grill lol1 point
-
Icon suspension set at 2.25 in
1 point
-
1 point
-
Here is what they look like. Assuming you already have tow mirrors fully functional, this harness will change the behavior of the running light and will make it Dual Function as a running light and a turn and signal. It’s $125 shipped anywhere in the US. PM me for more info or to order. I am working exhaustively to get my website built but trying to fill all orders as well. Sent from my iPhone using Tapatalk1 point
-
I just like the green flag it shows in the DIC when I switch it on... ??1 point
-
Sent from my iPhone using Tapatalk1 point
-
Wow! $4k for a little sound and better flow just to be choked back down by cats. I'd rather spend that plus 2 more on a supercharger Sent from my SM-G975U1 using Tapatalk1 point
-
More pics
1 point
-
I think the noise is the electric parking brake. Push the button and see if that is the noise you are hearing.1 point
-
Almost two years old...time flies...
1 point
-
Thanks! Sent from my SM-N950U using Tapatalk1 point
-
Re-did my rear bowtie as i had messed up a bit the first time and also did the Z in the front as per members request. The steering wheel bowtie was a challenge and I didnt really like it but maybe ill give it another go later. Sent from my iPhone using Tapatalk1 point


.thumb.JPG.96e5ac8c60641f8011665a2c92c083f2.JPG)


This leaderboard is set to New York/GMT-04:00