Jump to content

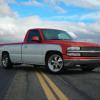
Temp Guage, Trans Temp Guage, Fuel Gauge all went out at same time aft


Recommended Posts

Posted

Hi guys. I have a 2001 Chevy Silverado 1500. I recently had to replace the turn signal switch do to the steering wheel tilt issue most of these trucks have. The wires disconnected under the column from using the tilt too much causing my headlights to stop working. I forget to disconnect the battery and in the process of changing this part, a spark went off when an exposed power wire hit a ground somewhere. I noticed 1 fuse went out that wouldn't allow my truck to start. I replaced it with a new fuse and my truck was up and running. But now the fuel gauge, temperature gauge and transmission temperature gauge all stop working at the same time. Also now the battery light is consistently on. Also the digital display for mileage and gear turns on when key is half turned but turns completely off when truck starts. This all happened at the same time. I checked all the fuses in the engine bay and cab and all seem to be fine. I had the gauge cluster checked at a pro shop and they said everything is working fine. What do you guys think the next step I should take? Are there relays I can check or test? Do you think all these sensors could have went out at the same time when I caused the spark? Any help would be appreciated, Thanks.


Posted

maybe reset the the Body Control Module (BCM) by disconnecting the battery for 30 minutes .... BCM runs the interior electrics completely


worth a try

Posted

I disconnected the battery for 2 hours and reconnected and everything is still the same. Also noticed that all the gauges except the fuel gauge move when I turn the key from off to on. The fuel gauge doesn't move a bit. The temp gauges move a smidge but don't rise up after I turn on the vehicle and let it run. I will try the techron fuel treatment and see if that helps the fuel gauge.


My truck also has been overheating when I sit at red lights or traffic for too long. The radiator fan doesn't seem to turn on at all. Not sure if the gauge has something to do with it or not. Waiting for some input from you guys before I start thinking about changing the temperature sensor or thermostat.


The transmission temp I have no clue as to why it stop working (I have escalade gauges and that is why I have a tran temp).


As for the battery light being on all the time in the display, I only checked for corrosion and it seems clean.


And finally I don't know why the gear/mileage display goes black after I turn the key from the half position to on position.


Any help would be appreciated, Thanks

Posted

Radiator Fan should trun on evey time the AC is turned on ... IIRC


When my BCM failed (2007 Avalanche) I lost Shift Indicator, gauges, interior lights, odometer (I could drive the truck & NO mileage would add to existing) radio pre-sets, door locks, and more - some would work some times and others at other times


gladly - with my BCM reset with the battery disconnect for 30 minutes, everything returned ...


sad it say a GROUND may be the issue ...


(off the net) man that sounds like a loose ground wire to me, probably the one that attaches to the chassis on your left hand front fender...it behind the wheel well closer to under the drive's side door


http://www.gm-trucks.com/forums/topic/84934-bcm-problems-and-ground-g203-location/


My 2004 had a bad ground and the CEL would Flash at highway speed - ground repair fixed that ... lots of grounds on these trucks rust out / you may have burned up a ground somewhere ... or pushed one to the end of its rusted life


check out this list ....


Body Control System Circuit Description

Wake-Up State
Wake-Up signals that will turn the BCM on and cause it to begin active control and/or monitoring certain devices. The BCM wake-ups are:
Door ajar switches
Door handle switches
Dome lamp
Park lamps
Power door lock switches
Interior lamp request active
Ignition key put into the ignition switch
Ignition key removed from the ignition switch
Ignition in the run position
Key in door lock switch
Liftgate release switch
Liftgate jamb switch
Remote control door lock transmitter request to the BCM
Asleep States
The BCM is Asleep when it has stopped controlling or monitoring devices and has become idle again. After the ignition switch is turned to the lock position and 20 minutes (1216 seconds) elapse without any wake-up signals, the BCM enters into a sleep state and goes into the low power mode. If the BCM is in low power mode and detects a wake-up command, the BCM will enter into the wake-up state and enter the high power mode. If the vehicle has been left inactive (ignition in the lock position and no BCM wake-ups) for 20 minutes, the BCM will return to the low power mode.
Remote Panic Alarm
The head lamps and the horn will be activated after pressing the horn button on the remote control door lock transmitter. Press the horn button again to de-activate the head lamps and the horn. Pressing the horn button only once on the remote control door lock transmitter will activate the head lamps and the horn for 30 seconds or until the ignition switch is turned to the run position.
Battery Run Down Protection
The battery run down protection provides protection against parasitic loads and excessive battery drain and high current loads related to the courtesy lamp circuit. The battery run down protection will also protect the battery against being run down from the courtesy lamp circuit to the level which will not allow the vehicle to start. The BCM will turn off the courtesy lamp circuit after the ignition switch is turned from the run position to the off position and 20 minutes (1216 seconds) have elapsed and without a lamp request input. In order to return the BCM to normal operation once the battery run down protection has shut the interior lamps off, the ignition switch is cycled from off position to the on position.
Inadvertent Power Relay
The BCM turns off inadvertent power relay after 20 minutes (1216 seconds) to preserve battery power. The 20 minute timer starts after any one of the following:
· Ignition switch is turned from run or start to unlock, lock or ACC.
· Illuminated entry is activated
· Interior lamps switch is turned on
· The liftgate is opened or closed
· Underhood lamp is activated
· Vanity lamp is activated
· Courtesy lamp is activated
· Dome lamp is activated
· Glove box lamp is activated
· Reading lamp is activated
· Inside rearview mirror lamp is activated.
If any one of the below inputs occur during the 20 minute timer period, the timer is reset to 20 minutes (1216 seconds).
· Ignition switch is turned from run or start to unlock, lock or ACC.
· Illuminated entry is activated
· Interior lamps switch is turned on
· The liftgate is opened or closed
· Courtesy lamp is activated
· Dome lamp is activated
Retained Accessory Power (RAP)
The RAP feature allows the power windows, the radio and the front and rear wiper systems to be operated after the ignition switch is turned from run position to the lock position, provided that the vehicle's battery voltage is above the minimum voltage threshold when the ignition switch is turned to the off position. The power windows ,radio and the front and rear wiper systems will be turned off when any door is opened or after 10 minutes (599 seconds) have elapsed since the last ignition switch transition.
Illuminated Entry
Interior lights will illuminate for 15 seconds under any of the conditions listed below:
· Open and close the driver's side door
· Open and close the passenger side door
· Open and close a rear passenger door
Interior Illumination
Interior lights will illuminate continuously if the interior light defeat button is off and any door is opened or the liftgate is opened, or if the dimmer switch is rotated to the on position for interior illumination.
Exit Lighting
Interior lights will illuminate for 40 seconds when the ignition key is removed from the ignition cylinder.
Remote Illuminated Entry
Interior lights will illuminate for 40 seconds when the unlock button is pressed on the remote control door lock transmitter or when the liftgate release button is pressed on the remote control door lock transmitter. Interior lights will illuminate for 2 seconds when the lock button is pressed on the remote control door lock transmitter.
Power Door Lock/Unlock Function
The BCM is responsible for energizing the door lock relay. The door lock relay will be energized whenever the BCM receives a command from any of the door lock/unlock switch or a input from the remote control door lock transmitter.
Door Lock/Unlock Switch Function
The drivers door lock switch and the passenger door lock/unlock switches are inputs to the BCM. The BCM will command the door lock relay to unlock the drivers door according to the state of the drivers door lock switch or the passenger door lock switch.
Liftgate Release Function
The liftgate release switch is an input to the BCM. The BCM will command the liftgate to release if the vehicle is in park/neutral or if the park brake conditions are met or if the liftgate release switch is pressed. When the BCM receives a message to activate the liftgate release solenoid from the remote control door lock transmitter, the BCM energizes the liftgate release relay if the vehicle is in park/neutral or if the park brake conditions are met.
Lockout Prevention
The lockout prevention feature is activated when the key is in the ignition switch, any door is opened and then the power lock switch is pressed. This feature will lock the doors then unlock the driver door.
Remote Lock
Press the remote control door lock transmitter lock button once and all doors will lock. Press the remote control door lock transmitter lock button twice within 3 seconds and all doors will lock and the horn will chirp.
Remote Unlock
Press the remote control door lock transmitter unlock button once and the driver door will unlock, the park lamps will flash and the interior lights will turn on. Press the remote control door lock transmitter unlock button twice within 3 seconds and all remaining doors will unlock, the park lamps will flash and the interior lights will turn on. Press the rear button twice within 3 seconds and the liftgate will unlock, the park lamps will flash and the interior lights will turn on.
Audible Warnings
When the BCM determines a driver warning sound is needed, the BCM will sound the chime when applicable.
Key In Reminder
The chime will sound when the ignition switch is not in the run or crank position and the ignition key is in the ignition key cylinder and the drivers door is opened.
Head Lamp Reminder
The chime will sound when the headlamp switch is in the parklamp or headlamp position and the dome lamp switch (thumbwheel) is not at the full down(max dim) position and the ignition switch is in the off position or ACC position. If the dome lamp switch is in the full down position (max dim) and the headlamps are turned on manually and the ignition key is removed the headlamp reminder chime will not sound.
Seat Belt Reminder
The chime will sound for 6 seconds when the ignition switch is turned from the off position to the run position and the seat belt is unfastened. The seat belt telltale on the IPC will also turn ON.
Turn Signal Reminder
The chime will sound when the right or left turn signal is turned on for more than 0.75 miles. The chime will be synchronous with the turn signal flasher.
Driver Warning Telltales
The BCM activates the seat belt telltale on or off in the instrument panel cluster (IPC).
Interior Lighting Control
The BCM can turn on some of the interior lighting independently of the interior lighting system. The vehicles lighting system also can control the same lighting components. The BCM provides the following interior lamp control:
· Courtesy lamps.
· Illuminated entry control of courtesy lamps.
· Vanity mirror lamp is activated
· Courtesy lamp is activated
· Dome lamps
· Glove box lamp
· Reading lamps
· Courtesy lamps are enabled by the following inputs:
· Discrete input to the BCM from the door jamb switches or door handle or dome lamp input
· Remote control door lock transmitter activation (function of illuminated entry)


G100

In the Forward Lamp Harness on the Lower Left of the Radiator Core Support

Power and Grounding Component Views in Wiring Systems

G101

In the Chassis Harness, left side of the engine near the generator

Power and Grounding Component Views in Wiring Systems

G102 - Except 4.3L

In the Engine Harness, on the left side of the engine block, #3 cylinder area, below the exhaust manifold

Power and Grounding Component Views in Wiring Systems

G102 - 4.3L

In the Engine Harness, Right Front of the Engine near the Crank Sensor.

Power and Grounding Component Views in Wiring Systems

G103 - Gas

In the Engine Harness, on the Left Rear of the Engine Block

Power and Grounding Component Views in Wiring Systems

G103 - Diesel

In the Engine Harness, on the Right Front of the Engine Block

Power and Grounding Component Views in Wiring Systems

G104 - 4.8, 5.3, 6.0L

In the Engine Harness, on the Left Rear of the Engine Block

Power and Grounding Component Views in Wiring Systems

G104 - 4.3 and 8.1L

In the Engine Harness, on the rear of the left Cylinder Head

Power and Grounding Component Views in Wiring Systems

G105

In the Main Battery Harness, Main Battery Ground on the Right Front of the Engine

Power and Grounding Component Views in Wiring Systems

G106

In the Main Battery Harness on the Right Side of the Engine

Power and Grounding Component Views in Wiring Systems

G108 - Diesel

In the Engine Harness on the left front of the Engine Block

Power and Grounding Component Views in Wiring Systems

G109 - Diesel

In the Engine Harness on the Right front of the Engine Block

Power and Grounding Component Views in Wiring Systems

G110

In the Chassis Harness on the frame to the rear of the left front tire.

Power and Grounding Component Views in Wiring Systems

G200

In the HVAC Harness, on the Right Side of the I/P Near the A-Pillar Below the I/P Top Cover

Power and Grounding Component Views in Wiring Systems

G203

In the I/P Harness, On the Left Side of the I/P Near the A-Pillar Below the I/P Top Cover

Power and Grounding Component Views in Wiring Systems

G302

In the Chassis Harness on the frame to the rear of the left front tire.

Power and Grounding Component Views in Wiring Systems

G304

In the Body Harness, Under the Passenger Seat

Power and Grounding Component Views in Wiring Systems

G305

In the Body Harness, Behind the Drivers Side B-Pillar Trim Near the Bottom

Power and Grounding Component Views in Wiring Systems

G306

In the Body Harness, Behind the Passengers Side B-Pillar Trim Near the Bottom

Power and Grounding Component Views in Wiring Systems

G390 (Crew Cab w/Rear Window Defog)

Defogger Grid Harness, Near C-Pillar

Power and Grounding Component Views in Wiring Systems

G401

In the Chassis Harness, On the Spare Tire Hoist Assembly

Power and Grounding Component Views in Wiring Systems

G402 (Export Only)

In the Chassis Harness, Near the Rear Bumper Assembly

Power and Grounding Component Views in Wiring Systems

G403

In the Chassis Harness, Near the Left Rear Body Mount

Power and Grounding Component Views in Wiring Systems

G410

In the Body Harness, Right Rear Interior of Vehicle Behind the Right Side Cargo Area Trim Panel

Archived

This topic is now archived and is closed to further replies.

×
×
  • Create New...