Jump to content
  • 0

Not so Painless #40103 Dual Battery Kit


2015 ALC

Question

I have a Painless wiring kit #40103 and have mixed info on the proper install on my 2015 Sierra. The confusion is the terminal box on top of the primary battery, what wires need to be upgraded to larger gauge, and how does the auxiliary battery get charged. I have also read that you have to ground both batteries to the same location. This originally seemed fairly straight forward, but is getting more confusing, I wanted to isolate a spare battery to make sure I always have starting power. I originally was going to add a 4ga wire from the the stud that the short wire that goes to the pos terminal on the primary battery and to the left side of the solenoid and from the solenoid to the starter. For the auxiliary battery I would run a 4ga from the pos terminal along the firewall to the left stud on the solenoid and add a wire from the neg terminal to the frame below it. The solenoid would be mounted behind the primary battery. The switch part is easy. Note the diagram below for the solenoid.


Dual Bat.bmp

Link to comment
Share on other sites

5 answers to this question

Recommended Posts

  • 0

Don't know about your question, it's too early in the morning and I am having troubles focusing, but one thing I can straighten out is that grounds do not need to be at the same point.  That being said. I would say that the grounds should be connected to the same "chunk" of metal.  Engine block for example.  Since the largest amperage drawing device is the starter motor, the best place to attach battery grounds to is the engine block.


I would expect that solenoid controls the charging of the auxiliary battery based upon the voltage of the primary battery and if engine is running. 

Link to comment
Share on other sites

  • 0
4 minutes ago, Doug_Scott said:

Don't know about your question, it's too early in the morning and I am having troubles focusing, but one thing I can straighten out is that grounds do not need to be at the same point.  That being said. I would say that the grounds should be connected to the same "chunk" of metal.  Engine block for example.  Since the largest amperage drawing device is the starter motor, the best place to attach battery grounds to is the engine block.


I would expect that solenoid controls the charging of the auxiliary battery based upon the voltage of the primary battery and if engine is running. 

Yes, an nice clean #2 wire to the engine block from the neg terminal as well as a connection to the frame as close to the battery as possible really helps.

Link to comment
Share on other sites

  • 0

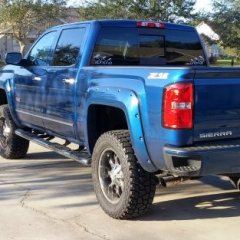
Painless has a simple instruction sheet, it's the distribution block that throws it off, they don't want to be responsible for bad advice. I found a good place to ground the neg to the block, but why is the main battery grounded to the frame. The only good thing is with a 6" lift and 35's I can roll right under it.

Link to comment
Share on other sites

  • 0
18 minutes ago, 2015 ALC said:

Painless has a simple instruction sheet, it's the distribution block that throws it off, they don't want to be responsible for bad advice. I found a good place to ground the neg to the block, but why is the main battery grounded to the frame. The only good thing is with a 6" lift and 35's I can roll right under it.

They use the frame simply because it is the best way to connect the various parts of the truck. If you think about it, it's the best way to ground the the headlights and the brake lights. It's the backbone of the truck for electrical and foe body components. 

Link to comment
Share on other sites

Join the conversation

You can post now and register later. If you have an account, sign in now to post with your account.

Guest
Answer this question...

×   Pasted as rich text.   Paste as plain text instead

  Only 75 emoji are allowed.

×   Your link has been automatically embedded.   Display as a link instead

×   Your previous content has been restored.   Clear editor

×   You cannot paste images directly. Upload or insert images from URL.


×
×
  • Create New...

Important Information

By using this site, you agree to our Terms of Use.