
Jump to content

Recommended Posts

Posted (edited)

Hi, guys.

New member here, but just wanted to give some info on leveling and tire size that will rub, or not rub if you have the stamped steel control arms.

Sorry if this has been covered in the thread previously, but up until a few weeks ago, I couldn't find a definitive answer on the net concerning this.

It seemed that some people said their setup would rub and others said it wouldn't, but it was unclear if they meant it wouldn't rub after they modified the inner fender, etc.

So, I'm here to let you know definitively my story, my setup and confirm that if the same parts that I used are purchased, there will be no rubbing on a 1500 Sierra 4x4 with stamped steel control arms.


So, here goes my story:


About a month ago, I bought a new 2018 All Terrain, with the intention of leveling and adding the largest M/T tire that would fit without issues.

I poured a lot of time into researching the subject on forum after forum, prior to my purchase and decided that the Rough Country 2.5 in lift (with the rear blocks) would work for me.

This kit appealed to me because of the ease of installation (I thought) and the fact that I'd be doing it alone in my garage.

Next I decided that the 285/55r20 maximum tire size (according to RC) was not enough larger than the OEM size for my taste, so I began to research that topic.

This is where the water got muddy with what will work and what won't work without the tire rubbing the stamped UCA's.


I ended up ordering a set of 295/55r20 Toyo Open Country M/T's for a smoking price of 1360 bucks, a set of 1/4 inch spacers and the lift on the same day.

The tires arrived first and my initial thought was how wide they looked.

I put them aside and waited for my lift.


The lift came in a few days later and the first thing I noted was that there was no top spacer blocks, just a couple of donut rings.

I quickly found out that RC fails to tell you, if you have the stamped control arms, you must remove the struts, compress the strut spring, disassemble the strut and install the donut spacer under the spring, then reassemble.

So, it was off to Auto Zone for their loaner spring compressor.

I'll just say that it worked, but the stress that the strut spring put that tool under was unbelievable and I wouldn't do that job at home again.

The threaded rods looked like bananas once the spring was compressed enough to reassemble with the spacer.

The rear blocks went in pretty easily except that the head of the spring bolt had some difficulty going into the RC rear blocks. Not sure if it was the paint on the blocks, but I eventually had to lower the truck's weight onto the blocks so that the head of the bolt would pop into the block.


Next I installed the 1/4" spacers on all four corners and checked clearance.

I found the stock tires almost touching the UCA's at full lock after the lift and spacers were installed.

So I did some measuring and figured 1-1/4" spacers would do the job and the excess length on the factory studs sticking out past the spacer would fit inside the OEM wheel pockets. No need to shave the studs.


I decided after more research that Bora had the best reviews and it's only money, so I dumped another 250 bucks into the project. What else can you do at this point?


While I was waiting for my spacers to be built and shipped, I had my tires installed. Not by Walmart I might add, because they won't install tires more than 2% larger than OEM specs for your vehicle. What a bunch of pricks.


Last Saturday afternoon, my spacers arrived and I went to work right away, installing the spacers.

They fit perfectly and are both hubcebtric and wheelcentric.


The result was that the tires are nowhere close to touching the UCA's - at least and inch away at full lock, but only about 1/16" from touching the felt liner at the rear of the tire on the right side while turning right and the left side when turning left.

I ended up drilling a 3/16 hole in the bottom lip of each liner and using zip ties to secure them back to the body mount.

Now there is enough room to clear easily, no rubbing, no cutting, no stud shaving or NorCal mod needed and it's totally undetectable.


So to recap, if you have stamped steel control arms, you can run without a doubt, a RC 2.5" level/lift (plan on removing and disassembling the struts), 295/55r20 Toyo Open Country M/T's on OEM 20" wheels with no rubbing, but you have to install spacers (no less than 1-1/4" unless you want to cut the factory studs) and tie back the rear inner fender felt.


Sorry for such a long story, but this whole process has taken a month to finish up and there's a lot to tell. I'm picking my truck up today from the alignment shop, who said that the front end was completely out of whack after the level kit, so an alignment is definitely needed ASAP after you level.


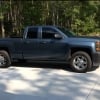
A few pics of the final result taken after the spacers were installed. Sorry for the crappy pictures, but it was dark outside and just took these to send to my son.

I can take a few more in daylight hours if anyone is interested in how the end result looks.

IMG_2796.jpg

IMG_2797.jpg

Edited by RigPig
  • Like 2
  • Thanks 2
Posted (edited)

A few more if interested.

One other thing -  If you install the RC lift with the stamped UCA's, your truck will ride stiffer up front due to the preload the spacer puts on the spring.

It doesn't really bother me, but it might bother some.

IMG_2798.jpg

IMG_2799.jpg

Edited by RigPig
Added comment
  • Like 2
Posted
4 hours ago, RigPig said:

A few more if interested.

One other thing -  If you install the RC lift with the stamped UCA's, your truck will ride stiffer up front due to the preload the spacer puts on the spring.

It doesn't really bother me, but it might bother some.

IMG_2798.jpg

IMG_2799.jpg

Nice write up! Have any full side shots?

Posted
CST 4.5 inch bracket lift with GMC Wheels and 305/55/20 Toyo AT II.
 
26dcb0f8e2d9af452efceaa793843500.jpg

Looks awesome! How does it ride.


Sent from my iPhone using Tapatalk
Posted
CST 4.5 inch bracket lift with GMC Wheels and 305/55/20 Toyo AT II.
 
26dcb0f8e2d9af452efceaa793843500.jpg

A few more pics would be appreciated and some additional details.


Sent from my iPhone using Tapatalk
Posted
2 hours ago, Coles5515 said:

Nice write up! Have any full side shots?

I don't, but I'll post some tomorrow. 

Posted
19 hours ago, RigPig said:

I don't, but I'll post some tomorrow. 

Side shot

IMG_2802.JPG

  • Like 3
Posted
13 hours ago, Coles5515 said:

Looks great!

Thanks, man. Next on the agenda is clear film on the rocker panels and a tonneau cover.

After that, I'm calling it a day..............for now:D

Posted
On 10/30/2017 at 10:14 AM, aware3218 said:

CST 4.5 inch bracket lift with GMC Wheels and 305/55/20 Toyo AT II.


26dcb0f8e2d9af452efceaa793843500.jpg

You done that right, son!   Looks perfect.   More pictures and details of the lift, install, spacers, etc...

Posted
12 hours ago, RigPig said:

Thanks, man. Next on the agenda is clear film on the rocker panels and a tonneau cover.

After that, I'm calling it a day..............for now:D

Great informative post!   Good to know that 1.25 spacers work as everything else I have read says 1.75 if no pockets, 1.5 with pockets.     

Posted (edited)
48 minutes ago, bcbz71 said:
You done that right, son!   Looks perfect.   More pictures and details of the lift, install, spacers, etc...


I’m afraid there isn’t too much to add, I chose this lift because I wanted to avoid increasing the track width and I really wanted to use stock wheels. One word of warning, I bought 33’s to go with the lift but I should have done 34’s at minimum.
IMG_0100.JPG


Sent from my iPhone using Tapatalk

Edited by aware3218
Stupid iOS 11 "I" bug.
Posted
On 11/6/2017 at 8:03 PM, pineland said:


Looks awesome! How does it ride.


Sent from my iPhone using Tapatalk

Rides fantastic.  Ride is as smooth as stock ride--I am factoring in the larger stiffer tires though.

Create an account or sign in to comment

You need to be a member in order to leave a comment

Create an account

Sign up for a new account in our community. It's easy!

Register a new account

Sign in

Already have an account? Sign in here.

Sign In Now

  • Latest Articles

  • Posts

    • I think we're reaching the end of constant projects/work.   The water pump bolt appears to have self-sealed, as it's not leaking anymore. I'll take it, and, I'm ready should it self-unseal! I was also getting an oil leak at the front oil pan seal and timing cover and came to find a pan bolt on the corner wasn't even finger-tight. Too easy. And, it was. But, it appears tightening it has reduced a leak producing spots on the ground every time I parked, to just a weep, leaving an occasional dot on the cardboard that lives under it while parked. That's acceptable on a 30 year old engine in my book. I do hate leaks, but, replacing the pan seal is quite the job.   The rear washer line is reconnected and the sprayer works, although getting an intermittent washer fluid drip off the bottom. I think it's just residual...the reservoir filled up the channel in the rear floor and drained down into the upside-down spare tire/wheel. So there are residual puddles all over under there, will wait a few days for it to spill out and dry before I go chasing a potential leak.   The door speaker...no dice. Speaker works just fine, it's that channel in the factory amp that's gone bad. Can't win 'em all. And, whomever buys this will probably tear out the factory radio for something more modern anyway.   I put about 110 miles on it yesterday. Put a lot of wind and heat into it with some mountain driving. Still runs great. Near the top of the pass I got off on a gravel side road and put about 10 miles on with 4hi engaged. Works great.   If ya squint, she's mint! God I wish these were still in production. I can see why they're not. They're rudimentary bordering on agricultural. They began life as a pickup truck and then modern society demanded the rear be enclosed for kids and crap. They're still a pickup underneath, and that gives them lots of ride character, sway and bounce and bump steer. They're alive on the road, and, at least for purposes of nostalgia, it makes driving one a lot of fun.   The Check Engine light did come back on the pass, P0134 for the upstream O2 sensor dropping out. Putting heat into the exhaust causes it after about 10-15 seconds of increased load at higher RPM. The downstream sensor is completely mangled (someone clearly had a rough time removing it, but they didn't replace it?) so I'll just put two in it. For what, mostly to cure the CEL, I can tell the cat is damaged. It's not plugged or fractured, but it's not catalyzing. There's some guilt in not fixing it, but at a cost of $500+, the truck just won't get driven much under my watch. I dislike the smell...running the truck in the shop even with both doors open and the overhead fans blasting, I still reek of pre-cat exhaust. Sticks to clothing and everything else.   Window motor (I'm dreading this), and tires, and that should be about it. 50/50 on Starfire Solarus H/T's, or spending $20 more per tire and going with Cooper Discoverer RT's. I like the look of the RT's a lot more, but is it worth it? I've got a really good (just very old) Toyo Open Country XTX on there now and I like it.  
    • From what I've seen, they "could" sell the switch but designed the assembly such that the switch can't be readily removed and replaced without removing a plastic locating pin.  Sure appears aimed at forcing the end user to purchase a $900 shifter assembly instead of a $20 switch.  Thankfully I still have some extended warranty left...  this one has had warranty repairs almost every 5K miles from the day I bought it.  
    • I'm well aware of the typical bathtub failure curve, but plotted, this truck has been more like an elevated straight line.  It started days off the lot with misfires that GM couldn't solve for almost 2 years, and steadily continued over the last 5 years with repeat replacements of wiring harnesses, camera modules, cameras, parking sensors, head unit, rear windows, rear leaf springs and bushings, lower control arms, a radiator, and now an ac compressor and a column shift assembly.  
    • It was a commercial vehicle at one point. I went through all the menus and see nothing. But ill look at mygmc.com. Thank you  
  • GM-Trucks.com Clubs

  • Popular Contributors

×
×
  • Create New...











