Discovered! Features you may not have known about...

-
Recently Browsing 0 members
- No registered users viewing this page.
-
Forum Statistics
250.5k
Total Topics2.7m
Total Posts -
Member Statistics
342,873
Total Members8,960
Most Online
-
Who's Online 11 Members, 1 Anonymous, 580 Guests (See full list)
-
Latest Articles
-
Posts
-
 On the other hand, GM is offering 0% for 5 years on various models including the 2026 Silverados. That's significant savings with current interest rates and average borrowing terms. While I don't doubt the truthfulness of the article, it's worth pointing out that fullsize trucks aren't exactly flying off the shelf right now with the highest and longest-sustained gas prices, lowest consumer confidence, and one of the periods of highest economic uncertainty. A certain level of incentive is still required to support sales at current pricing, even if GM's incentives are less than industry average. The article points out inventory is down 3% YOY and supports its 50-60 day target. The visual impact of this, or, maybe it's another factor entirely, is stunning. Local dealerships simply don't have rows and rows of Silverados in every color and configuration imaginable anymore. A local dealer I recall having "normal" inventory of about 50 Silverado 1500's on its lot now regularly only carries about 10-20. The inventory reduction seems more than just a few percentage drop, but maybe that's recurring over several years.
 -
-
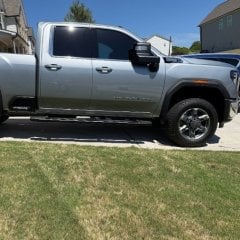
 That’s what I thought. I guessed there would be switches/buttons and lights for the traction control. I don’t have that.
 -
-

By sigmonster · Posted
Similar thing happened to me. Manual transmission mode didn't help. Transmission temp 190-203. Next day after transmission cooled, everything was fine. My check engine light stayed on. Had the code checked. It was a valve body failure which was repaired under warranty (5 yr/60,000 mi for gas).
-
-
GM-Trucks.com Clubs
-

Black Truck Club
Open Club · 612 members
-

White Truck Club
Open Club · 380 members
-

Canadian Owners Club
Open Club · 282 members
-

Red Truck Club
Open Club · 157 members
-

diesel 3.0
Open Club · 281 members
-

Texas Owner's Group
Open Club · 371 members
-

NorthSky Blue Club
Open Club · 118 members
-

Midwest Owner's Group
Open Club · 213 members
-

2015 Custom Sport Club
Open Club · 5 members
-

GM Snow Plowing Club HD
Closed Club · 14 members
-
-
Popular Contributors
-
.thumb.JPG.2c573de60d3a3a4407c7d92298db46dd.JPG)


Recommended Posts
Create an account or sign in to comment
You need to be a member in order to leave a comment
Create an account
Sign up for a new account in our community. It's easy!
Register a new accountSign in
Already have an account? Sign in here.
Sign In Now