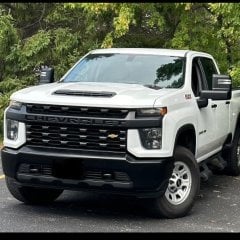
Jump to content
  • Sign up for FREE! Become a GM-Trucks.com Member Today!

    In 20 seconds you can become part of the worlds largest and oldest community discussing General Motors, Chevrolet and GMC branded pickups, crossovers, and SUVs. From buying research to owner support, join 1.5 MILLION GM Truck Enthusiasts every month who use GM-Trucks.com as a daily part of their ownership experience. 

Install a 2nd battery


Recommended Posts

I'm sure this is a dumb question, but why can't you simply wire the 2nd battery in parallel directly to original battery?


If you connect new batt ground to the jumper connection just forward of original battery, the load on 2nd battery should go thru the load sensor (doughnut) inboard of the battery and connection.

Link to comment
Share on other sites

You can, and in fact that’s how the diesels are set up because it takes that much battery to crank them in cold conditions. The reason for the battery isolator on the gas trucks is to prevent discharge of your starting battery when you use the aux battery for some accessory while the truck is not running, but then allow charging of both batteries when the truck is running. 
 

I don’t have it installed yet, but I plan to use my aux battery to power an on-board air compressor. 

Link to comment
Share on other sites

  • 2 months later...
On 3/27/2021 at 3:12 PM, BrentH said:

So here is the crazy thing:


On my truck: 2021 2500HD 6.6 gas LT I requested the 220 amp alternator and aux battery - It didn't come that way - no aux battery and a 170 alternator 


BUT:  My fuse panel on top of the regular battery is NOT the correct one for the set up as fitted (according to GM parts)  my fuse block is part number 84646133   this is a fuse block from a 1500 diesel with a 220 amp alternator.  So my fuse block (X50D) has the following F1 - 250 Amp connected to 170 Amp ALT, F2 - 175 Amp connected to Fuse Bock X50A  F3 - 400 Amp connected to Starter Motor  The next 2 fuses are 60 amp and run to the interior fuse panels and then I have a 1 more wire in the supposedly F4  position that is not fused and is a decent size wire.  No idea where this runs to and does not jive with any wiring diagrams on the GMUpfitters.


From the wire diagrams it "should" be easy enough to install the GM Fuse Block Auxiliary Battery 84663447.  The wire from F2 175 amp  would run to the 100 amp fuse in the X50E aux battery  block and then back to the X50A fuse panel.  The Auxiliary Fuse Block may already have the battery isolation relay  (KR79) that is supposedly controlled with a simple connection to the body control module. (connector x136).  This would be a very simple install and follows the jist of the parts diagrams for the auxiliary installation.


The GMUpfitters electrical seems to be riddled with mistakes or errors , probably created by the lack of parts during covid - my truck is supposed to have the main battery fuse block X50D as part number 84646132, which I suspect has a lower rated 200 Amp F1 Fuse, not the 250 - it will make a 220 alt upgrade a lot easier though.


I have an after market isolator, but for simplicity and looks under the hood it would be just as easy to purchase the required X50E OEM part.  


I tried to load the wire diagram and pics but exceeded the limit and then it won't let me try again...


IMG_5225.JPG


Link to comment
Share on other sites

The terminal labeled F4 (the one without a fuse) should goto the passenger footwell.  this is where it goes on my 22 yukon. I have traced the wire. I was looking to add a CB and did not want to put a hole int he firewall.


The dealer is unable to tell me if I will energize anything else IF i connect power to the F4 wire.


IMG_2353.jpg

IMG_2354.jpg

IMG_2357.JPG

Link to comment
Share on other sites

  • 3 weeks later...

So...if I understand BrentH's hand drawn wiring diagram and excellent research, I'm guessing the BCM signal is designed to keep the batteries separated until after the engine has cranked/started.  This would allow Chevy to use smaller gauge wiring and fusing between the two batteries as no current could potentially flow from the aux batt to the start battery when cranking the engine should the start battery have a low charge or be defective.  Unlike how the diesels work in parallel by needing more current to crank the engine.  Sound right?  I have two other questions:

1.  I'm unclear where and what wires I need to cut and splice so the constant 12V on the trailer harness is connected to the aux battery.

2.  I have a smart isolator I plan to use.  I noted that it has a spade connector to connect to the "crank side of your ignition circuit.  This feature is not required to be connected for the isolator to function and is primariiy designed for applications that may use smaller gauge wires with in line fuses."  aka the kit came with 6 gauge wiring.  My understanding from the seller is that their dual battery kit is only designed to support current to charge the aux battery and any accessories attached to it thus 60-80amps.  Kind of like the Chevy design for the gasser?  So, to enable this feature to get a "crank side circuit signal" to my isolator would I have to splice into that BCM connector/wire under the drivers console or can a fuse tap be used in the underhood fuse box?

Thanks.

Link to comment
Share on other sites

  • 10 months later...

Well I got the smart isolator installed on my 2022 Silverado 2500HD non-refresh.  Seems to work well.  My problem is I still can't figure out which wire goes to the constant 12V on the wiring harness from the fuse box.  I want to connect it to my auxiliary battery.  Any help would be appreciated.  Was much easier to find this wire on my 2012 Silverado as it was attached to a post on the fuse box.

Link to comment
Share on other sites

  • 3 months later...
On 4/21/2021 at 9:26 AM, BrentH said:

Here is the mess - no connection or even the wires according to the drawings.  There is some confusion as the power from the under hood fuse panel (X50A) is from fuse F79UA and the wire is red/white but one drawing has it as red/blue - argh!   Going to tape it back up and will   Find another power source for the isolation relay. 
9967C5B8-9D2E-475F-B20A-43210194210C.thumb.jpeg.bdf6ebc9952f3c5b0c1cf991b7be0606.jpeg


the next pic is what I have set up with the power as per the other drawings from the upfitters and the parts for the truck:


D7E138D5-33F7-4AD5-AFBF-FA9CAFA628AB.thumb.jpeg.b54ff1d71afd0418134ee2ed86835deb.jpeg

25B460D2-75C5-46E9-91C0-4E3A1FB11A2F.thumb.jpeg.aec35bfdadccd0a58d60a8d6dc8b3457.jpeg


I still have to hook up the 30 amp fuse but would like to have the battery charging properly first. 


I realize that this is an old post, but that 2nd pic helped me out immensely! I am installing a 2nd battery and I wasn't sure about where I was going to ground it. I was initially going to ground it on the engine block, but now that I can see where the factory ground is at I'm going to ground it in the same location (after I verify the resistance). I didn't see any info on the factory auxiliary battery ground point in the upfitters electrical manual. I'm glad I stumbled onto this pic while searching Google.

I'm hooking a winch up to the 2nd battery and the maximum draw is just over 500 amps. The winch will be grounded on the battery though. The 50 amp dc-dc charger I'm installing to keep the battery charged requires a common ground between the primary and auxiliary batteries. So, while none of the winch current should ever flow through the battery ground, I'm still more comfortable using the factory ground points.

Thanks again!

Link to comment
Share on other sites

Join the conversation

You can post now and register later. If you have an account, sign in now to post with your account.

Guest
Reply to this topic...

×   Pasted as rich text.   Paste as plain text instead

  Only 75 emoji are allowed.

×   Your link has been automatically embedded.   Display as a link instead

×   Your previous content has been restored.   Clear editor

×   You cannot paste images directly. Upload or insert images from URL.


×
×
  • Create New...

Important Information

By using this site, you agree to our Terms of Use.