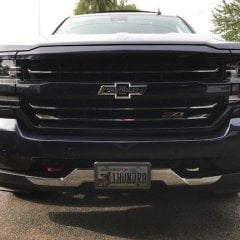
Jump to content

Noise coming from the dash


Moend

Recommended Posts

This post reminds me of RV warranties. Sometimes, between your sanity and "what could happen" when the 18 year old tech starts tearing apart your 50k RV - its just best to leave it alone. I'm currently deciding this over my leaking rear window. May just fix it myself.

  • Like 1
Link to comment
Share on other sites

6 hours ago, It's Tim said:

You should have searched this site and  you probably would have found the post concerning the 2 screws on the under side of the dash that were factory installed finger tight. After tearing into the suspension (twice?) and what not you are guaranteed to have all kinds of loose-noisy happening and it will only get worse in time.

Best of luck.

Can you please share that. I read almost 100 posts and followed instructions but didn't see nothing about those bolts probably missed it somehow

Thank you, Moe!

Link to comment
Share on other sites

Update #2


Truck is going back in next Wednesday. I honestly don't have high hopes they know what they are doing but i have spent most of my day today reading things and cross them off and result noise still there aside from the ability to reproduce it by driving over a scrap piece of 4x4.


I had a lengthy talk to the service manager and he said they are going to use a device that can pin point noises (can't remember the name of the damn thing to save my life) but I will ask him about it again.


This is it for now will let you know after Wednesday.


Thanks!

Link to comment
Share on other sites

On 11/27/2019 at 12:07 PM, SamDSJR said:

This post reminds me of RV warranties. Sometimes, between your sanity and "what could happen" when the 18 year old tech starts tearing apart your 50k RV - its just best to leave it alone. I'm currently deciding this over my leaking rear window. May just fix it myself.

I thought of that myself a lot. And tried my hardest to fix it, on the other hand I paid 40k+ for this thing and expected to be top nautch because let me tell you a clunker in my neck of the woods cost much more less. 

  • Like 1
Link to comment
Share on other sites

On 11/25/2019 at 7:05 PM, Moend said:


The thing that worries me the most is that I am not sure if this is a safety critical item or not - my father retired mechanic said it could be cab bolts if ball joints and tie rod are not an issue. I don't want a wheel come flying off while I am driving or towing not only for my safety also for others who didn't make the decision to buy a GM product.


will keep you guys posted...

Is it just me or does this seem a wee bit dramatic?

Edited by RaisedByWolves
  • Like 1
Link to comment
Share on other sites

22 hours ago, Moend said:

I thought of that myself a lot. And tried my hardest to fix it, on the other hand I paid 40k+ for this thing and expected to be top nautch because let me tell you a clunker in my neck of the woods cost much more less. 

Well said. I know. You shouldn't have to worry. It shouldn't be an issue where you have to think "Oh Lord what else could happen if I let them tear it apart." It's not right when we pay this much for these trucks.

Link to comment
Share on other sites

We are in the middle of a blizzard now. And driving on a snow packed road such a nuisance. I don't even know if my truck is falling apart on me or what the heck is going on. I use to enjoy driving on snowy days and helping other who are stuck or get stuck myself. But this issue just sucked the joy out of it.

Link to comment
Share on other sites

Update#3

So after dropping it off yesterday they called me the same day and informed the truck is ready for pickup. Went to get it and the service manager informed me that they are suspecting it is the struts. They have one on order and will call me when they have it in. I think at this point they are frustrated and going after guts/guesses. Nothing wrong with that. I am glad they didn't give up on it.


Will keep you posted. Thank you!

Link to comment
Share on other sites

On 10/27/2019 at 1:27 PM, jay webb said:

there is a bulletin about noises coming from the dash


it can be the inverter or they used the wrong size screws in behind the radio or whatever... 


just take it to the dealer , its under warranty 

any chance you have a link to the TSB about the wrong screws or thread that explains this - I think I have the same creak noise

Link to comment
Share on other sites

On 11/27/2019 at 7:41 AM, It's Tim said:

You should have searched this site and  you probably would have found the post concerning the 2 screws on the under side of the dash that were factory installed finger tight. After tearing into the suspension (twice?) and what not you are guaranteed to have all kinds of loose-noisy happening and it will only get worse in time.

Best of luck.

Can you share the thread that has this please?

Link to comment
Share on other sites

1 hour ago, JacobC1983 said:

any chance you have a link to the TSB about the wrong screws or thread that explains this - I think I have the same creak noise

The noise may be caused by the 110 Volt Power Inverter Module not being seated properly in the mounting bracket (if equipped with RPO K14).

Condition 2: Rattle, squeak or itch type noise from the center of the dash in the radio area.

The instrument panel accessory bezel may be rattling due to insufficient tension of retainers. Press on the bezel while duplicating noise to see if it is eliminated.

Condition 3: Rattle or itch type noise from the dash area near the windshield

Defroster grill may be rattling due to insufficient retention of retainers. Press on defroster grill ( # 1 in illustration) while duplicating concern to see if it is eliminated.

Condition 4: Rattle, tick, knock type noise from the front center floor or center of dash area (Applies to trucks equipped with center console subwoofer speaker)

This concern could be caused by the radio subwoofer speaker mounting nuts either being loose or missing.

Condition 5: Creak, ticking or popping type noise heard from the left center stack area.  (This issue only applies to Full Size Utilities built before November 18, 2016)

This concern could be caused by the use of an incorrect screw that secures the instrument panel carrier in place.  The screw that may have been used is too long, and it may contact the instrument panel tie bar.  In some cases, this noise may only occur after the vehicle has been driven for a period of time.

Condition 6: Chirp or squeak noise coming from the lower left side of the center stack area.

This concern could be caused by loose retaining nuts on the chassis harness retention bracket that is located below the brake booster.

Condition 7: Rattle noise coming from the drivers footwell area.

This concern could be caused by the IP junction block cover moving and causing a rattle noise.

Recommendation/Instructions
Correction 1 (for vehicles equipped with 110 Volt AC Converter  - RPO K14):

Follow SI to locate the Accessory AC and DC Power Control Module located to the right of the steering column.

See #1 in photos below:

Object ID: 4215620Click here for detailed picture of the image.

Object ID: 4215623Click here for detailed picture of the image.

Inspect the power inverter module for possibly moving slightly against mounting bracket and creating the noise.

Remove the K14 power inverter module and apply two sided tape to the module bracket to insulate it from the mount. 

Object ID: 4215617Click here for detailed picture of the image.

Two sided tape is available through Kent Automotive, part # P40519 which is a ½”x 50’ roll or it may be obtained locally.  

Correction 2:

Wrap Kent automotive BRS flocking tape part number KT13487 over retainers (#1 in illustration) and reinstall bezel.

Object ID: 4224095Click here for detailed picture of the image.

This will require an application of BRS flocking tape on ten retainers (one strip @ 1” x 10”). Two sheets should repair 16 vehicles.

Correction 3:

Remove defroster grill. 

Object ID: 4224091Click here for detailed picture of the image.

Apply foam tape around connectors located under grill to prevent them from rattling on grill. See # 1 in illustrations.

Object ID: 4224092Click here for detailed picture of the image.

Object ID: 4224093Click here for detailed picture of the image.

Apply foam tape to all mounting hooks in the front of the defroster grill # 1 and apply a strip of foam tape along the edge of the grill to isolate the grill from the dash #2. 

Wrap Kent automotive BRS flocking tape part number KT13487 over the metal retaining tabs that secure defroster grill in position  #3.

Object ID: 4224089Click here for detailed picture of the image.

Foam tape can be obtained from Kent Automotive, part # KT15103 (40 ft roll) or it may be obtained locally.

Correction 4

To correct this issue, inspect the center console subwoofer speaker (2) mounting nuts (1) for being loose or missing.  Subwoofer speaker mounting is shown below.  Install and tighten the subwoofer speaker mounting nut(s) to 6 Nm (53 lb in).

Object ID: 4644887Click here for detailed picture of the image.
Correction 5: (This issue only applies to Full Size Utilities built before November 18, 2016)

The screw shown in the photos below may be too long and the screw tip actually contacts the instrument panel tie bar.  This contact is shown as item #4 below.  This screw secures the instrument panel carrier to the instrument panel tie bar.

Chevrolet/GMC models are shown as item# 1 and a close-up of this fastener can be seen as item #2.  Replace this screw with a shorter fastener, GM part number 11547755, which is approximately 24 mm in length.

Cadillac models can be seen in item #3 below.  Replace this screw with a shorter fastener, GM part number 11547755, which is approximately 24 mm in length as well.

Object ID: 4644862Click here for detailed picture of the image.

Object ID: 4644864Click here for detailed picture of the image.

Object ID: 4644869Click here for detailed picture of the image.

Object ID: 4644874Click here for detailed picture of the image.
Correction 6:

The following picture shows the chassis harness retaining bracket and nuts (2) below the brake booster (1).  Verify the retaining nuts are tight.  

Object ID: 4846222Click here for detailed picture of the image.
Correction 7:

To correct this issue use foam tape to insulate the IP junction block cover to prevent movement which is causing the rattle type noise.  

  • Thanks 1
Link to comment
Share on other sites

8 hours ago, jay webb said:

The noise may be caused by the 110 Volt Power Inverter Module not being seated properly in the mounting bracket (if equipped with RPO K14).

Condition 2: Rattle, squeak or itch type noise from the center of the dash in the radio area.

The instrument panel accessory bezel may be rattling due to insufficient tension of retainers. Press on the bezel while duplicating noise to see if it is eliminated.

Condition 3: Rattle or itch type noise from the dash area near the windshield

Defroster grill may be rattling due to insufficient retention of retainers. Press on defroster grill ( # 1 in illustration) while duplicating concern to see if it is eliminated.

Condition 4: Rattle, tick, knock type noise from the front center floor or center of dash area (Applies to trucks equipped with center console subwoofer speaker)

This concern could be caused by the radio subwoofer speaker mounting nuts either being loose or missing.

Condition 5: Creak, ticking or popping type noise heard from the left center stack area.  (This issue only applies to Full Size Utilities built before November 18, 2016)

This concern could be caused by the use of an incorrect screw that secures the instrument panel carrier in place.  The screw that may have been used is too long, and it may contact the instrument panel tie bar.  In some cases, this noise may only occur after the vehicle has been driven for a period of time.

Condition 6: Chirp or squeak noise coming from the lower left side of the center stack area.

This concern could be caused by loose retaining nuts on the chassis harness retention bracket that is located below the brake booster.

Condition 7: Rattle noise coming from the drivers footwell area.

This concern could be caused by the IP junction block cover moving and causing a rattle noise.

Recommendation/Instructions
Correction 1 (for vehicles equipped with 110 Volt AC Converter  - RPO K14):

Follow SI to locate the Accessory AC and DC Power Control Module located to the right of the steering column.

See #1 in photos below:

Object ID: 4215620Click here for detailed picture of the image.

Object ID: 4215623Click here for detailed picture of the image.

Inspect the power inverter module for possibly moving slightly against mounting bracket and creating the noise.

Remove the K14 power inverter module and apply two sided tape to the module bracket to insulate it from the mount. 

Object ID: 4215617Click here for detailed picture of the image.

Two sided tape is available through Kent Automotive, part # P40519 which is a ½”x 50’ roll or it may be obtained locally.  

Correction 2:

Wrap Kent automotive BRS flocking tape part number KT13487 over retainers (#1 in illustration) and reinstall bezel.

Object ID: 4224095Click here for detailed picture of the image.

This will require an application of BRS flocking tape on ten retainers (one strip @ 1” x 10”). Two sheets should repair 16 vehicles.

Correction 3:

Remove defroster grill. 

Object ID: 4224091Click here for detailed picture of the image.

Apply foam tape around connectors located under grill to prevent them from rattling on grill. See # 1 in illustrations.

Object ID: 4224092Click here for detailed picture of the image.

Object ID: 4224093Click here for detailed picture of the image.

Apply foam tape to all mounting hooks in the front of the defroster grill # 1 and apply a strip of foam tape along the edge of the grill to isolate the grill from the dash #2. 

Wrap Kent automotive BRS flocking tape part number KT13487 over the metal retaining tabs that secure defroster grill in position  #3.

Object ID: 4224089Click here for detailed picture of the image.

Foam tape can be obtained from Kent Automotive, part # KT15103 (40 ft roll) or it may be obtained locally.

Correction 4

To correct this issue, inspect the center console subwoofer speaker (2) mounting nuts (1) for being loose or missing.  Subwoofer speaker mounting is shown below.  Install and tighten the subwoofer speaker mounting nut(s) to 6 Nm (53 lb in).

Object ID: 4644887Click here for detailed picture of the image.
Correction 5: (This issue only applies to Full Size Utilities built before November 18, 2016)

The screw shown in the photos below may be too long and the screw tip actually contacts the instrument panel tie bar.  This contact is shown as item #4 below.  This screw secures the instrument panel carrier to the instrument panel tie bar.

Chevrolet/GMC models are shown as item# 1 and a close-up of this fastener can be seen as item #2.  Replace this screw with a shorter fastener, GM part number 11547755, which is approximately 24 mm in length.

Cadillac models can be seen in item #3 below.  Replace this screw with a shorter fastener, GM part number 11547755, which is approximately 24 mm in length as well.

Object ID: 4644862Click here for detailed picture of the image.

Object ID: 4644864Click here for detailed picture of the image.

Object ID: 4644869Click here for detailed picture of the image.

Object ID: 4644874Click here for detailed picture of the image.
Correction 6:

The following picture shows the chassis harness retaining bracket and nuts (2) below the brake booster (1).  Verify the retaining nuts are tight.  

Object ID: 4846222Click here for detailed picture of the image.
Correction 7:

To correct this issue use foam tape to insulate the IP junction block cover to prevent movement which is causing the rattle type noise.  

Well this is awesome, thank you - I just can't see any of the pictures to figure out how to take care of it.  

Link to comment
Share on other sites

Join the conversation

You can post now and register later. If you have an account, sign in now to post with your account.

Guest
Reply to this topic...

×   Pasted as rich text.   Paste as plain text instead

  Only 75 emoji are allowed.

×   Your link has been automatically embedded.   Display as a link instead

×   Your previous content has been restored.   Clear editor

×   You cannot paste images directly. Upload or insert images from URL.


×
×
  • Create New...

Important Information

By using this site, you agree to our Terms of Use.