Amazing interior light mod!!!

-
Similar Content
-
wiring help Rewiring but I cant identify this component - 1991 Silverado K1500 4x4
By Malicious_Apeman,
- wiring
- electrical
- (and 5 more)
- 7 replies
- 453 views
-
- 3 replies
- 324 views
-
- 1 reply
- 353 views
-
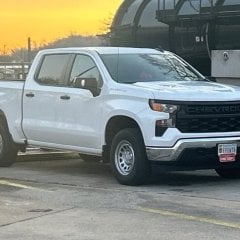
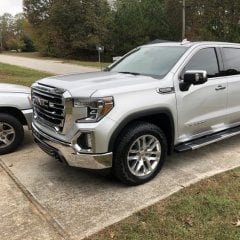
*UPDATE WITH PHOTOS* For anyone wanting OE metal skid plates for their 2019-2026 Silverado 1500 or Sierra 1500
By s10dragracer888,
- 14 replies
- 2,840 views
-
- 25 replies
- 5,491 views
-
-
Recently Browsing 0 members
- No registered users viewing this page.
-
Forum Statistics
250.4k
Total Topics2.7m
Total Posts -
Member Statistics
342,856
Total Members8,960
Most Online
-
Who's Online 8 Members, 1 Anonymous, 737 Guests (See full list)


-
Latest Articles
-
Posts
-

By asilverblazer · Posted
Wonder what happened to the "MEGA"max 8.3 rumors. I haven't had any rust issues, but the wax sure is ugly. Good to hear, considering the joint venture with International ended. -
 I still use kerosene and a brush for clean up since it's easily available to me. Then pressure wash if possible. Seems like on the really thick goo, brake clean doesn't work so well, at least for me. have also used simple green or similar on light coatings of oil/dirt. Again brushing it and agitating
 -
 I agree and why it seemed to make logical sense to swap it out before it did have a failure mode. I have no idea what the typical mileage was reached on the Allison 6 speed and variants from the beginning of the Duramax engine series but they were not putting through as much power either other than maybe the 2017 to 2019 models relative to the 2020 model trucks with the 10 speed. I am guessing there were some changes/upgrades over the years with that transmission as the engine in front of it certainly changed in output. I see some reviews of the Ram with the new 8 speed and comments about how great this transmission will be relative to the Ford and GM, but only time will really reveal how it all plays out as use and abuse always eventually show how good something is or what weakness it may have.
 -

By GMCustomerService · Posted
Your safety is our number one priority, @Chris80s, and we encourage you to bring your Blazer’s brake concerns to the attention of your local Chevrolet dealer. Our dealers have the tools and expertise to properly diagnose and recommend any repairs needed. We would also like the opportunity to act as an extra layer of support between you and your dealership as we pursue a resolution of your concern. To get started, please visit: https://s.chevy.com/support-request and fill out the request form with the pertinent details to ensure your request is routed correctly. We will keep our eyes peeled for your outreach. -
 I mean it made it over 300K, that's high mileage for any trans in my book!
-
-
GM-Trucks.com Clubs
-

Black Truck Club
Open Club · 612 members
-

White Truck Club
Open Club · 380 members
-

Canadian Owners Club
Open Club · 282 members
-

Red Truck Club
Open Club · 157 members
-

diesel 3.0
Open Club · 281 members
-

Texas Owner's Group
Open Club · 371 members
-

NorthSky Blue Club
Open Club · 118 members
-

Midwest Owner's Group
Open Club · 213 members
-

2015 Custom Sport Club
Open Club · 5 members
-

GM Snow Plowing Club HD
Closed Club · 14 members
-
-
Popular Contributors
-
1
.thumb.JPG.2c573de60d3a3a4407c7d92298db46dd.JPG)
-
2
-
3
-
4

-
5
-
-

Recommended Posts
Create an account or sign in to comment
You need to be a member in order to leave a comment
Create an account
Sign up for a new account in our community. It's easy!
Register a new accountSign in
Already have an account? Sign in here.
Sign In Now