Jump to content

Recommended Posts

Hello,


I recently installed OEM Chevrolet black bowties on my 2016 Silverado. Though I was unable to make a video recording the process, I did find a lot of shortcuts along the way that may be helpful to others. Below is a guide of how to do the swap yourself.


--------------------------------------------------


***Front Bowtie Removal/Install (30 min or less, 10 if you know what to look for):***
- To remove the front bowtie, Chevrolet recommends that you remove the entire front grille assembly. however, I found this is not necessary. If you lay underneath the front of the truck, you will see a plastic cover that fills the gap between the front bumper and the frame to cover the bottom side of the radiator from debris.

- There are three (3) plastic body molding/trim molding connectors that will need to be removed (one in the center and one to either side about 18 inches out). I found the best way to do this was with a short bladed flat head screw driver and both hands. Simply put, force will coerce the pins out of their plug holders.

- Once those are removed you will be able to stick your arm through the underside of the radiator protector and feel the four (4) tabs and two (2) pins that hold the front emblem to the grille.

- To remove the emblem, I used a key (spare, cheap one) to push the tabs outward from the center while pushing away from the front with my hand to pop the tab out of the clip area. I suggest starting from one side and making your way to the other. This did take slightly more force than I expected, so do not be afraid to push outward and away from the grille.

- Once all 4 tabs are free, you should be able to get out from under the front and remove the emblem completely from the front of the grille.

- The new, black bowtie, should snap right in!!! No glue or tape needed! **The 2016 Silverado 1500 uses a different front emblem than the 14 or 15 models, make sure you purchase the proper emblems for your truck!!!


----------------------------------------


***Rear Bowtie Removal/Install (1 hour or so, if done right):***

- First, gather the necessary tools to complete the job: Hair dryer or Heat gun, 2 microfiber towels, WD40, Goo B Gone, Fishing line (I used 50LB line, right size and strength, but you can used the guts of parachute cord and i have heard of dental floss, but that seemed silly), isopropyl alcohol, water, painters tape, plastic scraping blade/tool, small amount of gasoline (explained later)

- Using the painters tape, outline the emblem on all 4 sides, careful to follow all the edges as close as possible. This will stay there until the new emblem is placed, serving as your guide lines.

- Disclosure: I removed the back emblem on a 93 degree day, my truck is dark colored, and I used a hair dryer. Other conditions may require longer heating time. Heat the emblem to soften the adhesive backing on the emblem making it easier to remove (yes this actually makes it easier). Use your own judgment, heat until you think it is ready, just don't overheat.

- Using the fishing line (or whatever you have), begin at one corner and slice through the backing. I would do an inch or so at a time and then reheat the nest area I was removing. This process took about 7-10 minutes to get off completely.

- If you are lucky (like hit the lottery lucky), the adhesive backing will come off with the emblem, and there will not be much left on the tailgate. But, if yours is anything like mine, the adhesive will be stuck on the tailgate. spray this with WD40 and/or Goo B Gone, allow to soak momentarily, and use the scraping tool to remove the thickest parts of the adhesive back. There will be leftover glue on the tailgate.

- You can play around with WD40/Goo B Gone to get the rest off, or you can be like me and take it off in seconds. This is where that gasoline comes into play. Using one of your microfiber towels, apply a liberal amount of gas and the glue should come right off. This should not harm the paint at all, as long as you clean it off within a day.

- Now that you have the glue and adhesive backing removed, you need to sterilize the area to put the new emblem on. Mix a one to one mixture of the rubbing alcohol and water. Using the other microfiber towel, wipe the area clean. The alcohol will dissolve the WD40 and Goo B Gone and anything else that would prevent good adhesion. Clean until you are satisfied.

- The area should be ready to be fitted with the new emblem now. I would perform some dryfits, with the adhesive backing cover still on so that you get a feel for where it should go. Then, remove the film, and slowly and carefully place the new emblem. Make sure and press firmly once positioned to ensure good adhesion.

- Step back and admire your work.


------------------------------------------------------------------


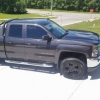
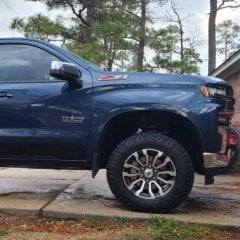
Here are some pictures of my success!


(I also added the OEM GM backup camera that my truck did not come with. If you need one like I did, I can tell you about that process too! I have a big hitch on, and backing into every spot, since I hate backing out, was getting risky.)

post-162447-0-45718000-1473302483_thumb.jpg

post-162447-0-01322800-1473302490_thumb.jpg

post-162447-0-45718000-1473302483_thumb.jpg

post-162447-0-01322800-1473302490_thumb.jpg

post-162447-0-45718000-1473302483_thumb.jpg

post-162447-0-01322800-1473302490_thumb.jpg

post-162447-0-45718000-1473302483_thumb.jpg

post-162447-0-01322800-1473302490_thumb.jpg

Link to comment
Share on other sites

  • 2 months later...

Hello,


I recently installed OEM Chevrolet black bowties on my 2016 Silverado. Though I was unable to make a video recording the process, I did find a lot of shortcuts along the way that may be helpful to others. Below is a guide of how to do the swap yourself.


--------------------------------------------------


***Front Bowtie Removal/Install (30 min or less, 10 if you know what to look for):***

- To remove the front bowtie, Chevrolet recommends that you remove the entire front grille assembly. however, I found this is not necessary. If you lay underneath the front of the truck, you will see a plastic cover that fills the gap between the front bumper and the frame to cover the bottom side of the radiator from debris.

- There are three (3) plastic body molding/trim molding connectors that will need to be removed (one in the center and one to either side about 18 inches out). I found the best way to do this was with a short bladed flat head screw driver and both hands. Simply put, force will coerce the pins out of their plug holders.

- Once those are removed you will be able to stick your arm through the underside of the radiator protector and feel the four (4) tabs and two (2) pins that hold the front emblem to the grille.

- To remove the emblem, I used a key (spare, cheap one) to push the tabs outward from the center while pushing away from the front with my hand to pop the tab out of the clip area. I suggest starting from one side and making your way to the other. This did take slightly more force than I expected, so do not be afraid to push outward and away from the grille.

- Once all 4 tabs are free, you should be able to get out from under the front and remove the emblem completely from the front of the grille.

- The new, black bowtie, should snap right in!!! No glue or tape needed! **The 2016 Silverado 1500 uses a different front emblem than the 14 or 15 models, make sure you purchase the proper emblems for your truck!!!


----------------------------------------


***Rear Bowtie Removal/Install (1 hour or so, if done right):***

- First, gather the necessary tools to complete the job: Hair dryer or Heat gun, 2 microfiber towels, WD40, Goo B Gone, Fishing line (I used 50LB line, right size and strength, but you can used the guts of parachute cord and i have heard of dental floss, but that seemed silly), isopropyl alcohol, water, painters tape, plastic scraping blade/tool, small amount of gasoline (explained later)

- Using the painters tape, outline the emblem on all 4 sides, careful to follow all the edges as close as possible. This will stay there until the new emblem is placed, serving as your guide lines.

- Disclosure: I removed the back emblem on a 93 degree day, my truck is dark colored, and I used a hair dryer. Other conditions may require longer heating time. Heat the emblem to soften the adhesive backing on the emblem making it easier to remove (yes this actually makes it easier). Use your own judgment, heat until you think it is ready, just don't overheat.

- Using the fishing line (or whatever you have), begin at one corner and slice through the backing. I would do an inch or so at a time and then reheat the nest area I was removing. This process took about 7-10 minutes to get off completely.

- If you are lucky (like hit the lottery lucky), the adhesive backing will come off with the emblem, and there will not be much left on the tailgate. But, if yours is anything like mine, the adhesive will be stuck on the tailgate. spray this with WD40 and/or Goo B Gone, allow to soak momentarily, and use the scraping tool to remove the thickest parts of the adhesive back. There will be leftover glue on the tailgate.

- You can play around with WD40/Goo B Gone to get the rest off, or you can be like me and take it off in seconds. This is where that gasoline comes into play. Using one of your microfiber towels, apply a liberal amount of gas and the glue should come right off. This should not harm the paint at all, as long as you clean it off within a day.

- Now that you have the glue and adhesive backing removed, you need to sterilize the area to put the new emblem on. Mix a one to one mixture of the rubbing alcohol and water. Using the other microfiber towel, wipe the area clean. The alcohol will dissolve the WD40 and Goo B Gone and anything else that would prevent good adhesion. Clean until you are satisfied.

- The area should be ready to be fitted with the new emblem now. I would perform some dryfits, with the adhesive backing cover still on so that you get a feel for where it should go. Then, remove the film, and slowly and carefully place the new emblem. Make sure and press firmly once positioned to ensure good adhesion.

- Step back and admire your work.


------------------------------------------------------------------


Here are some pictures of my success!


(I also added the OEM GM backup camera that my truck did not come with. If you need one like I did, I can tell you about that process too! I have a big hitch on, and backing into every spot, since I hate backing out, was getting risky.)

When removing the front bowtie, you said there are 3 molding fasteners that need to be removed. Are those accessible from underneath or only through the top? I see the plactic radiator protector but not the fasteners you mentioned

Link to comment
Share on other sites

That's a great writeup for 2016/2017 but you should change the title of your thread because the process for the front is different on 2014/2015 Silverados (the emblem is attached differently).

Link to comment
Share on other sites

That's a great writeup for 2016/2017 but you should change the title of your thread because the process for the front is different on 2014/2015 Silverados (the emblem is attached differently).

Do you know anything about removing the front bowtie on a 2014?

Link to comment
Share on other sites

  • 1 year later...
On 11/17/2016 at 10:28 PM, qwank said:

the front bowties will pry off with a screwdriver. I replace them all the time at work.

When done this way, do you scratch the grill at all?

Link to comment
Share on other sites

6 hours ago, FSU1985 said:

When done this way, do you scratch the grill at all?

If you are careful, no.  it may scratch it behind the bowtie a little, but no one will ever see it 


Link to comment
Share on other sites

  • 2 weeks later...
On 1/4/2018 at 7:52 PM, qwank said:

If you are careful, no.  it may scratch it behind the bowtie a little, but no one will ever see it 


Thanks for the info, I did exactly what you suggested and it was super easy.

Black Bowtie Install.JPG

Link to comment
Share on other sites

Archived

This topic is now archived and is closed to further replies.


×
×
  • Create New...

Important Information

By using this site, you agree to our Terms of Use.