Jump to content

2019 GMC Emblem Installation


Recommended Posts

Hey all,


I installed the OEM black GMC letters on my AT4 this weekend and thought I would pass this shortcut along.  If you don't mind being a bit destructive and want to take the easy route - just pry the red insert off of the factory emblems and it exposes the retaining clips.  Insert a screw driver and they pop right off.  No grill removal required.  I had one or two tangs that didn't immediately snap back in on the new emblems.  apply a bit of pressure to the grill tab with either your finger or a flat blade screw driver from behind until it clicks.  You are good to go.


20190202_151922.jpg

20190202_151932.jpg

20190202_151938.jpg

20190202_151941.jpg

  • Like 6
  • Thanks 1
Link to comment
Share on other sites

  • 2 months later...

I did mine the hard way, which the front grill removal is a B$%#.  Looks sweet though.  The rears are easy with a heat gun and masking tape.  A little harder since all the letters are the same.  Since I have the Dark Sky Metallic and swapped for Black wheels its a good combo.


IMG_0478.jpg

IMG_0479.jpg

IMG_0480.jpg

  • Like 6
Link to comment
Share on other sites

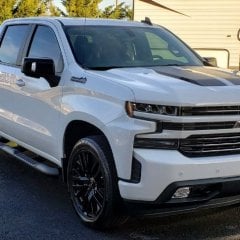
TY, I originally wanted the Pacific Blue, then Satin Steele...hard to find around here and when I did they were gone before I could get em.  This one was special ordered with the performance pack and the painted wheel arch to match...the guy that ordered it backed out.  Really glad I got it and so glad I got the performance pack.  The wheels & emblems and overall tones work well together so really happy with what I ended up with.  Just need to level the front a bit and will be all set.


Just put on a ceramic coating before this pick..took 1.5 bottles to do, still need to do the rims.  Really makes it pop.

Edited by quicksilverc5
Link to comment
Share on other sites

On 4/30/2019 at 4:11 PM, quicksilverc5 said:

TY, I originally wanted the Pacific Blue, then Satin Steele...hard to find around here and when I did they were gone before I could get em.  This one was special ordered with the performance pack and the painted wheel arch to match...the guy that ordered it backed out.  Really glad I got it and so glad I got the performance pack.  The wheels & emblems and overall tones work well together so really happy with what I ended up with.  Just need to level the front a bit and will be all set.


Just put on a ceramic coating before this pick..took 1.5 bottles to do, still need to do the rims.  Really makes it pop.

Gorgeous truck.  I'm getting my rims done the same way. 


Love the wheel arches too.  I couldn't do it because I knew mine would get destroyed but I def love the way they look. 

Link to comment
Share on other sites

I did mine the hard way, which the front grill removal is a B$%#.  Looks sweet though.  The rears are easy with a heat gun and masking tape.  A little harder since all the letters are the same.  Since I have the Dark Sky Metallic and swapped for Black wheels its a good combo.
 
 
IMG_0478.thumb.jpg.fd7821d48813bd7b73f0e59d56f94e81.jpg
IMG_0479.thumb.jpg.1408be8924deb515a7016ed36f92754e.jpg
IMG_0480.thumb.jpg.48f22e2f2cc7cdae6e29485f3f215e97.jpg

Could you be specific and how you remove the front grill


Sent from my iPad using Tapatalk
Link to comment
Share on other sites

Well there was an earlier post that said all you had to undo was the top bolts to remove it.  I removed the entire font valance, which I would not recommend for most to do.


1.  You have to remove the wheel arch moldings at least half way to reach a bolt towards the top of the front Valance.

2.  There are push clips and body clips everywhere.  The hard ones are where the valance meets the front fender as its really hard to get the trim tool in there

3.  There are to clips that hold the fog lamp air intake to the Frame, 2 clips and 3 U-Body clips for the trim by the headlights, 3 push clips across the front and 4 body clips as well. 

4.  You need two people to support the valance until you have the clips off so 1 side wont twist and fall

5  there are 3 bots on the bottom of the grill (that I though or think hold it on as well)

6.  Replace the valance by starting on 1 side, do not do the middle section till the end as the trim that goes up to the headlights takes some fiddling to get right and with the bottom clipped you wont have the clearance to get them all aligned.

The grill lifts up with a bit of a tug.


I plan to never ever take it off again.


Fortunately you can get replacement clips for the Wheel arch moldings from Oreilly or autozone.  (I broke 3 right away)


image.thumb.png.2dd75841a525676f92489b587e66d4a9.png

Edited by quicksilverc5
Link to comment
Share on other sites

Thank you for the very specific instructions it is a little more complicated than I was thinking


The grill on my 13 was so easy I removed it all the time to tinker with stuff


Sent from my iPad using Tapatalk


Link to comment
Share on other sites

Join the conversation

You can post now and register later. If you have an account, sign in now to post with your account.

Guest
Reply to this topic...

×   Pasted as rich text.   Paste as plain text instead

  Only 75 emoji are allowed.

×   Your link has been automatically embedded.   Display as a link instead

×   Your previous content has been restored.   Clear editor

×   You cannot paste images directly. Upload or insert images from URL.


×
×
  • Create New...

Important Information

By using this site, you agree to our Terms of Use.